Operation – Apantac KEYPAD User Manual
Page 5
P a g e | 5
Apantac Keypad Configuration
7-Aug-11
Once all the buttons have been configured, press the “Save As”
button to save your work and give it a name.
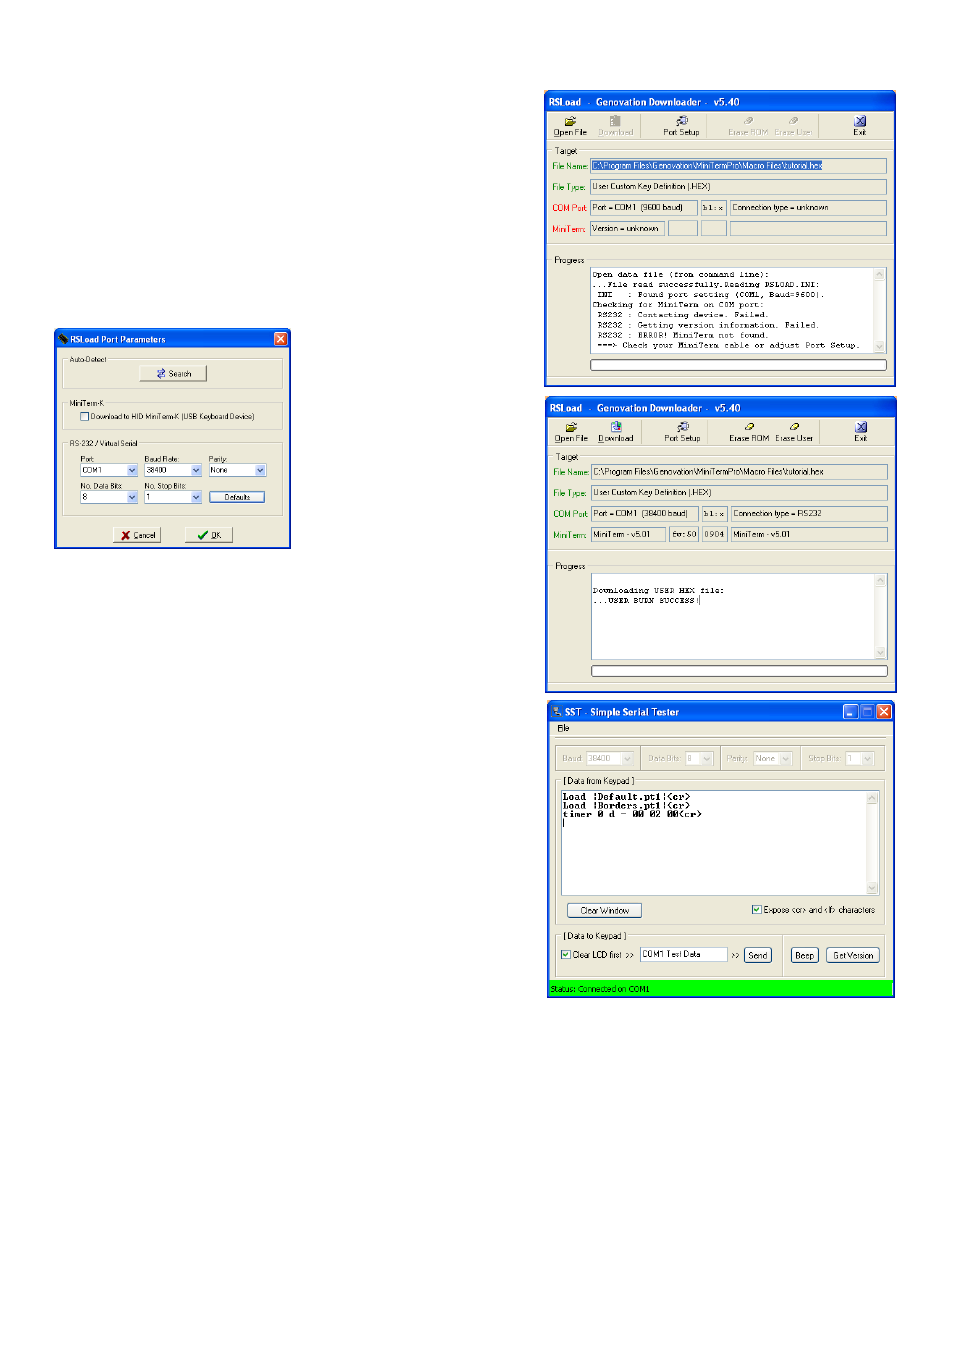
The next step will be to download the resulting file into the
Keypad. Press the Download button. You may get and error
message because the application tries an immediate download
and the communication parameters of the download utility have
not been set yet.
Press the Port Setup button, set the Baud rate to 38400, set the
proper COM port to use and press OK
Try again a download by pressing the Download button. You will
see the progress both in the Download utility Progress window
and on the Keypad LCD display: You will get “Receiving Data:”
and then “Load Complete!” messages
Finally run again the “Test” utility” (Test button of the
MacroMaster232 application) to ensure that the configured AXP
messages are properly sent as expected. Refer to the steps above
for setting the proper communication speed and COM port
choice and press the configured buttons in turn. You will see the
corresponding messages that will be sent by the Keypad to the
Apantac multiviewer. E.g. in the example, three buttons have
been assigned: The two first respectively recall the “Default.pt1”
and “Borders.pt1” presets. The third one sets the digital clock 0 to
2 minutes and starts a down count.
Repeat the previous configuration and test steps until the Keypad
is fully configured according to your needs.
Operation
Finally connect the Keypad to the Tahoma Multiviewer according to the “Keypad Operation Connection” drawing in
the beginning of this document and ensure that pressing the buttons have the expected result. Note that the
Keypad, the ASP (and Apantac Touch Panel), the Tahoma Multiviewer front panel buttons and GPI control (e.g. using
the Apantac Simple Preset Panel) can operate all in parallel.