Aplex Technology ADP-1154 User Manual
Page 16
ADP-1154 User Manual
16
Board Size:
6.0 x 2.5cm
Portrait:
Support 90∘to 279∘screen rotation
Static Protection:
ESD device (optional)
3.4 Installation of the 9036 Controller Board
Follow the steps below to install the 9036 control board:
1. Power down your computer and display, and open your display or system case. Find space on your
system and attach the control board to your system with screws. The control board has industry
standard 3φ screw holes.
2. Find the white 6-pin right-angle connector (on the left in the image above [see Figure 3.1]). The
power cable is pin 1 and pin 2. Solder the power and ground wire to the system. The RS-232 cable
is for pins 3 to 6. Attach the RS-232 cable’s D-sub connector to a COM port at the back of the
computer.
3. Find the white 9-pin right-angle connector (on the right in the image above [see Figure 3.1]). Attach
the female end of the touch screen cable to this connector. If you attach the cable of a 4-/5-/8-wire
touch screen to pins 1~5/1~6/1~9, attach the male end of the cable to the touch screen tail.
4. Mount your touch screen to the display.
5. Find the onboard DIP switch (on the upper right of the image above [see Figure 3.1]). This switch
selects baud rate, PnP or non-PnP mode, and touch screen type. Set the DIP switch to configure
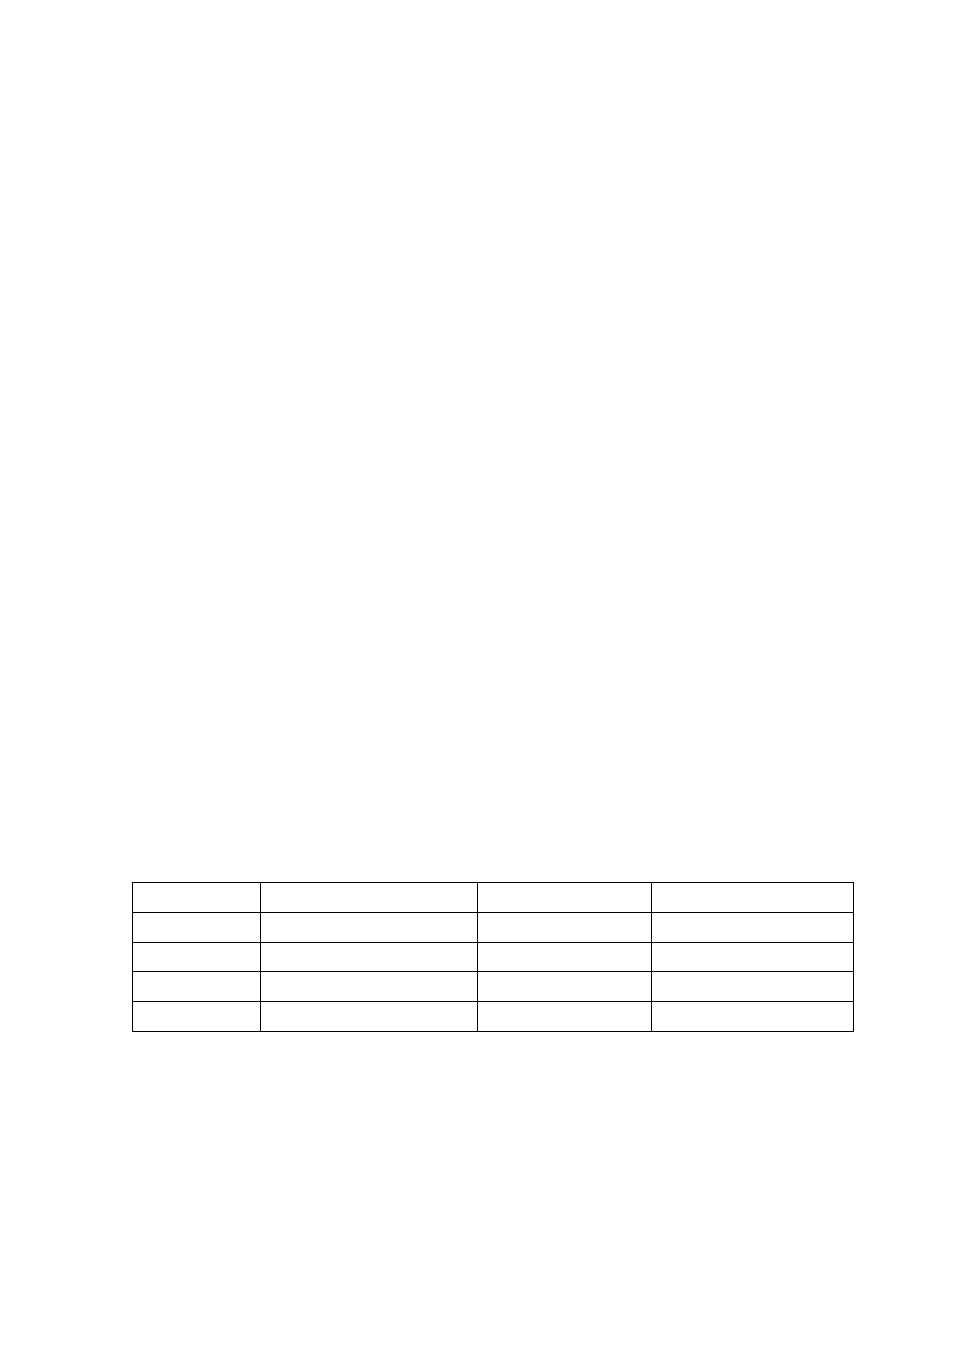
your control board according to the definitions and settings of the table below:
Switch Definition
ON
OFF
S1 Baud
Rate
Adjustment 9600
19200
S2
PnP enable or disable Disable
Enable
S3
Touch screen type
5-wire
4-, 8-wire
S4
Touch screen type
4-, 8-wire
5-wire
6. Turn on power to the computer and the display.
7. Install the software drivers and utilities and calibrate the touch screen.