Adjusting the printhead pressure dials, Adjusting the printhead pressure dials -11 – Avery Dennison Monarch 9906 Operator Handbook User Manual
Page 23
A d j u s t i n g t h e P r i n t h e a d P r e s s u r e D i a l s
The default setting is least pressure, which provides optimal printing in most cases. If
you see smudging, ribbon wrinkling, or poor print quality, you may need to adjust the
printhead pressure dials.
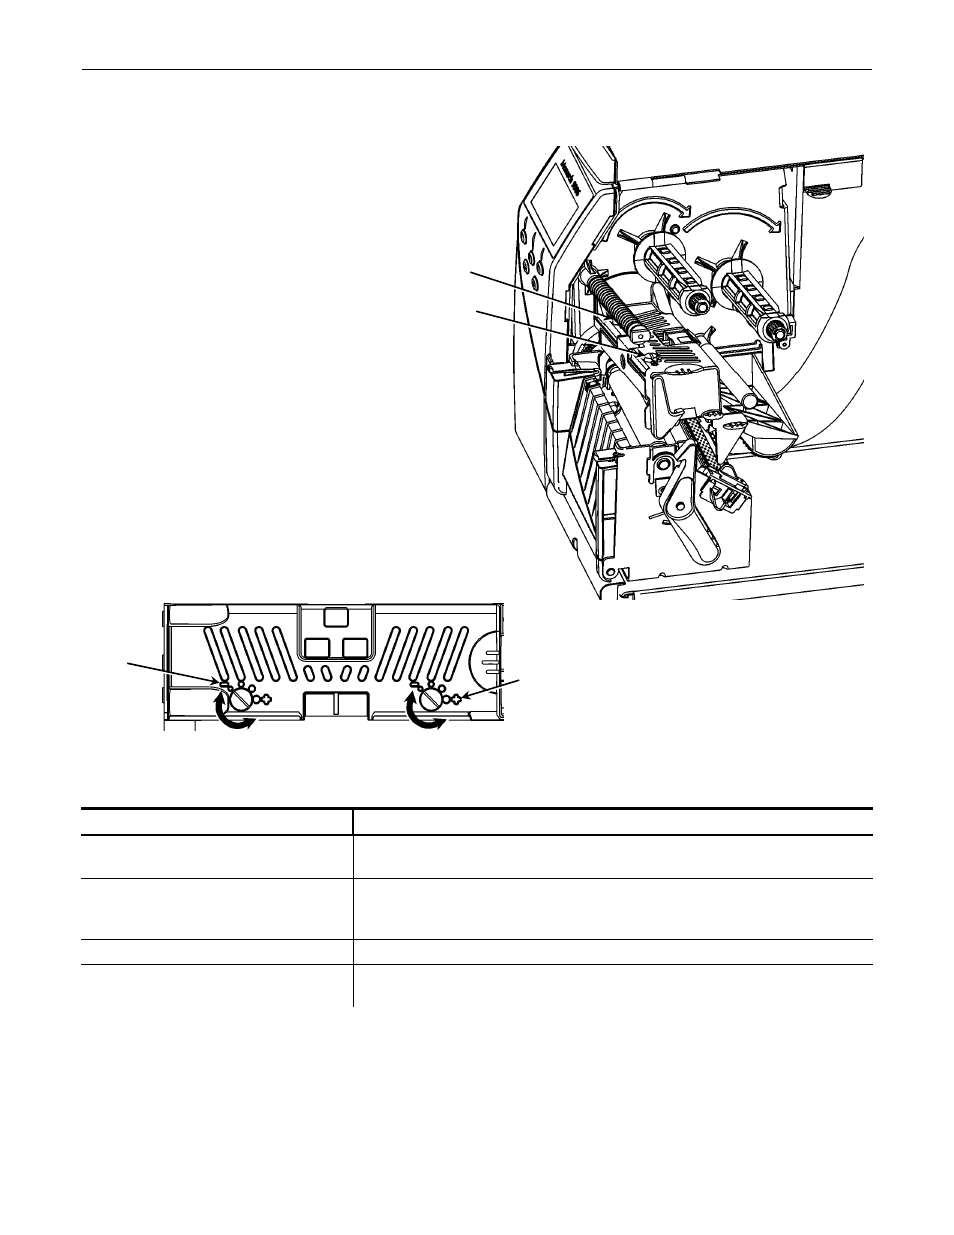
I n s i de P ri n t he a d
P re s s ur e D ia l
O u t s i d e P r i n th e a d
P re s s ur e D ia l
The two dials are located on
either edge of the printhead
assembly (inside and
outside). The dials may be
set to different positions;
however, the inside dial
should be equal to or more
pressure than the outside
dial. Use a coin or flathead
screwdriver to adjust the
dials.
Each dial has four settings:
Least pressure
Light pressure
Medium pressure
Most pressure
L e a s t
P re s s ur e
M o s t Pr e ss u re
Use the following guidelines to adjust printhead pressure.
Supply/Ribbon Dial
Settings
Increase both dials one step, check print quality, repeat if
necessary.
Wide supply (> 2 inches)
Increase inside dial one step, check print quality, repeat if
necessary. If uneven printing occurs you may need to increase
the outside dial.
Narrow supply (≤ 2 inches)
TUFF-MARK® wide (> 2 inches) Increase both dials to the most pressure setting.
TUFF-MARK® narrow
(≤ 2 inches)
Increase the inside dial to most pressure and the outside dial to
light pressure.
Print a test label to check the printhead pressure; make adjustments as necessary.
Loading Supplies 2-11