Installing the thread antennae, Installing the color touch-screen – Baby Lock Tiara II (BLTR16-2) Instruction and Reference Guide User Manual
Page 15
Page 14
Baby Lock Tiara II Instruction Manual
1. Locate the threaded hole on top of the machine near
the rear by the handwheel.
2. The thread antennae comes with a washer and a nut.
Remove the nut and washer, replace the nut onto the
antennae and tighten for two or three turns.
3. The washer protects the painted surface when the nut
is tightened. Place the washer on the hole and insert
the thread antennae.
4. Turn the thread antennae clockwise several revolu-
tions, stopping when the antennae eyelets are posi-
tioned directly over the spool pins.
5. Tighten the nut to secure the thread antennae to the
machine.
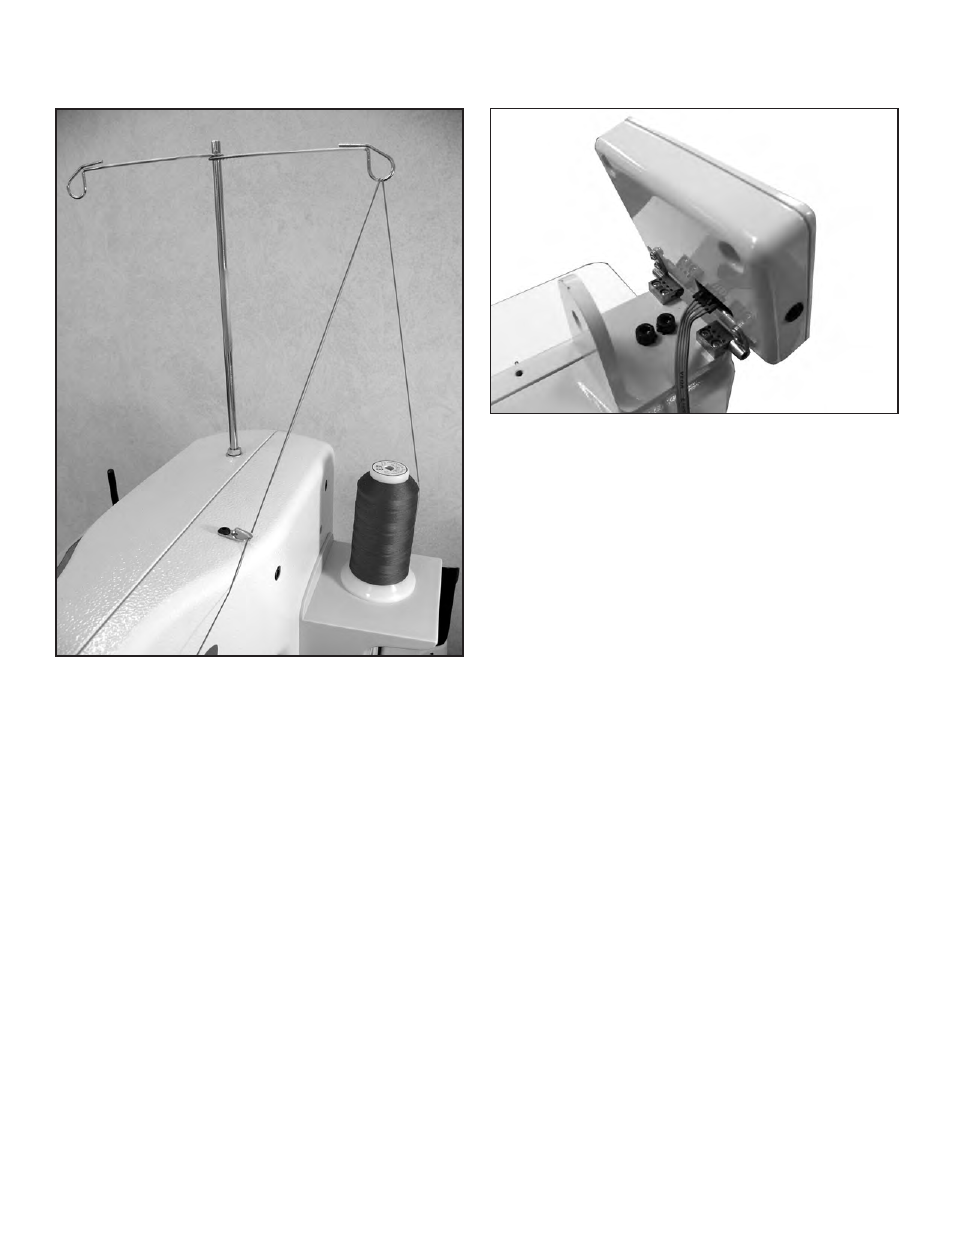
Installing the Thread Antennae
NOTE: The eyelets of the thread antennae MUST be cen-
tered over the spool pins. This ensures that the thread
cone will not pull, turn or tilt, which will cause thread
tension problems (see Figure 5).
Figure 5
Installing the Color Touch-Screen
The color touch-screen comes pre-installed on its
mounting bracket and should have one end of the D cable
attached to the back of the touch-screen (see Figure 6).
NOTE: Confirm that the power is turned off before in-
stalling the Color Touch-Screen.
1. Remove the two long bolts from the bag in which they
are packed.
2. There are three holes on top of the machine head (see
page 11, Figure 2, #19). Only the two holes that are
in line wth each other are used. Ignore the third hole
located to the side of these two holes.
3. Align the holes in the color touch-screen bracket with
the two holes on top of the machine, with the touch-
screen facing the needle end of the machine.
4. Use a 5mm Allen wrench to insert the two long bolts
through the holes of the bracket and into the machine
(Figure 6). Tighten in place.
5. Plug the remaining cable end into the display connec-
tor located on the side of the machine (page 11,
Figure 2, #23).
6. Carefully remove the protective plastic from the touch-
screen before using.
Figure 6