Threading the machine – Baby Lock Tiara II (BLTR16-2) Instruction and Reference Guide User Manual
Page 18
Babylock.com
Page 17
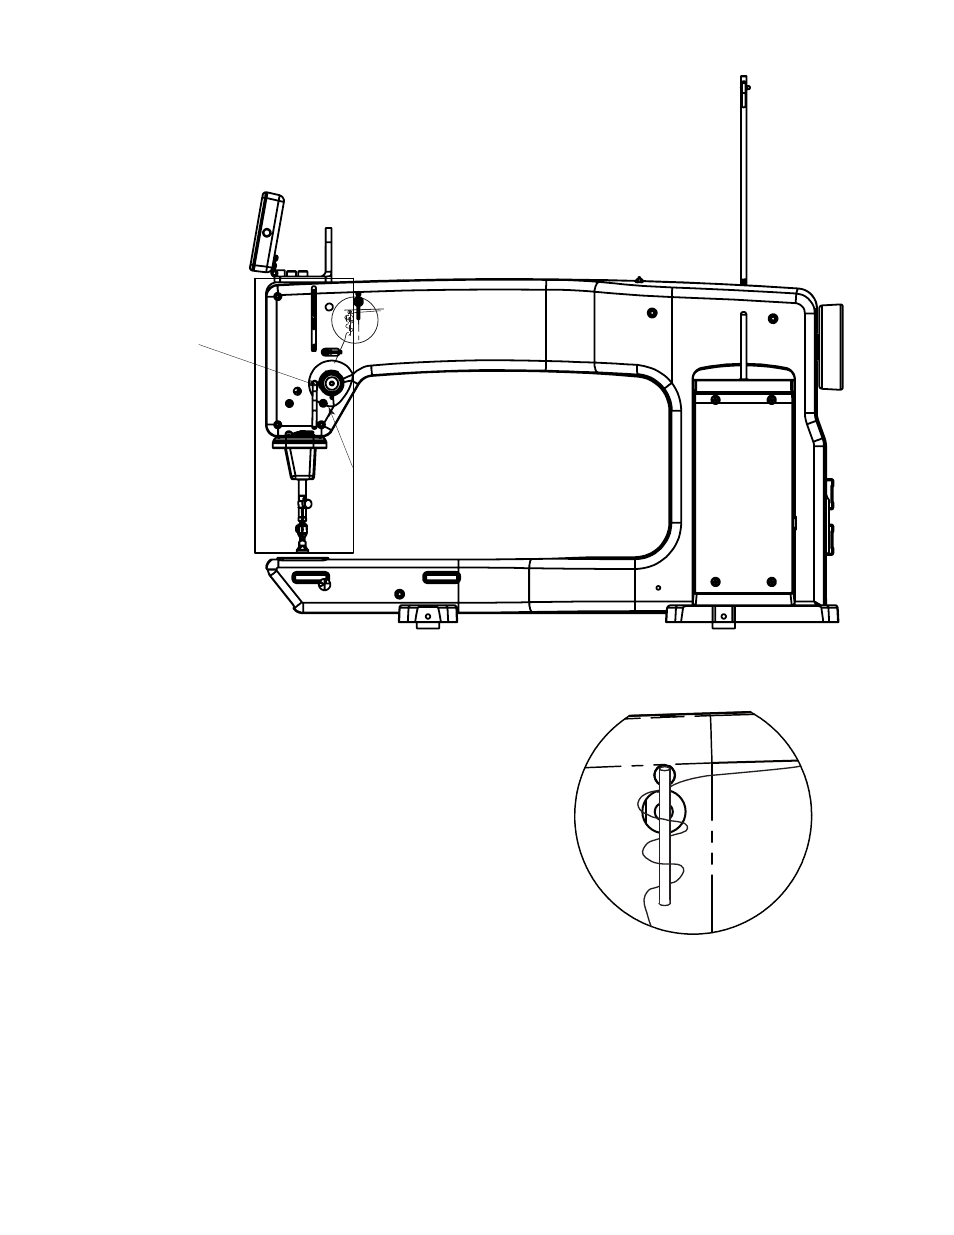
1. Place a cone or spool of thread on the spool pin. If us-
ing a spool, make sure that the slits on the spool are
against the base of the spool pin holder. Pass the thread
through the thread antennae eyelet from back to front,
continuing to thread guide A. (Figure 10)
2. Continue to the three-hole thread guide B. Beginning
at the top of the guide, wrap all three holes from back
to front, handwheel side to needle side being careful
not to cross threads. (see Figure 11).
NOTE: The purpose of the three-hole thread guide B is
to prevent loops of thread coming off the thread cone
from going into the top tension as a knot causing thread
breakage and bad tension. For most threads on a cone,
it is important to thread all three holes for consistent re-
sults and to make adjustments at the top tension assem-
bly. An exception to this rule is when working with very
delicate threads, such as holographic or threads that are
prone to breakage. You may try skipping one or two holes
on thread guide B when using these threads.
Figure 10
Figure 11
Threading the Machine
F
Page 12
HQ
18
Avanté User Manual
1. Place a cone or spool of thread on the spool pin.
Pass the thread through the thread-mast eyelet from
back to front, continuing to thread guide A.
(Figure 11)
2. Continue to the three-hole thread guide B. Wrap
all three holes from back to front, hand wheel side to
needle side (see Figure 12).
Note: The purpose of the three-hole thread guide B
is to prevent loops of thread coming off the thread
cone from going into the top tension as a knot caus-
ing thread breakage and bad tension. For most
threads on a cone, it is important to thread all three
holes for consistent results and to make adjust-
ments at the top tension assembly. An exception to
this rule is when working with very delicate threads,
such as holographic or threads that are prone to
breakage, in which case you may try skipping one or
two holes on thread guide B.
Threading the Machine
B
C
D
E
A
BACK
FRONT
2
TENSION ASSEMBLY
TAKE UP SPRING
1
E
C
D
DETAIL 2
B
DETAIL 1
Figure 11
Figure 12
Note: See “HQ Quilting Machines Getting Started”
DVD (included with your machine) for videos show-
ing threading and other tips. These videos are also
available on www.HandiQuilter.com.
B
E
C
D
DETAIL 2
F
DETAIL 1
C
Take Up Spring
Tension Assembly
FRONT
BACK
A