Laser stylus safety and use guidelines – Baby Lock Crown Jewel II (BLCJ18-2) Manual User Manual
Page 21
14
Laser Stylus Safety
and Use Guidelines
Theory of Operation
The laser stylus projects a straight laser beam
visible as a dot on surfaces it hits. The laser dot is
used as a guide or stylus allowing you to stitch the
same pattern onto a quilt that is being traced with
the laser dot.
Laser Operation and Use
There is not a separate on/off switch for the laser.
Power is supplied to the laser when it is plugged
into the Baby Lock Crown Jewel II. Be sure the
laser is attached to the Baby Lock Crown Jewel II
and pointed downward toward the table before
connecting it to the port. Never point it in a direc-
tion that would project the beam into someone’s
eyes. If the laser should cease to operate, check to
ensure the plug is firmly seated into the Baby Lock
Crown Jewel II laser port.
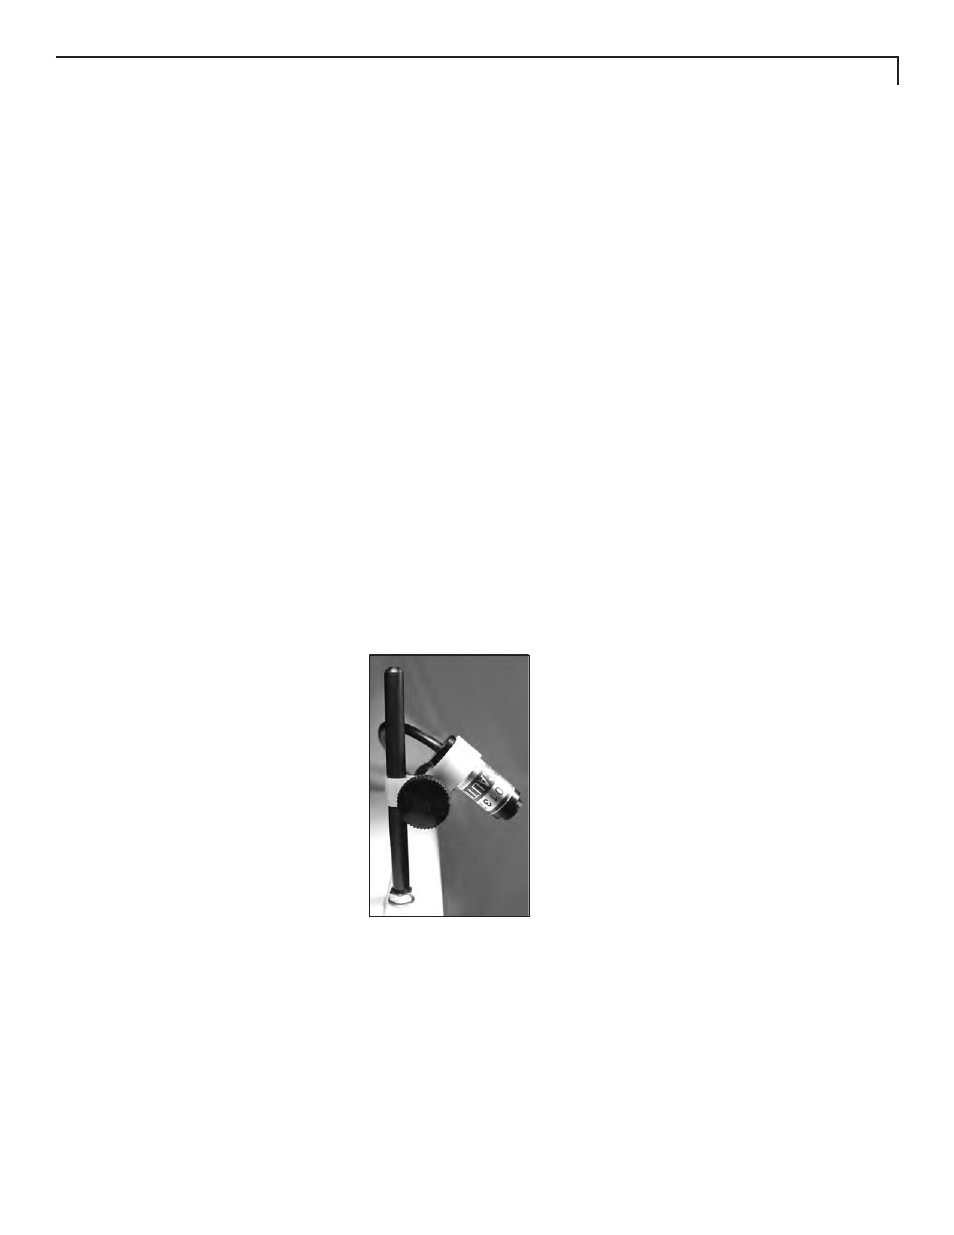
Laser Focus/Laser
Image Size
This high quality laser
is focusable. The laser
is focused by simply
grasping the threaded
housing surrounding
the lens and turning
clockwise or counter
clockwise (Figure 11).
(If you cannot see this
threaded housing, it may
be threaded too far into
the lens area. Take an
appropriate size screw-
driver and turn counter clockwise so the housing
is visible, you can then turn with your fingertips.)
The laser image can be adjusted bigger or smaller.
The direction of rotation needed is determined by
the distance of the laser from the intended focal
plane. Experiment by turning the threaded end to
achieve your desired focal size.
Clamp Adjustment
The laser attaches to a mounting post. The post
may be vertical (installed on the top side, at
the front of the machine, in the post hole
(Back-Side Diagram B, #21 page 7) or
horizontal (installed toward the right back of the
machine in the hole marked as (Front-Side Dia-
gram A, #13 page 6). The Laser Stylus is designed
to articulate any direction by rotating the clamp
on the post and pivoting the laser up or down.
To make an adjustment, simply loosen the black
thumbscrews, position, and retighten.
Location of Laser Labels
The label is attached to the case of the laser and
contains an arrow which indicates the direction
the laser light will shine when energized. The label
must remain in place on the laser.
IMPORTANT NOTE: Removal of the label will
void the laser’s warranty.
Figure 11