BrightSign BSNEE Configurator Tech Note v.1.04 User Manual
Page 3
Technical Notes – BrightAuthor Configurator
3
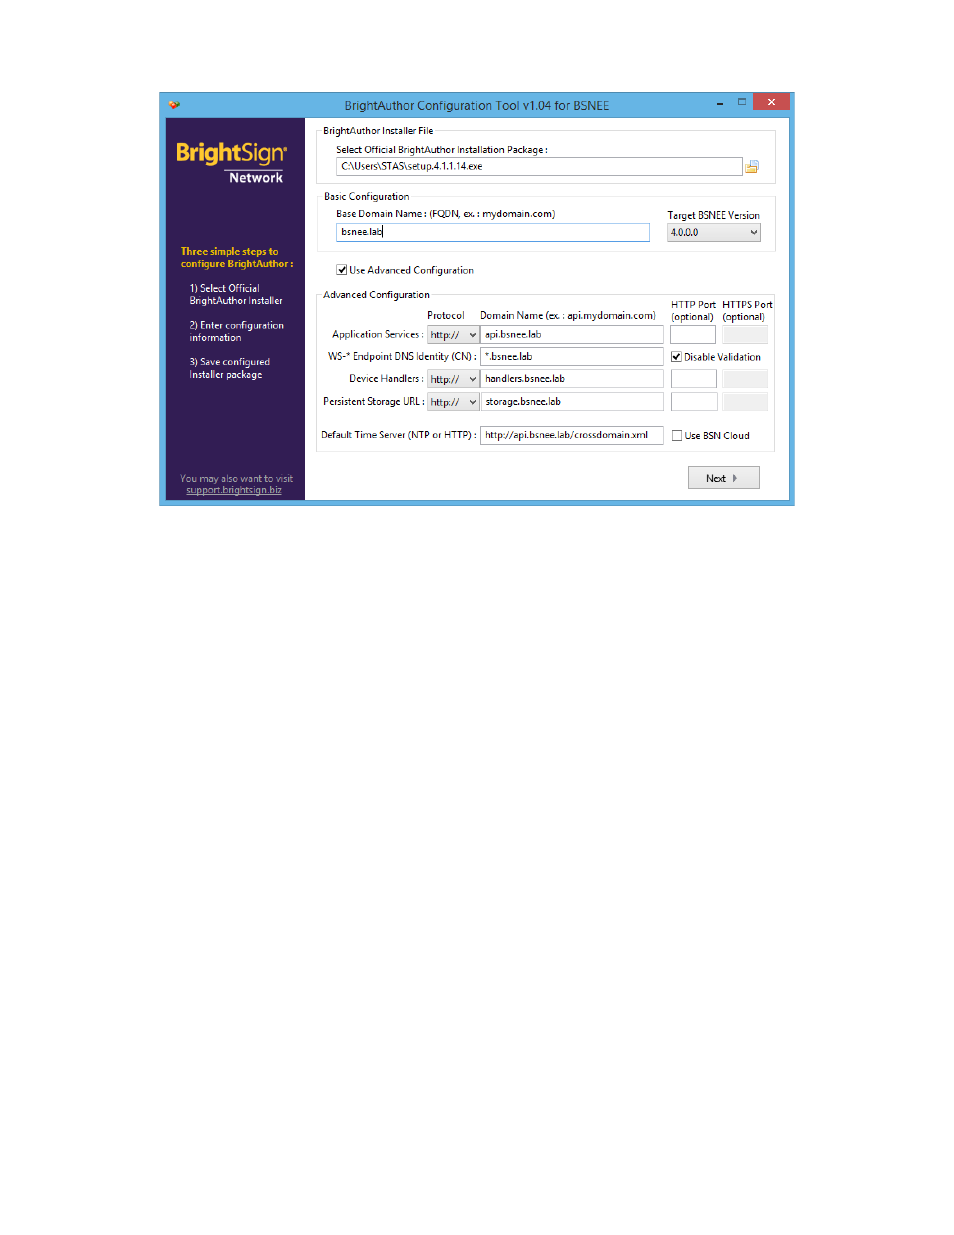
5. If you used custom domain names for BSNEE services during the BSNEE
installation process, or if the “CN” attribute of the certificate installed for the BSNEE
Web Services node differs from the BSNEE Web Services domain name (FQDN),
you will need to perform the Advanced Configuration steps:
a.
BrightAuthor Installer File: Locate and select the BrightAuthor installer
executable file you wish to configure. Alternatively, you can locate the
BrightAuthor installer in Windows Explorer and drag it into the configurator
window.
b. Check the
Use Advanced Configuration box.
c. Specify the
Protocol used for each node (HTTP or HTTPS).
d. Specify the
Domain name and Port of each node. Ensure that the same
names and port numbers were used during the BSNEE installation process.
e. Set the
WS-* Endpoint DNS Identity (CN) to a value that matches the “CN”
attribute of the certificate. If you’re using a self-signed certificate for the
BSNEE Web Services node (for testing purposes), check
Disable Validation
to allow BrightAuthor to bypass certificate validation/revocation checks when
calling API methods.
Note: The Web Services node must use HTTP for BrightAuthor file uploads. As a
result, if you are using custom HTTP/HTTPS ports and you specify an HTTPS
port for the Web Services node, you must enter an HTTP port as well. This
condition does not apply to the Device Handlers and Storage nodes.
BrightAuthor will use standard HTTP/HTTPS ports if the
Port fields are left blank.