BrightSign BSNEE Configurator Tech Note v.1.04 User Manual
Page 4
Technical Notes – BrightAuthor Configurator
4
f. If desired, enter the
Default Time Server for BrightAuthor. Check the Use
BSN Cloud box if you wish to use the default BrightSign Network time server.
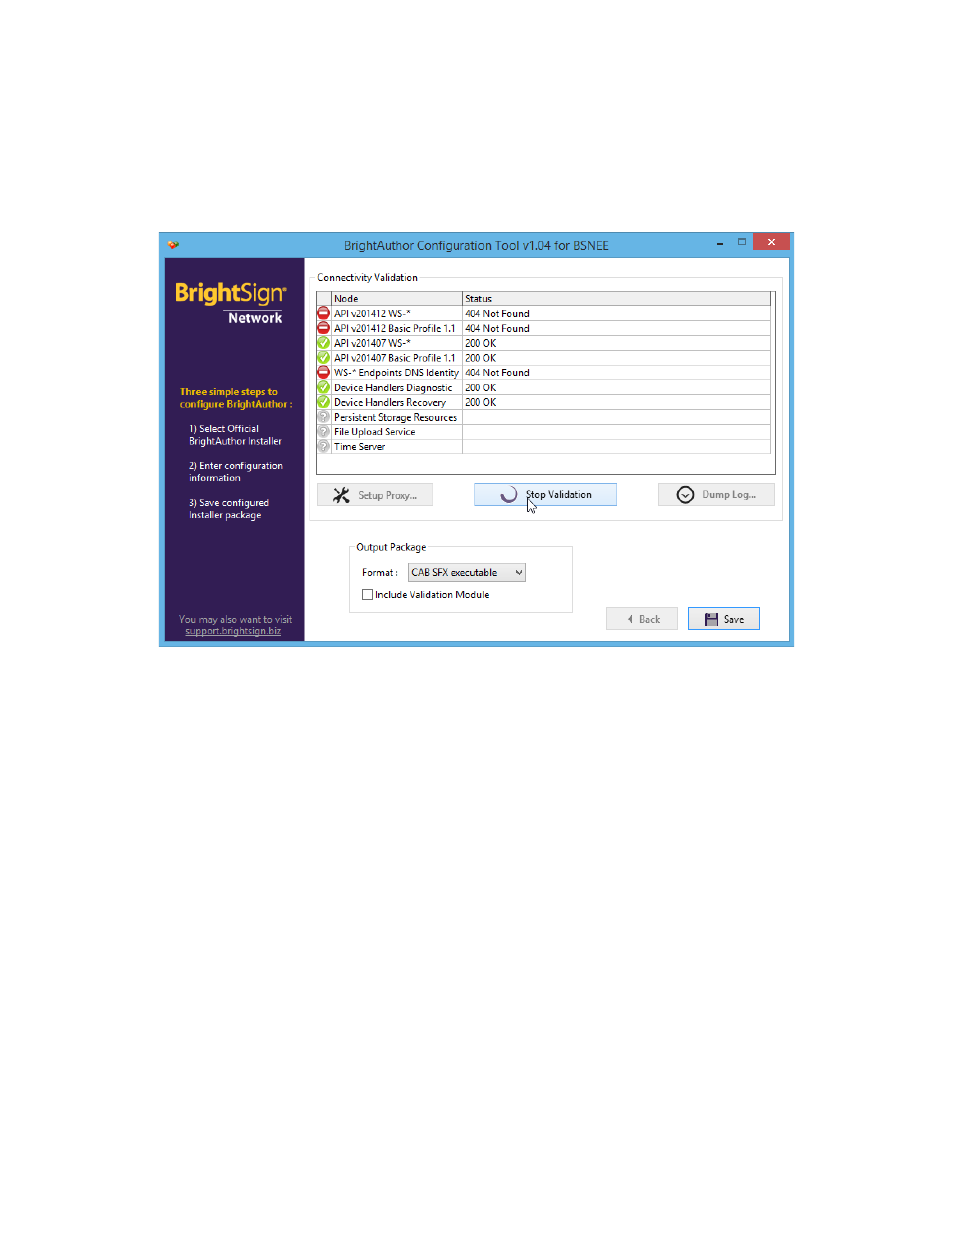
6. Click
Next to proceed to the Connectivity Validation step. This optional step allows
you to test that all information was entered into the BrightAuthor Configurator
correctly. It also allows you to determine whether BrightAuthor will be able to
connect to the BSNEE instance in specific network environments.
7. Click
Setup Proxy... if the Configurator will be connecting to the BSNEE instance
through a proxy server.
a. Check the
Use Proxy box to configure the proxy settings.
b. Enter the IP address of the proxy server into the
Host field.
c. Enter the port number of the proxy server into the
Port field.
d. Check the
Requires Authentication box if the proxy server requires you to
enter credentials. Enter your
Username and Password.
e. Click
OK when finished configuring the proxy connection.
8. Click
Validate Connectivity. The configurator will attempt to communicate with all
relevant BSNEE endpoints and report whether each attempt was a success or
failure using standard HTTP status codes.
9. Click
Dump Log to retrieve a log of error messages.
10. Select the
Output format of the BrightAuthor installer package:
a.
CAB SFX executable: This package is built using Windows IExpress
technology. It supports the “unattended” installation mode for enterprise
network deployment.