Eizo DuraVision FDX1003 / FDX1003T 取扱説明書 User Manual
Page 28
11
En
gli
sh
Installing the Touch Panel Driver (FDX1003T / FDX1203T)
Attention
• The user account to be used for installing the touch panel driver must have the “Administrators” privilege.
• When reinstalling the touch panel driver to update the driver, etc., restart the PC after uninstalling the driver and
then install it.
1.
Uninstall the other touch panel driver, if it is installed.
2.
Install the touch panel driver according to the instructions included in the CD-
ROM.
For how to install the touch panel driver, see the Touch Panel Driver User’s Manual (on the CD-ROM).
3.
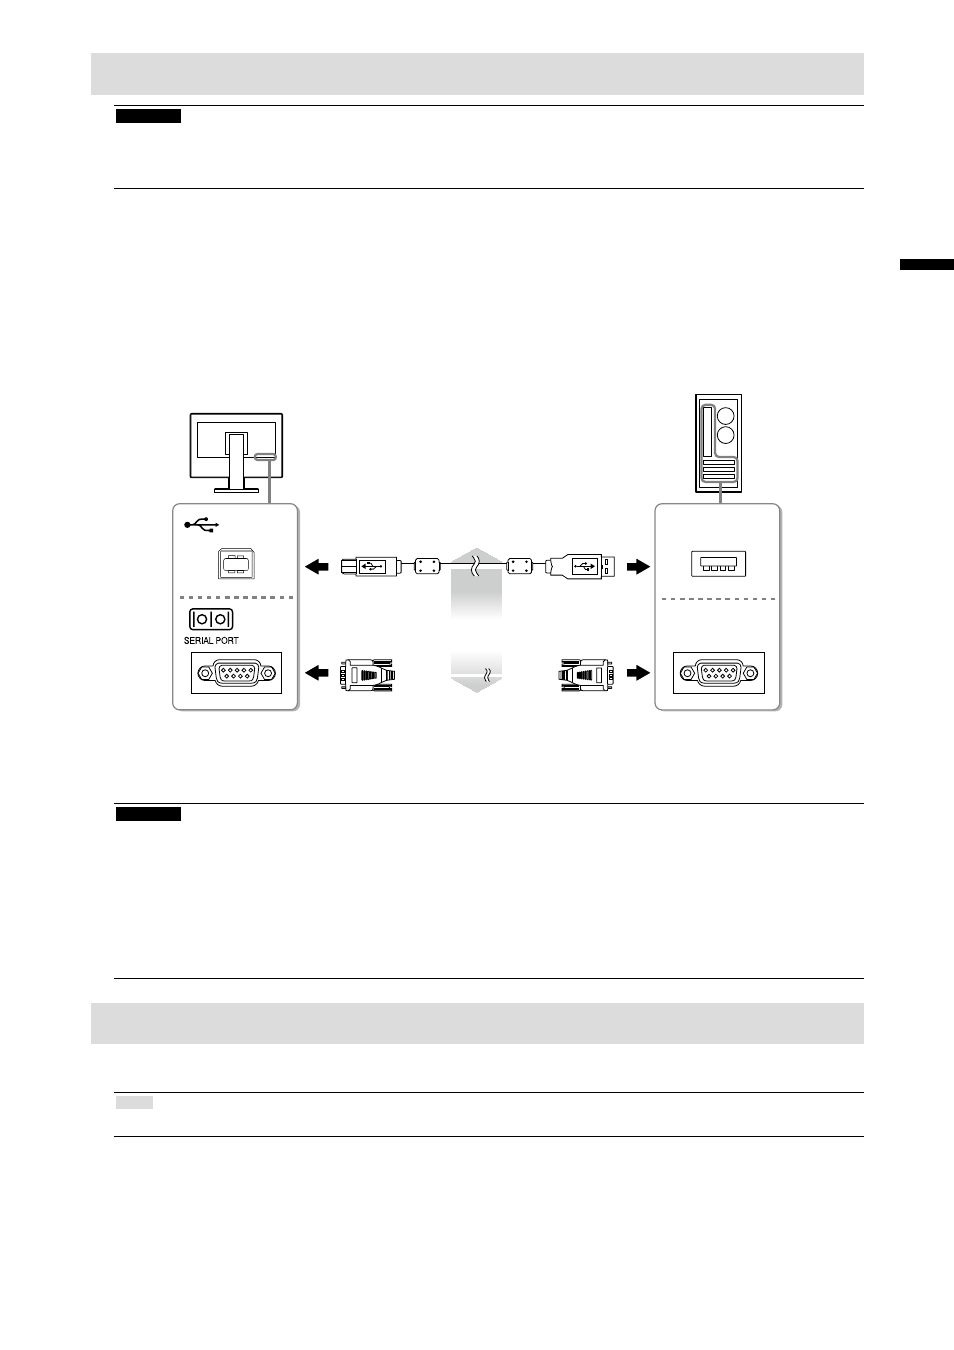
Use the USB cable or RS-232C cable to connect the monitor and the PC.
USB
COM
USB Cable MD-C93 (supplied)
or
RS-232C Cable
*1
(option)
*1 crossover type
4.
Restart the PC.
Attention
• When using the RS-232C cable, set up the device using the following procedure after the restart. For details, refer
to the Touch Panel Driver User’s Manual (on the CD-ROM).
1. Click “Start” - “All Program” - “DMC” - “DMC Touch Panel Configuration” to display “Properties” window.
2. Click “Add a serial device”, and register a new serial device.
3. Click “Device”, and specify the COM port number used for the “COM port”.
4. Click “Apply”.
5. Click “Close”.
Calibrating the Monitor (FDX1003T / FDX1203T)
Calibrate the monitor according to the Touch Panel Driver User’s Manual (on the CD-ROM).
Note
• If its installation location has changed, please perform calibration.