Configure static ip address – Exacq exacqVision S-Series User Manual User Manual
Page 2
www.e
x
acq.com
+1.317.845.5710
+44.1438.310163
USA (Corporate Headquarters)
Europe/Middle East/Asia
Page 2 of 17
3/24/2014
2
Configure Static IP Address
S-Series Professional has two network connections configured as a bonded interface that provides expanded
bandwidth and redundancy. This interface, labeled as Bond 0 in exacqVision Client, is used for data storage traffic
and management.
S-Series Enterprise has three network connections. The red port is an optional port for management of traffic. The
other two ports are the bonded interface. Because video traffic can be intensive, it is recommended that you
separate your video traffic from your management traffic.
By default, an S-Series system is configured to connect to a network using DHCP. It is highly recommended that
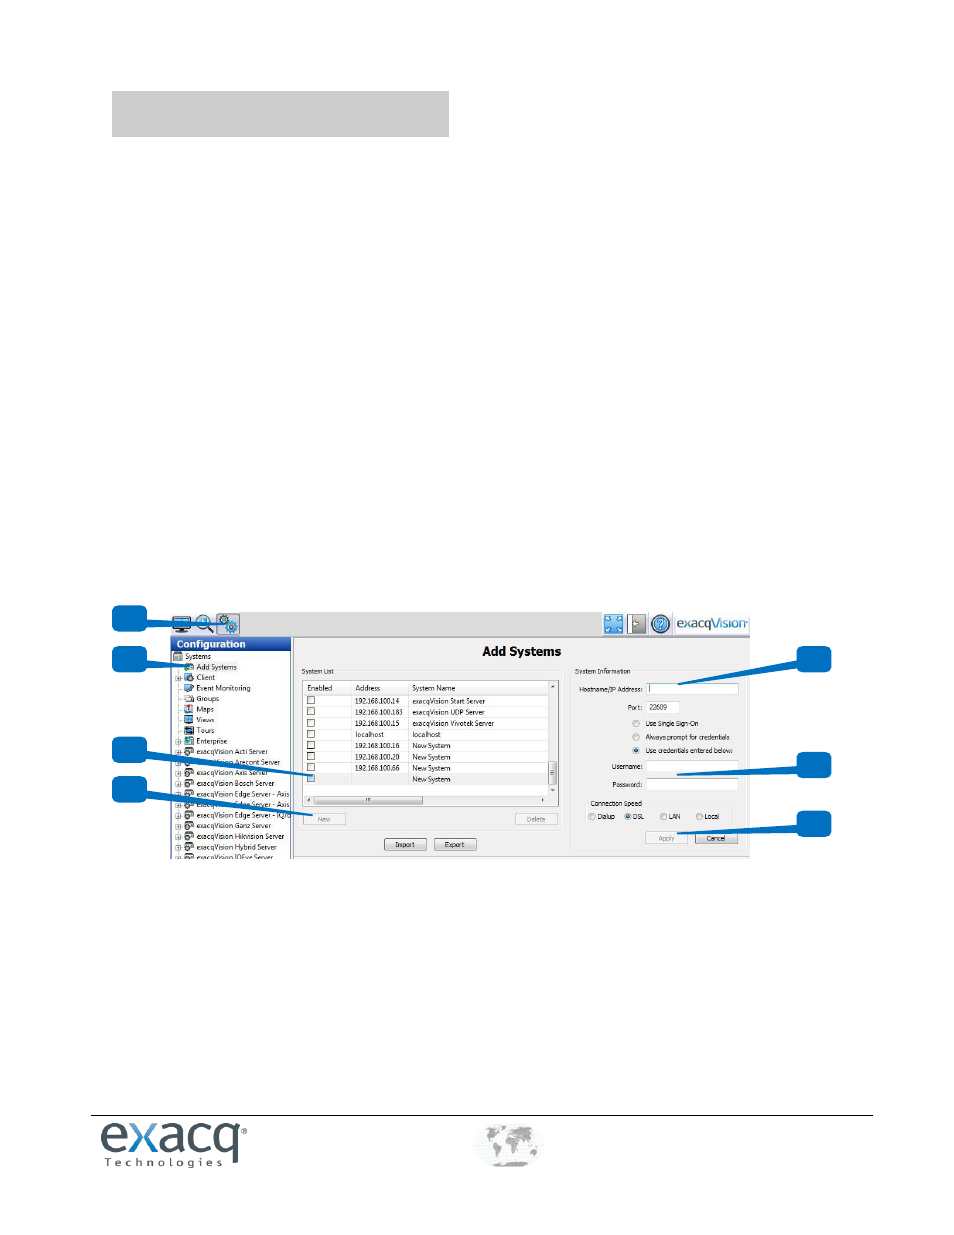
you configure a static IP address for the system. To do this, complete the following steps:
1. Note the IP address of the S-Series system from the rotating information shown in the LCD panel on the
front of the system.
2. Open exacqVision Client on any computer that can access the network to which the S-Series system is
connected.
3. Open the Config (Setup) Page in exacqVision Client.
4. Select Add Systems.
5. Click New.
6. Enter the IP address from step 1.
7. Enter the default username (admin) and password (admin256) of the S-Series system. These can be
changed later, if desired.
8. Click Apply to add the S-Series system to the System List.
9. Click the Enable checkbox next to the S-Series system and ensure that the status changes to Connected.
3
4
5
6
7
8
9