Installation (cont.) – Fire Magic 3050 Infrared Burnet Kit User Manual
Page 2
REV 6 - 1502230915
L-C2-251
2
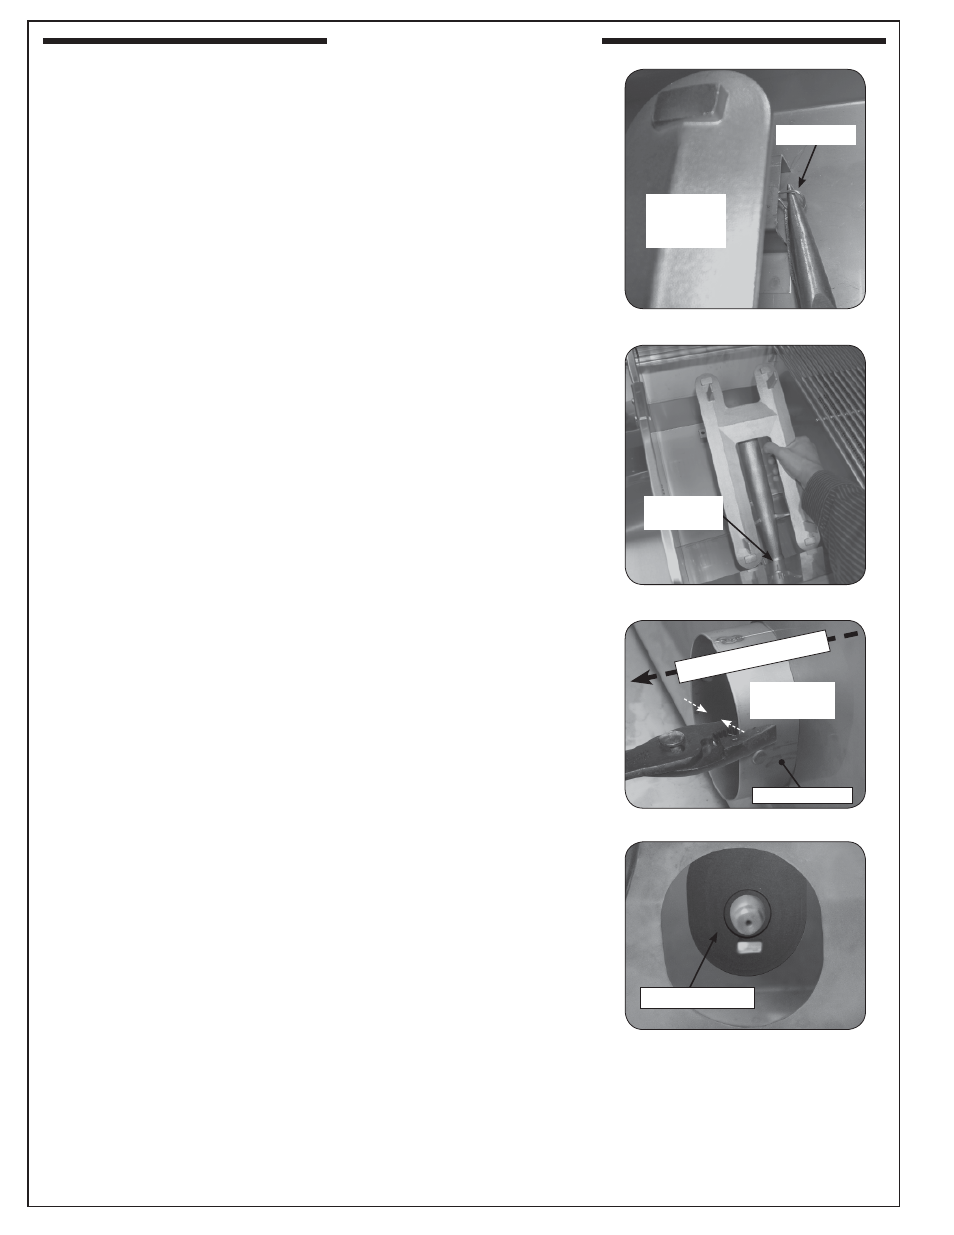
5. Remove the cotter pin from the right rear burner anchoring peg
using needle-nose pliers. Pull it straight out of the cotter pin hole
(see Fig. 2-1).
CAUTION: The burner is heavy.
6. Remove the existing main burner by lifting the pegs extending
from under the back end of the burner out of the two (2) holes on
the bottom of the oven. After the pegs have been freed, move the
whole burner toward the back of the grill so that the burner gas
intake pulls away from the gas orifi ce at the front fi re wall of the
grill (see Fig. 2-2). Then carefully lift the burner out and set it aside.
Retain the clip with the burner so that they can be re-installed in
the future if desired.
7. The grill is equipped with a heatshield kit for each main burner.
This kit is only functional with the standard main burner, and
must be removed for proper infrared burner operation. Use pliers
to remove the diverter tube by bending in each side and pulling
it outwards (see Fig. 2-3), then reach in and remove the silicone
gasket (see Fig. 2-4).
Fig. 2-2 Remove the burner
Fig. 2-1 Remove the cotter pin
Cotter pin
Right rear
lobe of old
burner
Burner gas
intake
INSTALLATION (cont.)
Fig. 2-4 Remove silicone gasket
Remove gasket
Fig. 2-3 Remove diverter tube
Use plier
s to remo
ve
Diverter tube
Bend sides
inward