Installation (cont.) – Fire Magic 3050 Infrared Burnet Kit User Manual
Page 5
REV 6 - 1502230915
L-C2-251
5
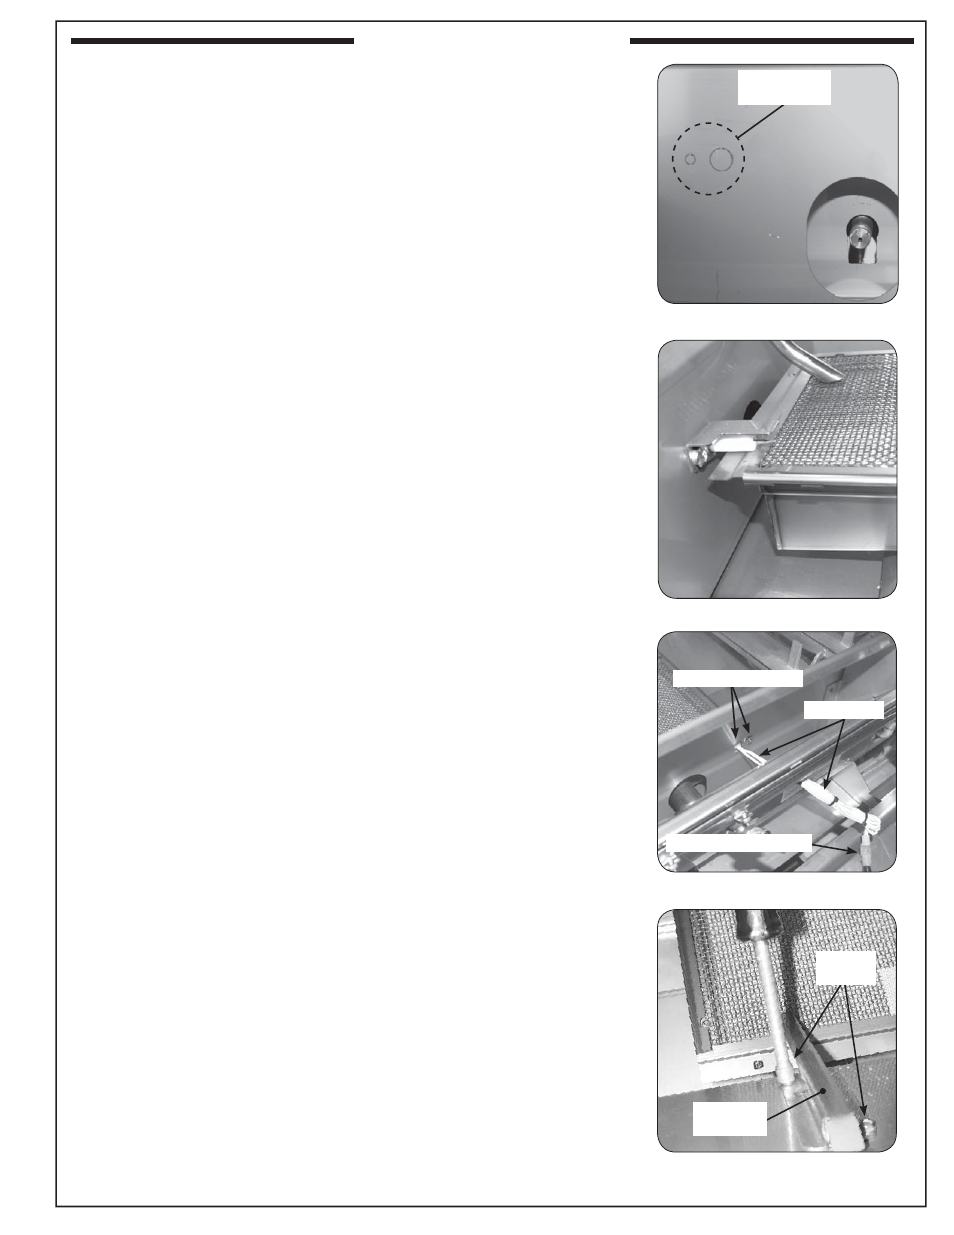
Fig. 5-1 Remove Punch-outs
Remove
punch-outs
7. Carefully remove the punch-outs located in the forward fi rewall
(see Fig. 5-1).
8. Slide the infrared electrode wire into the large punch-out hole.
Secure in place through the small punch-out with the screw and
nut provided (see Fig. 5-2 and see 5-3).
9. Feed the infrared electrode wire through the hole in the manifold
fi rewall and heat shield.
10. Connect the wire to the main harness wire that used to be connected
to the old electrode (Fig. 5-3). Test the ignitor by pressing the
corresponding ignitor button and observing that the tip of the
ignitor glows orange.
Note: On select Echelon grills, the adapter wire (provided) will need
to be used to connect the new electrode wire to the main
harness wire.
11. Apply the conversion label supplied with this kit to the inside of
the fi re wall behind the control panel so that it does not obscure
any other labels.
12. Reposition the heat shield by hooking the diagonal slots back
over the sheet metal of the manifold fi re wall.
13. Replace the fl ash tube with the one provided in your installation
kit by carefully lining up the two holes in the back of the tube with
the two pins sticking out of the inside front of the grill fi re wall.
Then use the 1/4 inch hex nut driver to lightly tighten both hex
nut screws (see Fig. 5-4).
14. Remove the appropriate punch-outs (on the protective cover) for
your burner and location. Place the cover on the infrared burner.
(See Fig. 6-1.)
15. Reinstall the control panel.
16. Replace the cooking grid so that the cut-out section of the grid
is in front.
Note: FLAVOR GRIDS ARE NOT TO BE USED with infrared
burners.
Fig. 5-2 New electrode
Fig. 5-3 Connect new electrode wires
Fig. 5-4 Replace the fl ash tube
New wires
Electrode installed
Main harness wire
Hex nut
screws
New fl ash
tube
INSTALLATION (cont.)