MacroSystem Columbus 2 User Manual
Page 21
21
5.3 Fading the head object in and out
We shall need a finished route to work through
this example. Therefore, after you have activated
a map of a continent and started Columbus 2,
you should create a new route or load one from
the Archive, for instance, the one you created in
the first example exercise (i.e. „Africa“).
You will now use the route you created to learn
about another settings option called „transiti-
on“.
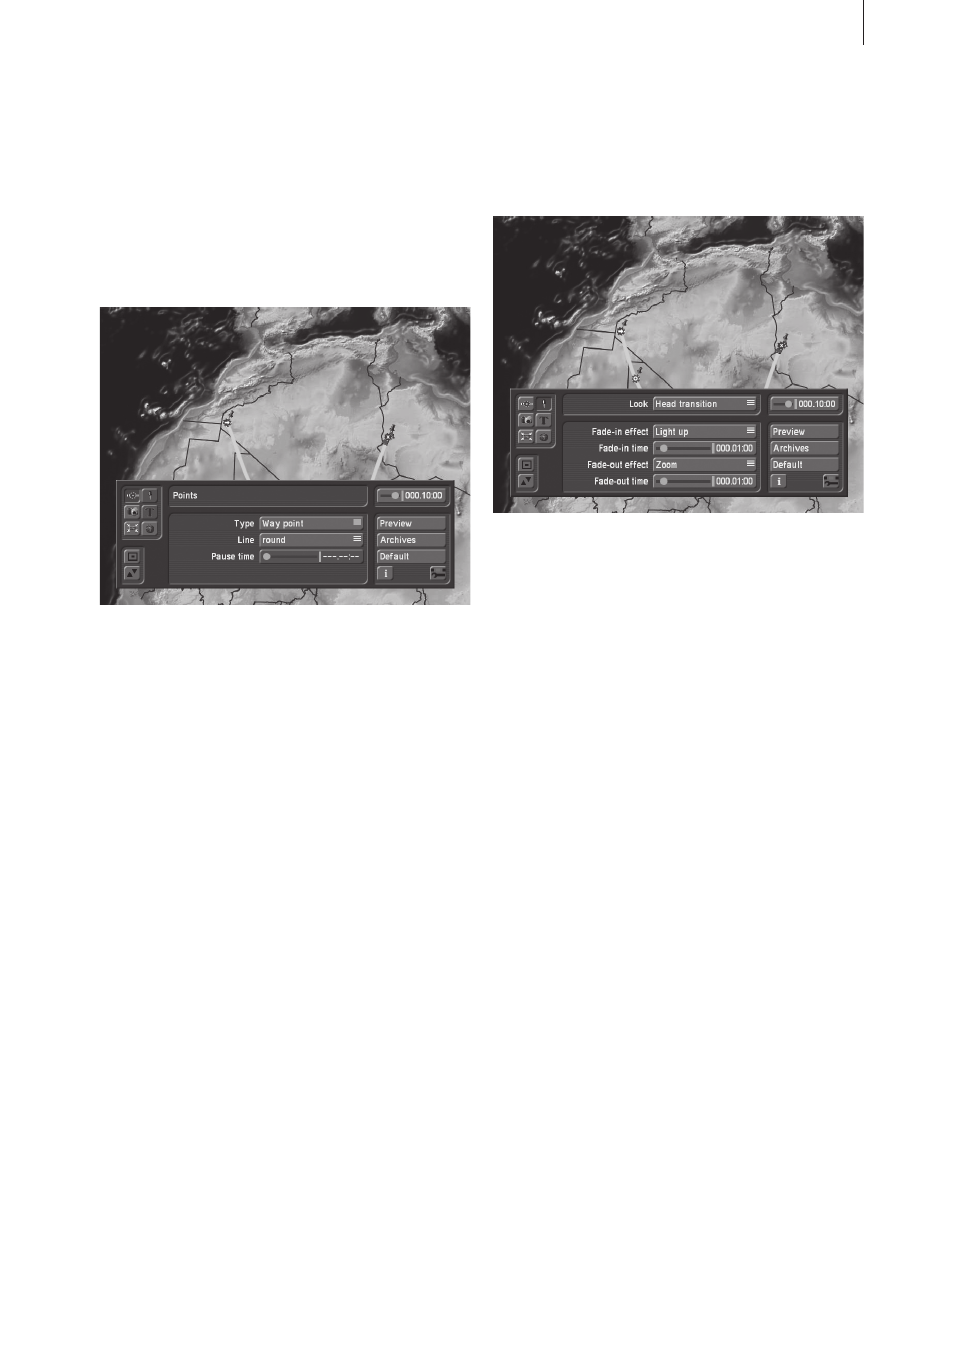
You will make use of the Head object transition
setting in the Look menu to change the look of
the head object at the point in time at which it
reaches the finishing point.
Select the starting point on your route so that it
turns green, and then adjust the settings for the
starting point.
Only the Fade-in effect button is currently active
in the transition settings, since the starting point
is selected. If, on the other hand, you activate
the finishing point of your route, only the Fade-
out effect button will be active.
If you view the route using Preview, you will see
the head object that you selected appear fully in
the very first frame and it will be visible at the
finishing point until the very last frame. Since,
however, you want your head object to fade in
at the start and fade out at the destination, you
should first activate the starting point and then
set the Fade-in effect button to any value except
Off: you can choose between the three transi-
tion effects Smooth fade, Light up and Zoom.
(The Global transition setting uses the standard
settings for the transition that have been confi-
gured in the Global settings menu item.) In this
example, select the Zoom transition setting.
Once you have selected the type of transition,
you will need to set the transition time (e.g. 1
second) and then start the preview so you see
the effect taking place at your starting point. If
you are satisfied with the result, activate your
finishing point in order to fade out the head
object there. Proceed in a similar way as descri-
bed for the fade-in effect, though this time select
Smooth fade as the fade-out effect.
Note: If, on the other hand, you select a key
point within your route (you will of course first
need to set one if you are using the route from
the first example exercise) you can make your
head object first fade out and then fade back in
at that key point. We advise you only to use a
fade out and fade in together. If, for instance,
you were to only use a fade-in effect, your head
object would arrive at the key point, would dis-
appear suddenly and would then fade in again.
Using the fade-out and fade-in effects along
your route at a key point can be effective if, for
instance, you want to interrupt the journey at
this point so as to crossfade briefly to some
video footage that you filmed at this point in
the journey. (To do so, however, you must make
absolutely sure that the Split video function is
activated in the Special window.)
You can then use a transition effect at this point
(see example exercise 5.5).