MacroSystem Columbus 2 User Manual
Page 25
25
Similar to your fade-in effect at the beginning of
the route sequence, you can also use a Colum-
bus 2 effect to crossfade back from the video to
the Columbus 2 scene at the end of your film
sequence (Direction: Video -> Col.).
Proceed in the same way for the remaining se-
quences along your route until you have finis-
hed editing your entire cruise.
Tip: If, when creating your route, you are already
sure you want to insert a transition to a video
at a particular key point, you should include the
time needed for this transition effect in your set-
tings here. For instance, if you want a 2 second
fade from Col. -> Video and another 2 second
fade from Video -> Col., then you should set the
pause time at this key point to at least 4 seconds
(i.e. 2 seconds + 2 seconds).
If the defined pause time were less than this or
not even configured at all, the crossfade would
already start before the head object had even
reached the key point or the crossfade would
only come to an end after the head object had
already set off again from the key point.
In addition to the pause time that you might
use for a crossfade to other video footage, you
can also define a transition for the head object
at key points. For instance, an airplane head
object would be seen approaching a key point
and would shrink in size as a result of the Zoom
effect (i.e. so it looks as though it is landing)
and thereafter the crossfade from the map to
the video would begin. After the transition from
the video footage back to the map, the airplane
would then appear to take off again and conti-
nue along its route.
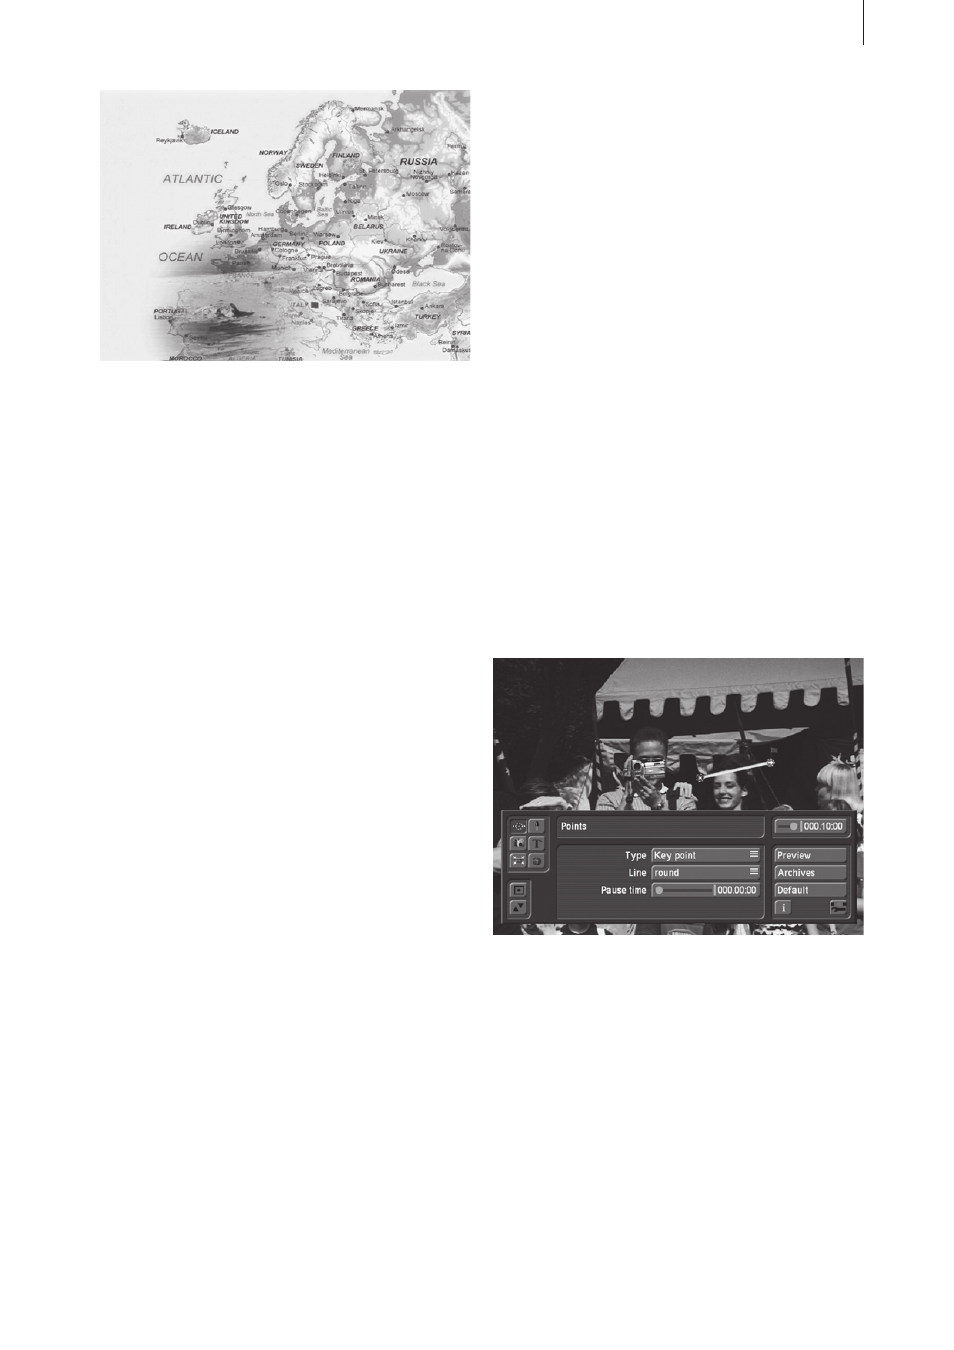
5.6 Encircling a person
You can of course use Columbus 2 not only for
displaying routes but also for editing your video
footage in other ways too.
In this example you will learn how to encircle a
person on a photograph.
For instance, use a school photograph of your
entire class to show your audience what you
looked like at the time. Import the photograph
into your system using PC-Link or Photo Trans-
fer or alternatively make a video recording of it.
Activate the photograph in the scene bin and
start Columbus 2 in Video Ext. mode.
Click on Default so that you see the yellow dia-
gonal line.
First of all, make sure that the Pause time is set
to a value of 000.00:00 in the Points menu.
Click on the starting point, reposition it so that it
is near your head and confirm its new position.
Next, activate the finishing point of the line and
reposition it near your head as well.
After confirming, insert further points along this
path simply by clicking at various positions on
the line.
Make sure that the Type is set to Waypoint and
that the Line is set to the Round option.
Now click twice on the point that is positioned
immediately after the starting point so that you
can reposition it. Move all the key points in the
same way so that the line roughly traces out
your head. (If the menu bar covers up too much
of the class photo, you can of course hide it by
pressing the button that you are already familiar
with from SMART EDIT).