Operating instructions – MBM Corporation FMM3 User Manual
Page 12
Operating Instructions
Page 11
Locate the product on the Table and adjust the Paper Side Stops to trap the material allow-
ing no lateral movement.
Move the Table to align zero (0) on the Back Gauge Scale with the center drill bit.
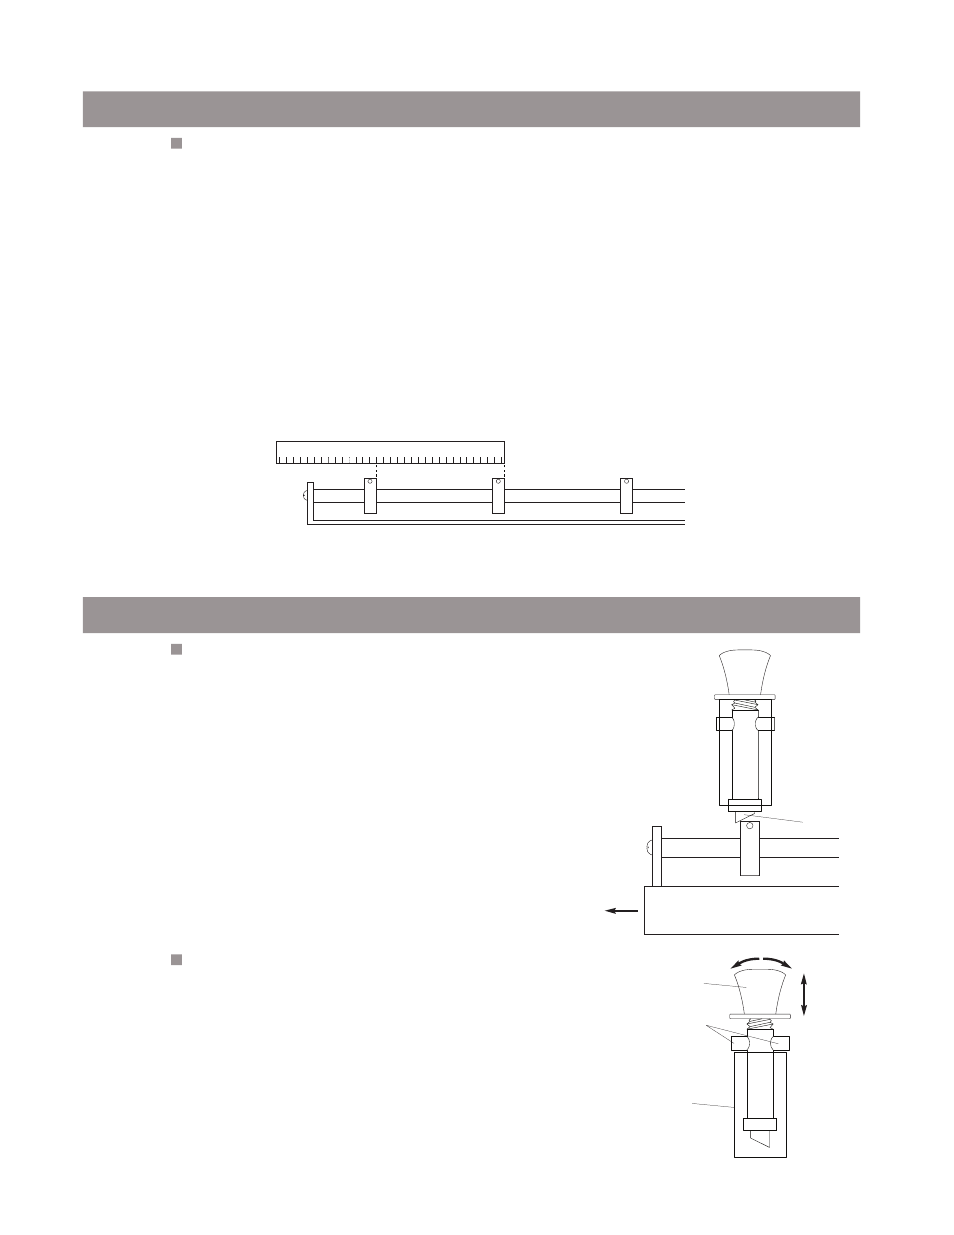
Loosen the Stop Collars and position the first one against the Pedestal Pin marking the
beginning position of the Table and tighten in place.
The right side of this Stop Collar now indicates the center of the product to be drilled. Place
the remaining Stop Collars as desired by measuring with a Ruler (not provided) to the
desired positions and tighten them down. Always measure from the right side of the Stop
Collar to the right side of the next Stop Collar as shown.
When all the Stop Collars are positioned as desired
return the Table to its original position. When traversing
the Table during drilling (See Page #12 for Drilling
Procedures), move the Table to the left until the Pedes-
tal Pin “clicks” over the next Stop Collar. Pull the table
back to the right and hold it there to assure contact
between the Stop Collar and the Pedestal Pin. Con-
tinue drilling and repeat as needed.
1.
2.
3.
4.
Multi-hole Set Up
To reverse the direction of the Table traverse, lift up on
the Pedestal Pin Knob and turn it around. This will
cause the angle of the Pedestal Pin to reverse allowing
the Table to travel back over the Stop Collars. There
are Locking Pins on the Pedestal Pin that fit into a
groove on the Pedestal keeping it locked into a
direction.
Traversing The Table
If a hole pattern includes more than three holes, you will need to adjust the Stop Collars to the
desired spacing. The Stop Collars are adjusted as descibed in Step #9 of the Operating
Instructions. Measure the distance between the stop collars in the following manner:
Note: Due to the width of the Stop Collars, the shortest travel between holes is 3/8”. Almost
any center-to-center distance can be drilled, but requires variations of table travel and
lateral head adjustments.
Step #11
Step #10
Pedestal Pin
Table
Pedestal Pin Knob
Locking Pins
Pedestal
Ruler (not provided)