Measurement Computing DigiCard/24 User Manual
Page 2
2
DigiCard/24 User’s Manual Addendum Feb. 1998
290-0921, rev 1.0
Once this installation is launched, the installation script inflates the compressed files and creates the file structure
in the specified directory. Note that complete installation of the software libraries and supporting files requires
about 1 Megabyte of hard disk space.
7. Copy the system files from the system directory (created in the previous step) to the Windows/System directory.
This is accomplished as follows:
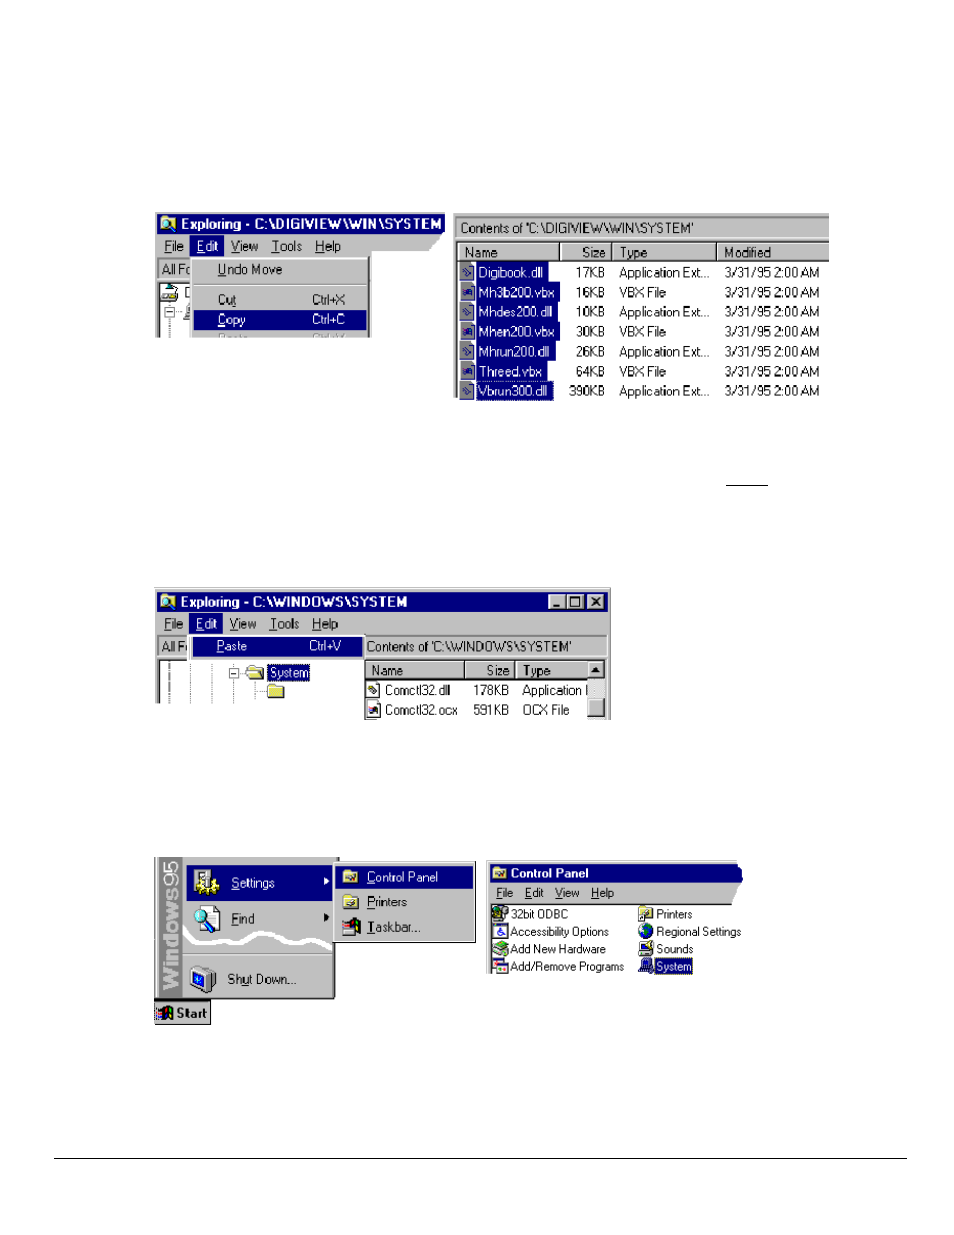
a. Using Windows Explorer, go to the newly created System directory. In our example this is
C:\DIGIVIEW\WIN\SYSTEM
b. Select the seven files (identified in the above figure).
c. Click on the Edit menu and select Copy.
d. IMPORTANT - In this step you may encounter duplicate files. If a file already exists, do not replace it
unless the replacement file has a more recent date. Paste the files in the C:\Windows\System directory.
You can also use the MS-DOS Prompt for this step.
MS-DOS Example: COPY C:\PROGRAM\WIN\SYSTEM\*.* C:\WINDOWS\SYSTEM
Remember, do not replace a duplicate file with a less recent file.
8. Insert the DigiCard/24 into the computer’s PCMCIA slot.
9. Use the Device Manager to verify the DigiCard/24 device. This is accomplished as follows:
a. From the Windows 95 Desktop, click through the following selections: Start, Settings, Control Panel, and
System (refer to following condensed screen image).
b. After the System dialog box opens, select the Device Manager tab. See following figure.