Measurement Computing DigiCard/24 User Manual
Software installation for digicard/24, Under windows 95
290-0921, rev 1.0
Feb. 1998
DigiCard/24 User’s Manual Addendum
1
Software Installation for DigiCard/24
under Windows 95
Addendum to DigiCard/24 User’s Manual
These instructions are based on an example to install C:\DIGIVIEW. The example also uses the A drive for the
installation disk (243-0601). For your application, please substitute drive designations as applicable. The 3.5”
installation disk for DigiCard/24 contains the following files:
Digibook.exe
− self extracting installation
Install.bat
− MS-DOS batch file for starting the installation process
iotdaqpc.inf
− device information file for Windows 95
readme.txt
− installation instructions for Windows 95
Note: Do not install DigiCard/24 until instructed. Installing the card sooner can confuse the operating system.
Installation steps are as follows: Note that screen images have been condensed.
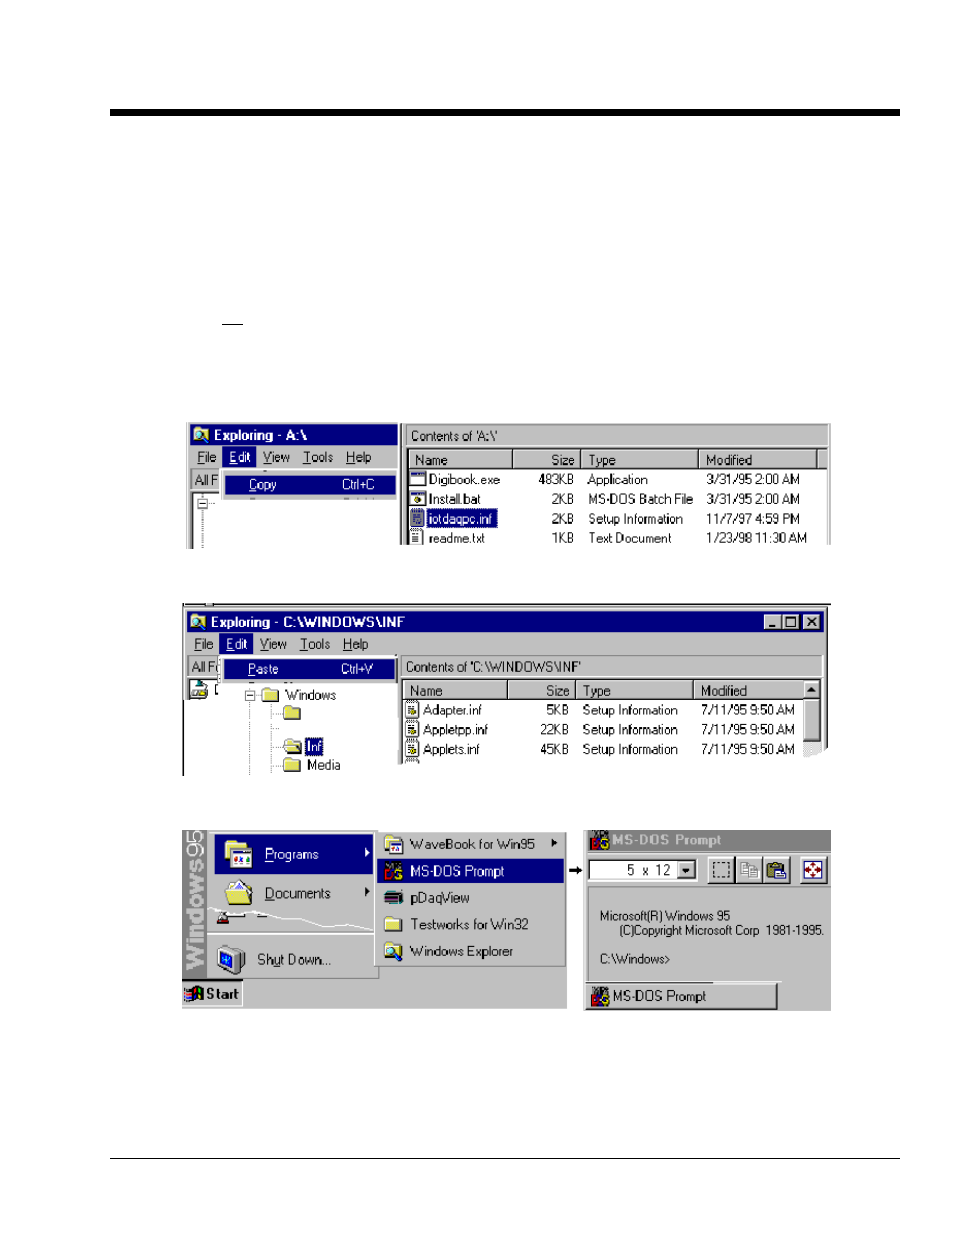
1. Install installation disk. In our example we use Drive A.
2. Copy iotdaqpc.inf from the disk.
3. Paste iotdaqpc.inf into C:\Windows\inf. This can be done from the Windows Explorer as indicated in the
following figure, or from the MS-DOS prompt, e.g., COPY A:\IOTDAQPC.INF C:\WINDOWS\INF.
4. Activate the MS-DOS Prompt by clicking through the following selections from the Windows 95 Desktop: Start,
Programs, MS-DOS Prompt (refer to following condensed screen image).
5. After the MS-DOS window opens, change the current drive designation to the drive containing the installation
disk. We have been using Drive A in our example.
6. Specify the destination disk and path for the software libraries. Example: To install the software libraries to the
C:\DIGIVIEW directory you would enter the following command in the MS-DOS Prompt:
INSTALL C:\DIGIVIEW