Installation, Wiring installation, Warning – Montigo EDVWSPV47 User Manual
Page 8: 1" min. vent cable
Page 8
EDVWSPV Horizontal Power Vent System
Part No. XG1303 - 120110
Installation
WARNING
:
Montigo will not be held responsible for any water damage that
may occur from not installing the equipment as specified by
this document.
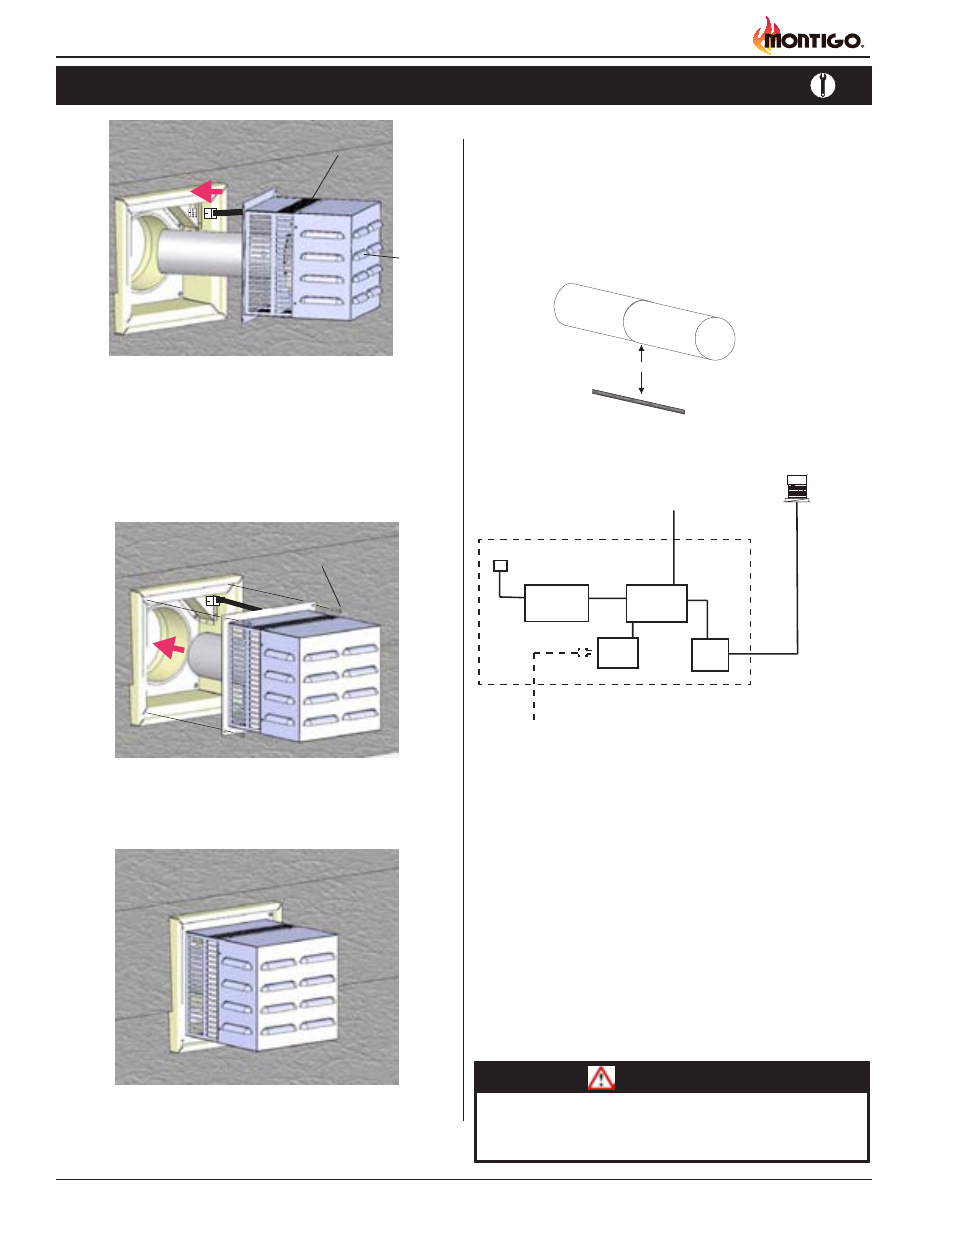
Figure 11. Conduit and Wiring Clearances.
Wiring Installation
Connect the wiring to the external power vent termination as outlined
in the previous section, and connect the wiring to the fireplace as
outlined in the schematic below. Ensure that the proper clearances
are maintaned for the wiring and conduit.
■
When installing the wiring it must never run above the vent run
and it must be at least 1" clear of all venting.
1" min.
Vent
Cable
Figure 12. Wiring Diagram for Power Vent System.
Control Cable Installation
for Vertical Termination
EXPVH 10 - 100.
Honeywell
SV9501M
PPO
Box
Power Vent
EDVRP47
PVFCB
ECB005
Pilot
Inside Fireplace
Wall Switch
120V
Step 10.
Completed installation.
Step 9.
Install the Power Vent. Place the Power Vent into the Rough-in
frame, aligning the Power Vent into final position. Ensure the
Harness is placed down in the Rough-in box when placing the
Power Vent. (Secure the Power Vent in Place with the supplied
hardware).
Figure 9. (Installation of Power Vent communication harness)
Figure 10. (Installation of Power Vent)
TOP of Power Vent,
(Note Quantity of
louvers).
Note louver
direction
Tightened hardware,
4-pcs.
Figure 11. (Completed Installation of Power Vent)