Dryer mounting kit instructions – Rena TB-390 User Manual
Page 11
TB-390 Operations Rev. 7/30/2014
10
Dryer Mounting Kit Instructions
Note: The images shown in this procedure depict a conveyor that is being setup for right to left
transport. If you plan to use your conveyor for left to right transport; the items shown in this
procedure must be attached at the opposite sides of the conveyor.
In addition; the dryer images, shown in this procedure, are of an older dryer model.
1. Disconnect the power cord from the conveyor.
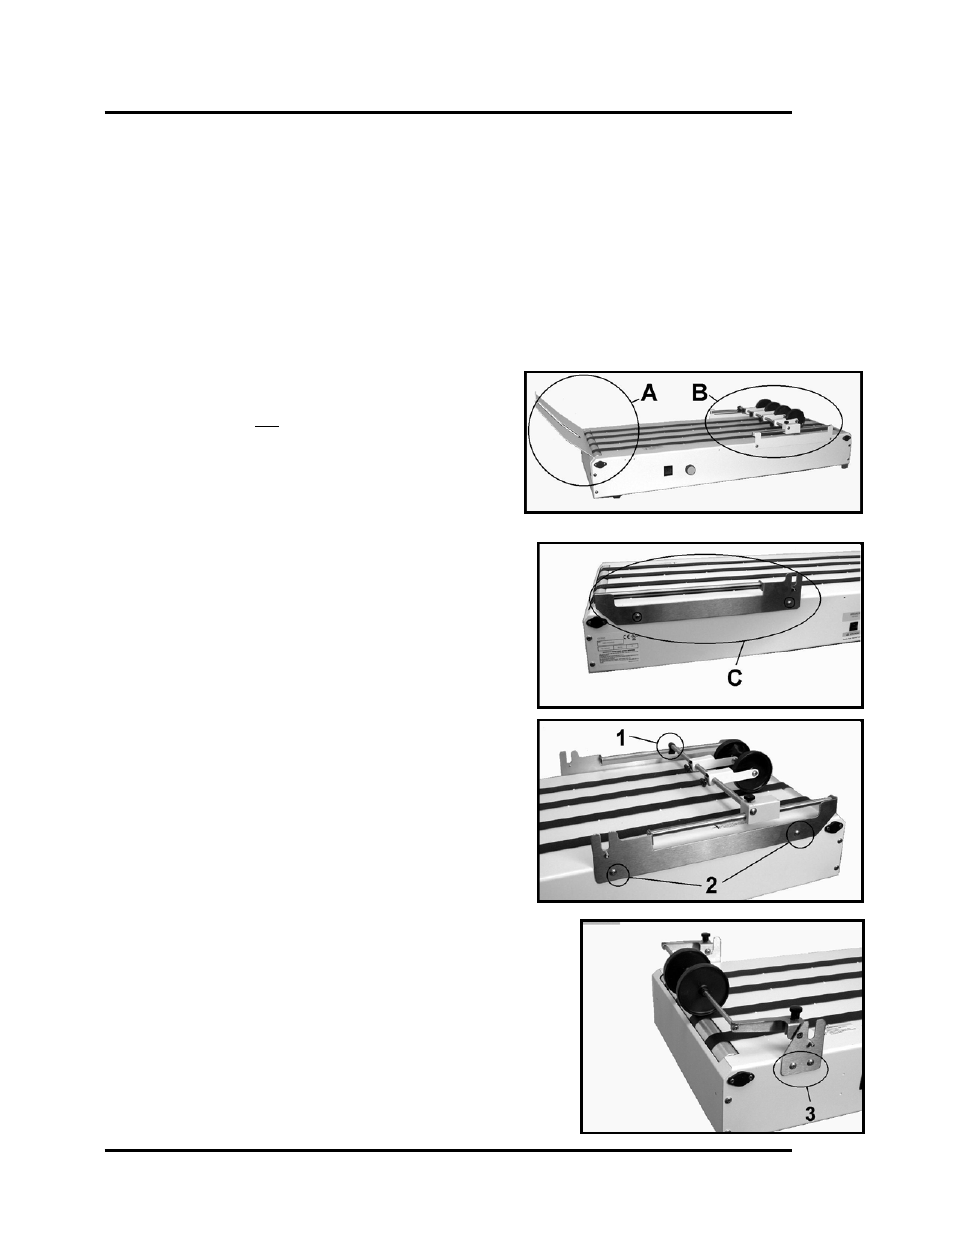
2. To install the Dryer Mounting Kit (DKE-700) you must first remove the following parts
from the TB-390.
A. Stacking Tray [A] (2 screws)
Important: The optional back-stop
can not be used when the optional
dryer is installed.
B. Guide Assembly [B] (4 screws)
Remove the operator’s side bracket
first, then the rear support bracket.
3. Install the new Rear Roller Support [C], to the
entrance end of the conveyor, using two
screws as shown.
Note: As viewed from back side of conveyor.
Conveyor being used for right to left transport.
4. Hook the Guide Roller Support over the shaft
on the rear roller support [1], and then install
the Front Roller Support using two screws [2]
as shown.
Note: As viewed from operator (front) side of
conveyor. Conveyor being used for right to left
transport.
5. Next install the Front Exit Roller Assembly, to the
exit end of the conveyor, by attaching the mounting
brackets to the frame of the conveyor as shown using
two screws each side [3].
Note: As viewed from operator (front) side of conveyor.
Conveyor being used for right to left transport.