Assembly – Skutt Kickwheel User Manual
Page 6
TAB TEXT HERE
TAB TEXT HERE
TAB TEXT HERE
TAB TEXT HERE
TAB TEXT HERE
K I C K W H E E L M A N U A L
rev 11/20/08
Assembly
16. Insert the inner seat post (Piece 4) into the outer seat post. Secure it at the proper
height with the locking handle tightened firmly. This piece may be rotated 180 degrees
to give you more or less space for your legs.
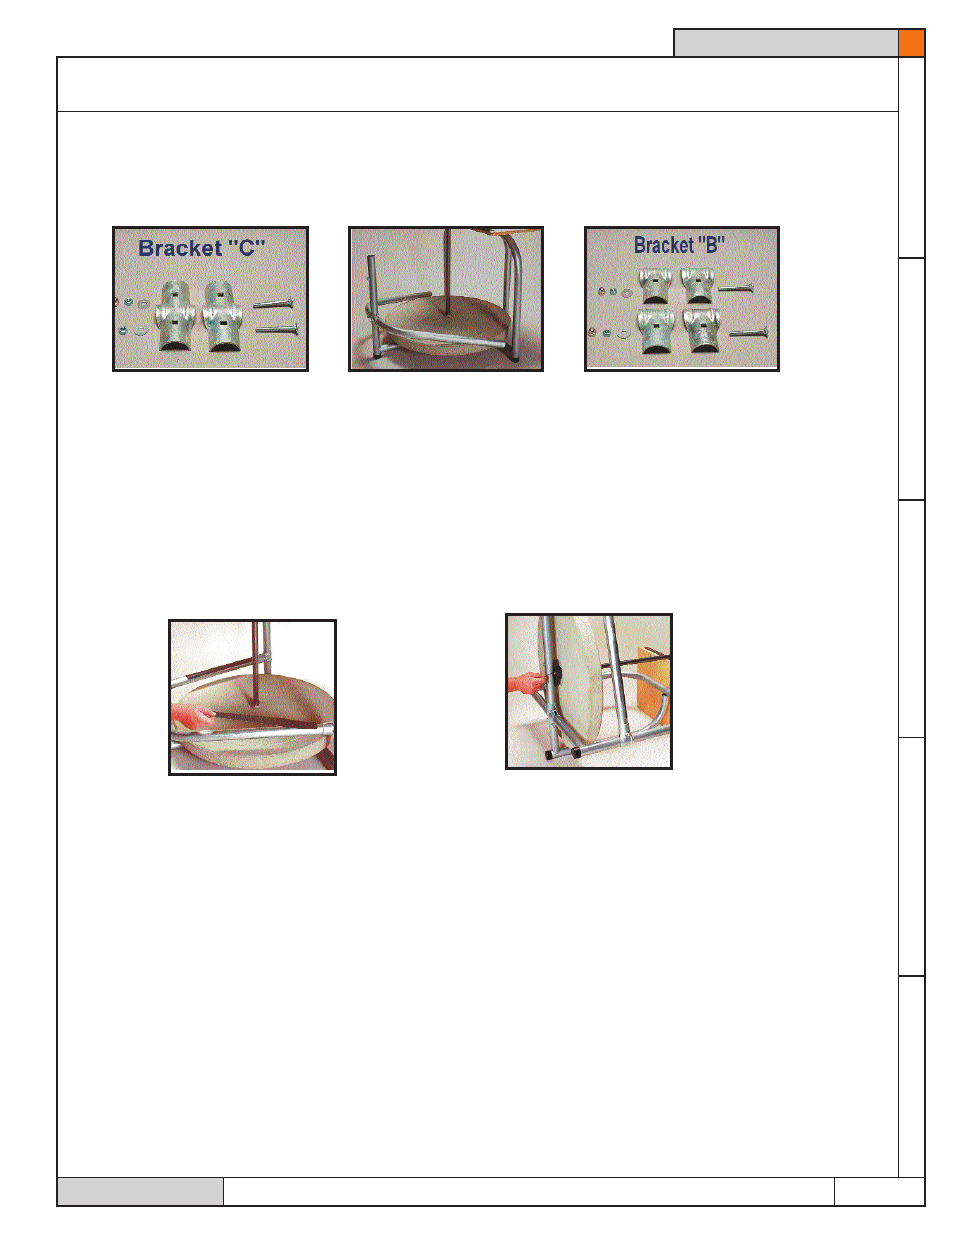
17. Assemble the foot rests into Bracket C on the outer seat post of Piece 2 using 2
carriage bolts, 2 washers, and 2 nuts. The carriage bolts should go thru the bracket
so that you are tightening the nuts on the outside area of the pipe frame. Do not com-
pletely tighten this bracket until the other ends are in place. Set the other ends of the
foot rests in Bracket B attached to the sides of Piece 1 with the remaining carriage bolts,
washers, and nuts. (Make sure the bolts point away from the center of the wheel so no
one is injured if they happen to slip while using the wheel.) Do not over tighten. Before
tightening, make sure that there is adequate space (approximately 2” - 3”) between the
foot rests and the flywheel. When all of the Brackets are set, place the 4 cap nuts on
the ends. Do not over tighten.
18. After completely assembling the wheel, clean the footrests (Piece 3). Completely
remove all oily substances. Let this dry completely. Without touching the back, remove
paper backing from the skid-proof strips. Place on footrests. Avoid air bubbles and
rub strips for a few minutes to guarantee good adhesion. Temperature must be at least
65 degrees Fahrenheit.
19. Tighten the two set screws on the bottom bearing. This might be easier by tilting
the wheel forward so that the front edge of the table top touches the floor.
20. The splash pan fits both a 12" work head or a 14" work head. The Thomas Stuart
splash pan has exclusive mounting clips that slip over the table angle iron. The wheel
head should be high enough only to allow the clips on the splash pan to pass over the
hook onto the steel angle.
Page 6