Spohn D94-02-TB-DS User Manual
Page 3
5. Slide flat washers and the supplied crush sleeve on each 1/2” x 2 1/2” long bolt and insert the bolts
through our bracket and the frame crossmember. Install 1/2” washers and nuts on the bolt ends and
tighten the bolts (3/4” wrench). Use the bolt with the brake line attachment welded to the bolt head
in the hole towards the center of the truck.
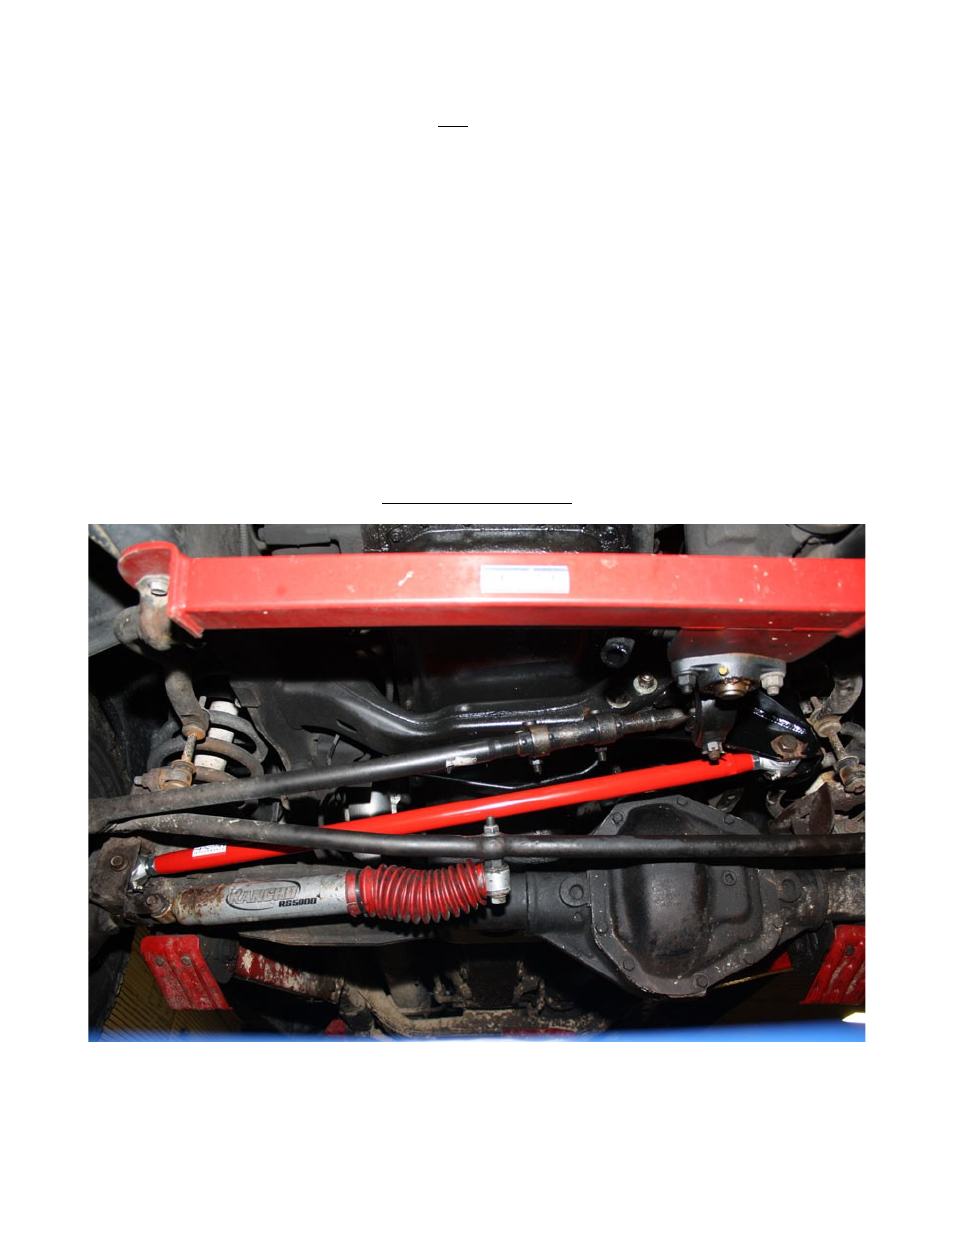
6. Install the end of our track bar that does NOT have the hex wrench flats to the passenger's side front
axle housing mount using the factory bolt and nut (18mm wrench). Do not fully torque yet. The
grease fittings should face down.
7. Install the other end of the track bar that has the hex wrench flats to the driver's side upper
mounting bracket. Install the 16mm x 80mm long bolt and lock nut (24mm wrench). Note: You may
need to turn the steering wheel to correctly align the bolts with the holes for Steps 6 and 7.
8. With all of the bolts installed and snugged up, measure the front axle location and make sure it is
centered. Dropping a plumb bob off the fender and measuring to the lip of the rim works well. Adjust
the bar as needed for centering. To adjust the bar simply loosen the jam nuts on each end and turn
the bar using a wrench on the bar's hex to lengthen or shorten it (for lifted applications you will need
to lengthen the bar).
9. Torque the passenger's side track bar to front axle housing mounting bolt to 125 ft./lbs. and the
driver's side track bar to upper mounting bracket mounting bolt to 140 ft./lbs.
10. Apply red Loctite® to the threads and then fully tighten both jam nuts.
11. With the front axle properly centered, the drag link may need to be adjusted to re-center the
steering wheel. If you have the truck aligned after installation is complete (recommended), make
sure they check the thrust alignment.
12. Grease the Del-Sphere™ pivot joints through their grease fittings.
13. Re-install the front wheels and then safely lower the truck to the ground. Installation is complete.
Complete Installation