SVS 7 110V User Manual
Page 12
9. ACCESSORY INSTALLATION
Please refer to the accessory installation instructions located in the accessory shipping crates for specific
instructions for each accessory. The Accessory #2 Plenum Shroud and Accessory #12 Decorative Cover require
that hardware be added to the threaded rods supporting the Lift before the Lift is installed. The Accessory #1
Ceiling Closure and FP1 Closure Panel attach the ceiling closure support brackets on the platform of the Lift
using supplied threaded rods.
10.
MOUNTING THE PROJECTOR
•
After checking the Lift operation
and all clearances you can install
the projector on the Lift. The
projector can be installed using a
ceiling type projector mount
(inverted) or using an Accessory
#13 Metal Platform (non-inverted).
For custom mounting option please
contact SVS, Inc.
•
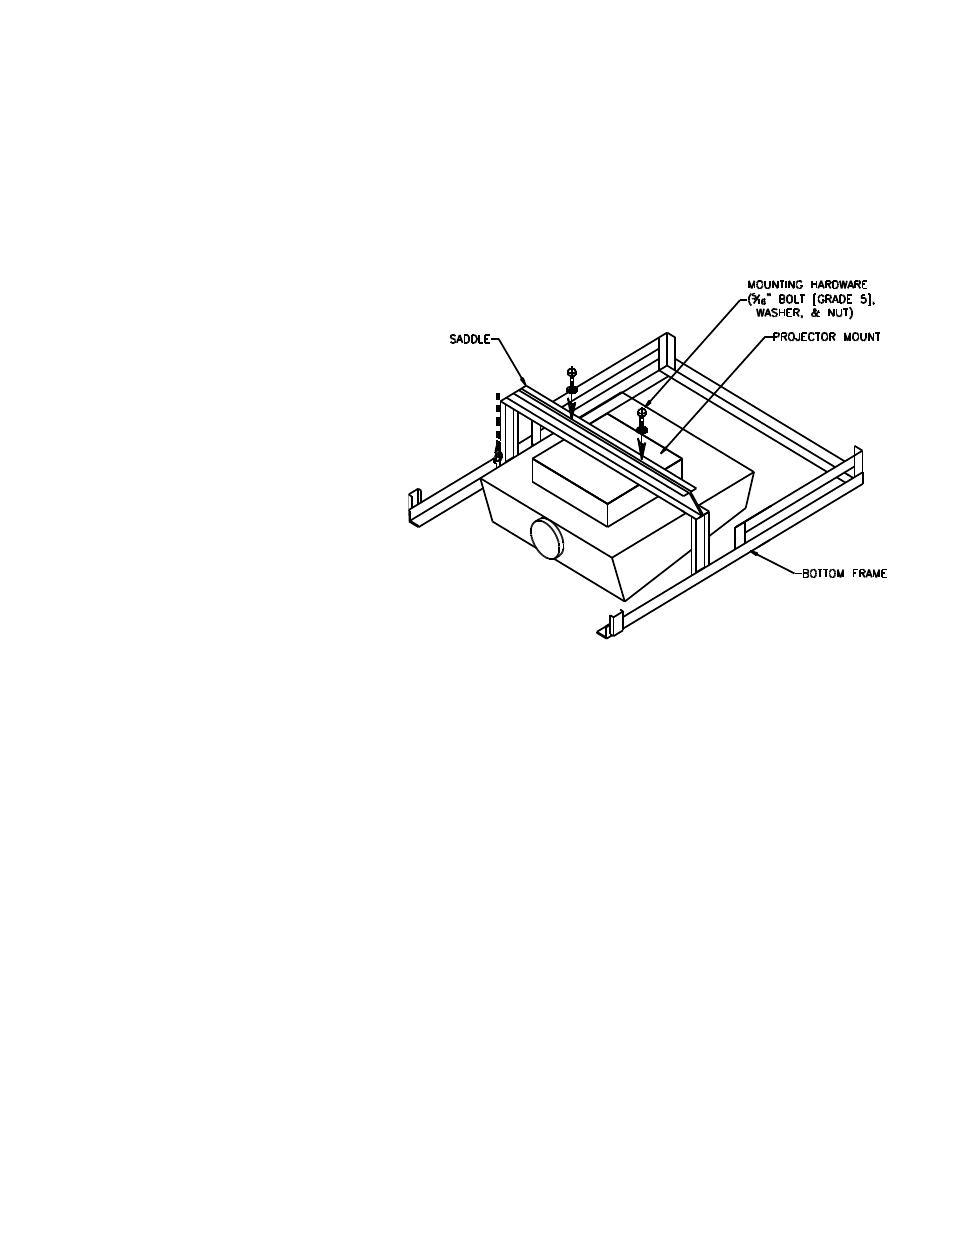
The Projector can be attached to the
Lift using an Accessory #9
Projector Mount from SVS or a
standard ceiling type projector
mount. The projector mount is
required to attach the projector to
the Lift. The base box of the
projector mount will need to be
bolted to the Lift. The mount should be centered side-to-side with the Lift Frame. See Figure 10.
•
If a ceiling type projector mount is not available for the projector or if the projector needs to be non-
inverted, the projector can be placed on an Accessory #13 Metal Platform. The Accessory #13 Metal
Platform is a shelf mounted below the Lift to support the projector.
•
All weight attached to the lift must be centered between the lift's cables. The balance point of the
projector should be placed in line with the lift cables (+/- 1-inch). If this is not possible you may need to
counter weight the lift.
Leveling the Projector
•
If you can not level the projector using the projector's leveling adjustments, you can adjust the level of
the lift.
•
Level corrections are made with the projector mounted after confirming that the cable is packed tightly
and is straight on the Cable Drum.
•
It is best to lower the lift to the Service position and then completely up before leveling the projector.
•
Level adjustments should be made with the projector in the Show position.
•
Position a level across the front of the projector. Fine adjustments are done by adjusting the nuts on the
bottom of the cable eye bolts. Raise and lower the Lift until satisfactory level is achieved.
•
After adjustments are made tighten the eye bolt nuts.
SVS 7 Lift Installation Instructions
Page 12 of 18
Figure 10. Projector Mounting