Set your detection zones, Lane configuration option 2: manual configuration – Wavetronix SmartSensor Matrix (SS-225) - Quick-reference Guide (User) User Manual
Page 3
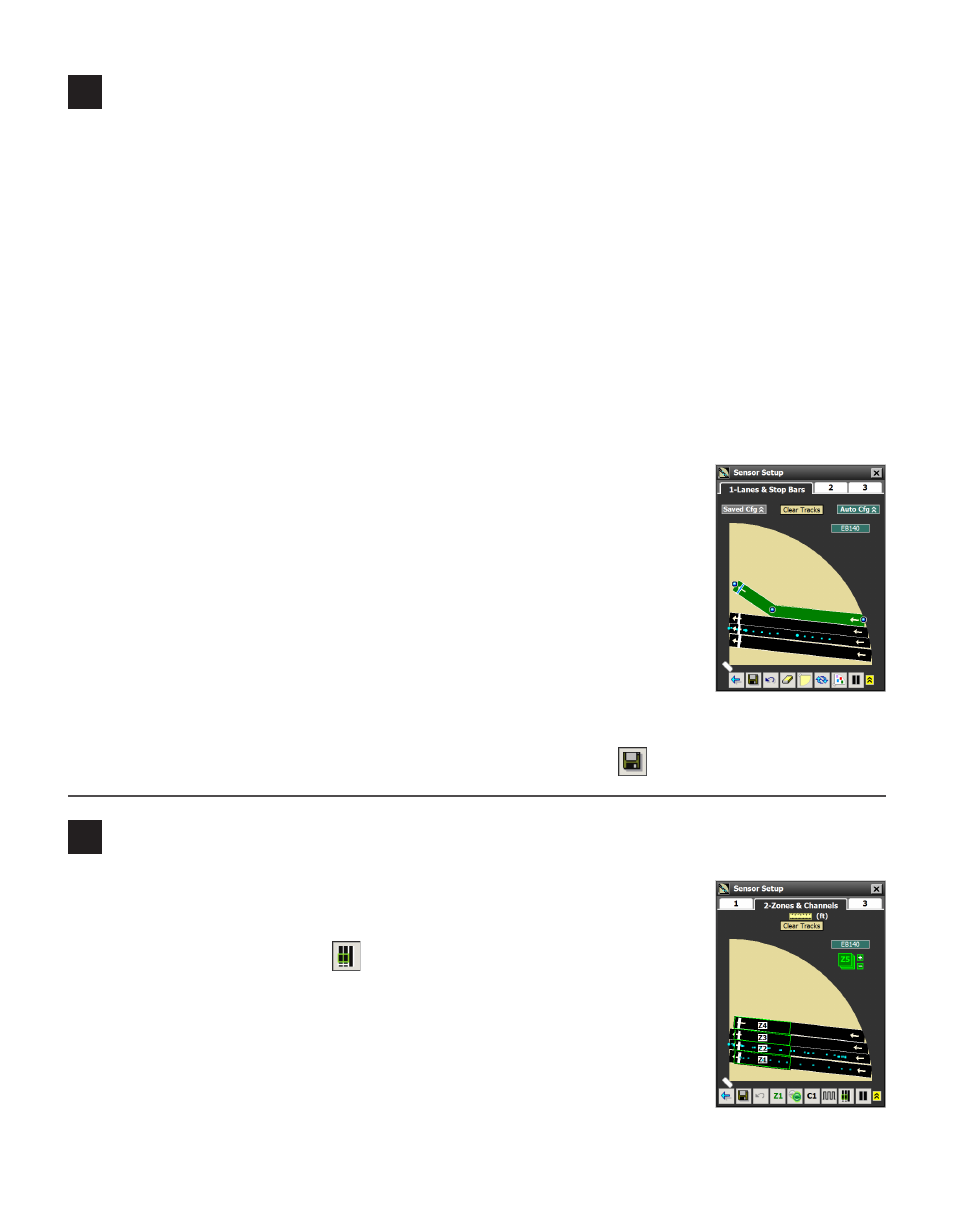
The Lanes & Stop Bars tab lets you manually adjust your automatically configured lanes, or to configure
your lanes completely manually instead of using the automatic configuration options.
Add or Delete a Lane
˽
To add a lane – Click in the edit area where you would like to add a lane. The Edit Area window will
appear; click on the Add Lane button. There can be a maximum of ten lanes.
˽
To delete a lane – Select the lane you want to delete, then click it again. The Edit Lane window will ap-
pear; click on Delete Lane.
Insert, Delete or Move a Stop Bar
˽
To insert a stop bar – Select the lane you want to insert it into, then click on it again. The Edit Lane
window will appear; click on the Insert Stop Bar button.
˽
To delete or move a stop bar – Select the lane, then click on the stop bar. The Delete Stop Bar window
will appear. Click Delete Stop Bar to delete the stop bar or use the arrow buttons to move it. Also, in the
edit area you can grab the stop bar and drag it.
Insert, Delete, Adjust or Move a Lane Node
Lane nodes are used to change the trajectory, curve, or width of a lane.
˽
To insert a lane node – Select the lane to insert it into, then click again. The
Edit Lane window will appear; click on the Insert Node button. There can be a
maximum of six nodes per lane.
˽
To delete or adjust the width of a lane node – Select the lane, then click on
the lane node. The Node Adjustment window will appear. Click Delete Node to
delete the node; use the arrow bumpers under Width to adjust the width of the
node (this changes lane width).
˽
To move a lane node – Click on the lane, then the lane node; in the Node Ad-
justment window, use the arrows to move the node (or you can grab and drag the node in the edit area).
Note. When you’re done, save your changes to the sensor by clicking the
button.
6
Set your detection zones
5
Lane configuration option 2: manual configuration
Click on tab 2 for the Zones & Channels screen. If there are stop bars and no zones
are currently configured, when you open the tab you will be asked if you want 20-ft.
(6.1-m) detection zones to be automatically placed at each stop bar. You can place
auto zones at any point by clicking
.
If you want to manually set or adjust the zones:
˽
To change a zone’s shape – Select a zone, then drag its corners.
˽
To add or delete a zone – Drag a green zone from the zone bank onto the edit
area to add it. To delete a zone, drag it back out to the zone bank.
˽
To move a zone – Select it and then click the zone button (the number will
change based on the zone selected) for the Edit Zone window. Use the arrows to
move the zone. Aso, in the edit area you can click and drag the zone.