Westermo FDV-206-1D-1S User Manual
Page 17
17
6660-2201
Step-by-step guide to configure a DSL-connection
using the web interface
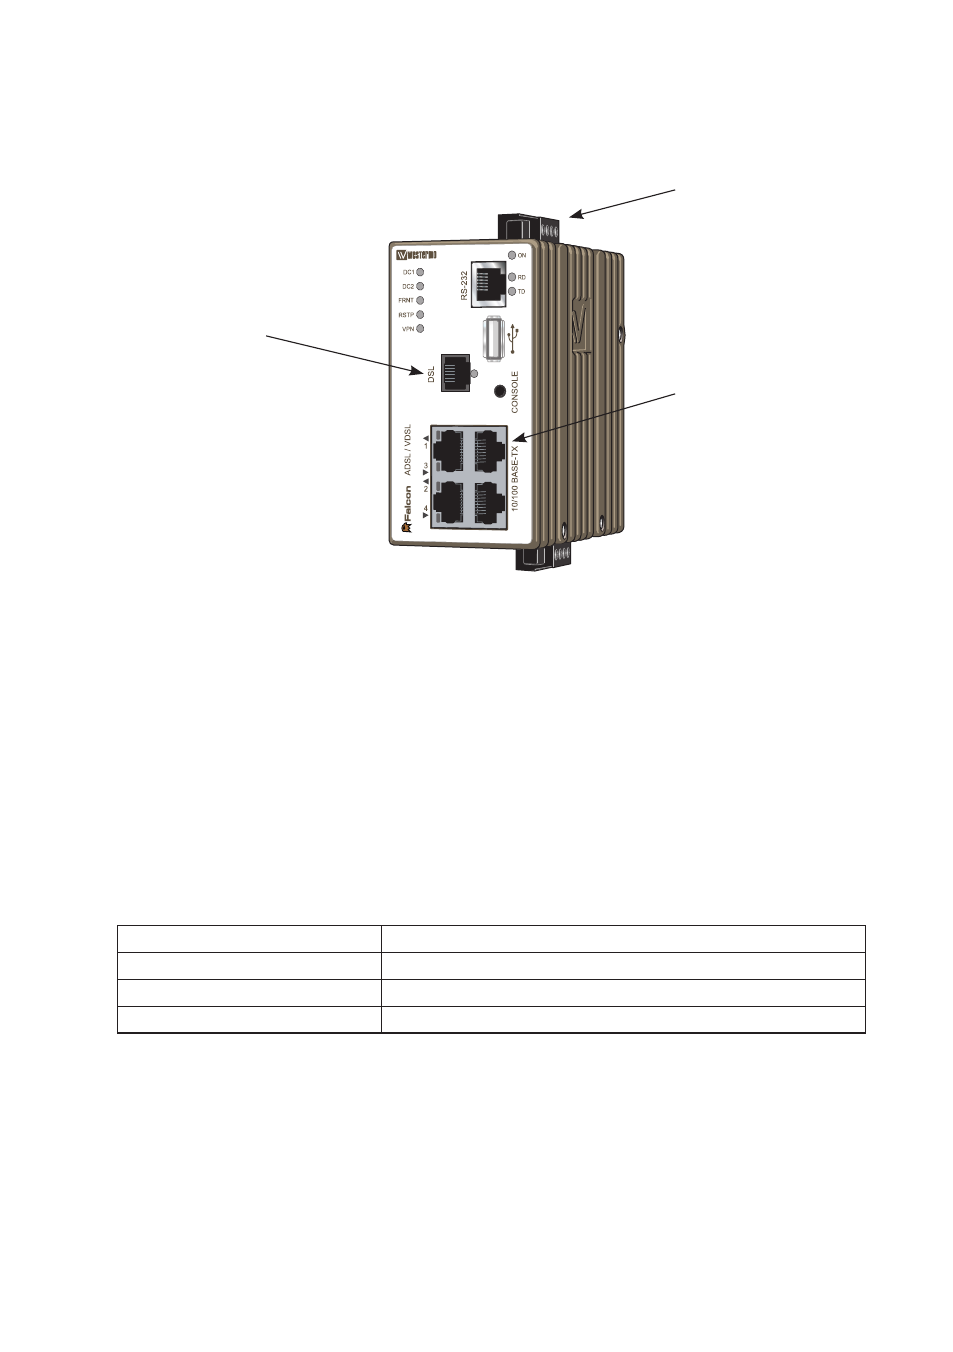
Power Connection
ADSL/VDSL2
connection (RJ-11)
PC/Ethernet
connection (RJ-45)
Step 1 – Power-up the unit and wait for it to become ready
Connect the Falcon to the DSL-network using the RJ-11, connect an RJ-45 cable from
one of the four Ethernet-ports to your PC, and then connect the unit to an appropriate
PSU and power it up.
The unit will start to negotiate the DSL-connection after approximately 15 – 20 seconds,
please note that the default settings might not be appropriate for your specific connec-
tion. Continue reading in order to assure that you have a valid setup.
Step 2 – Configure your PC
Make the following changes in your PC.
IP address
192.168.2.100*
Netmask (Ethernet ports)
255.255.255.0
Gateway
192.168.2.200
Preferred DNS server
192.168.2.200
* Can be any address in the 192.168.2.0-255-range except 192.168.2.200.
Note! If you are unsure or unable to change the above – consult your network
administrator.