Westermo FDV-206-1D-1S User Manual
Page 21
21
6660-2201
Step 7 – Unit ready and online
The Falcon will immediately start to negotiate the DSL-connection with the new details
after Step 6. To monitor the connection progress, navigate to Statistics → DSL.
Under Negotiated State you see the status of the DSL-connection, if it reads Sync State
it means you have a successful connection.
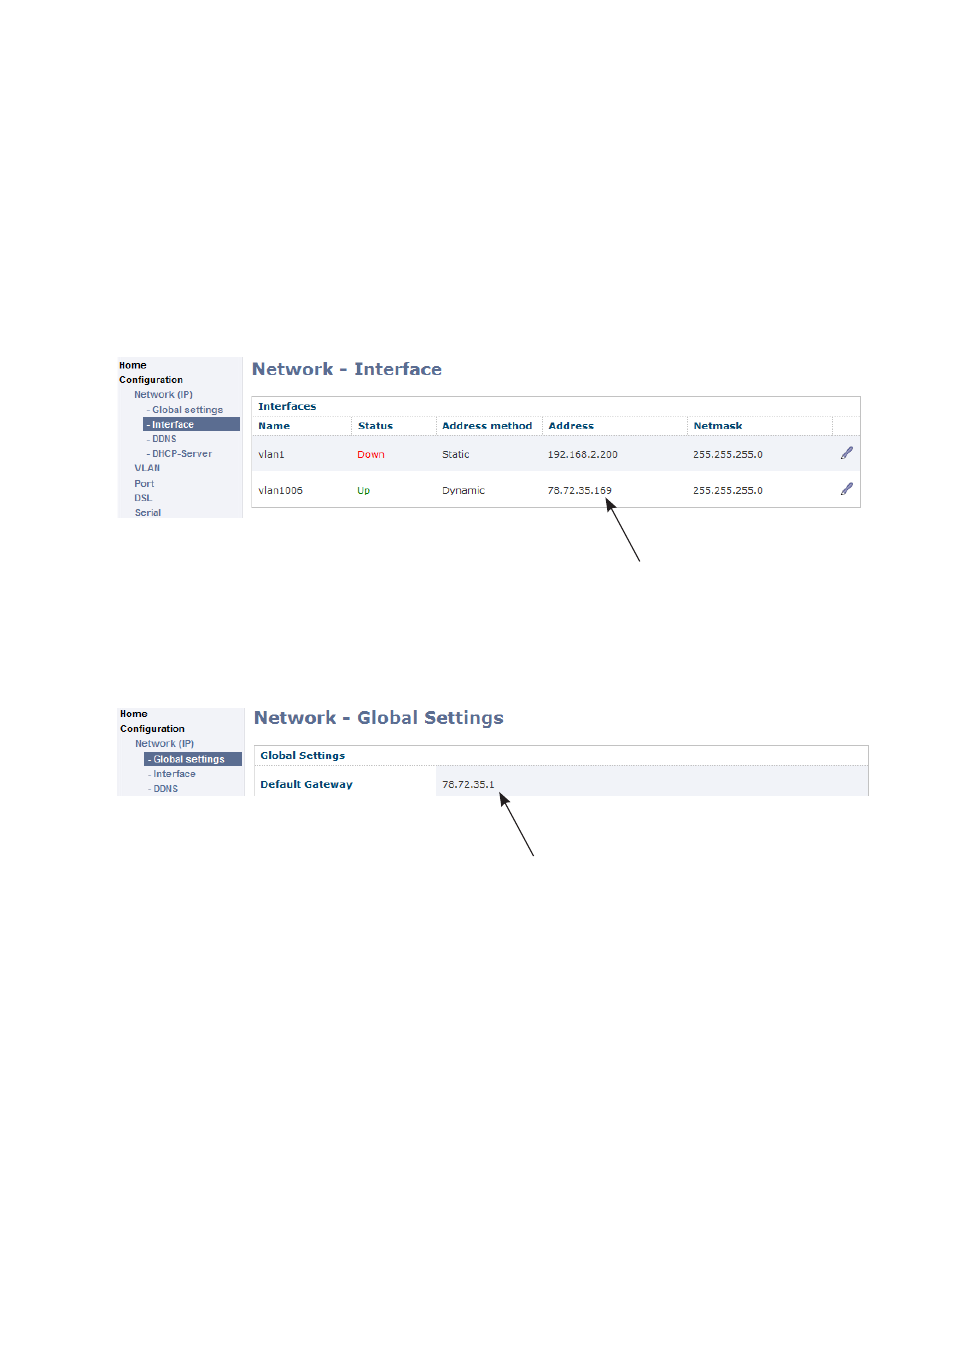
Step 8 – Verify that you have a WAN IP Address
Verify that you have a received an IP address for the WAN connection by navigating
to Configuration → Network (IP) → Interface. Look at the column under Address.
In the example below the address on the WAN-interface, vlan1006, is 78.72.35.169.
Step 9 – Verify that you have a default gateway address
Your Falcon now have a WAN IP-address assigned to it from the service provider,
next step is to verify that there is a default gateway address. Navigate to Configuration
→ Network (IP) → Global settings and verify that you have an address in the Default
Gateway-field.
Step 10 – Test your connection
In your Internet browser type in www.westermo.com and test your connection, you
should be able to see the Westermo website.
You are now ready to use the Falcon Industrial Broadband Router!