Installing the insert, Cable routing & connecting, Checking for leaks – Airmar B122—Long-Stem User Manual
Page 6
6
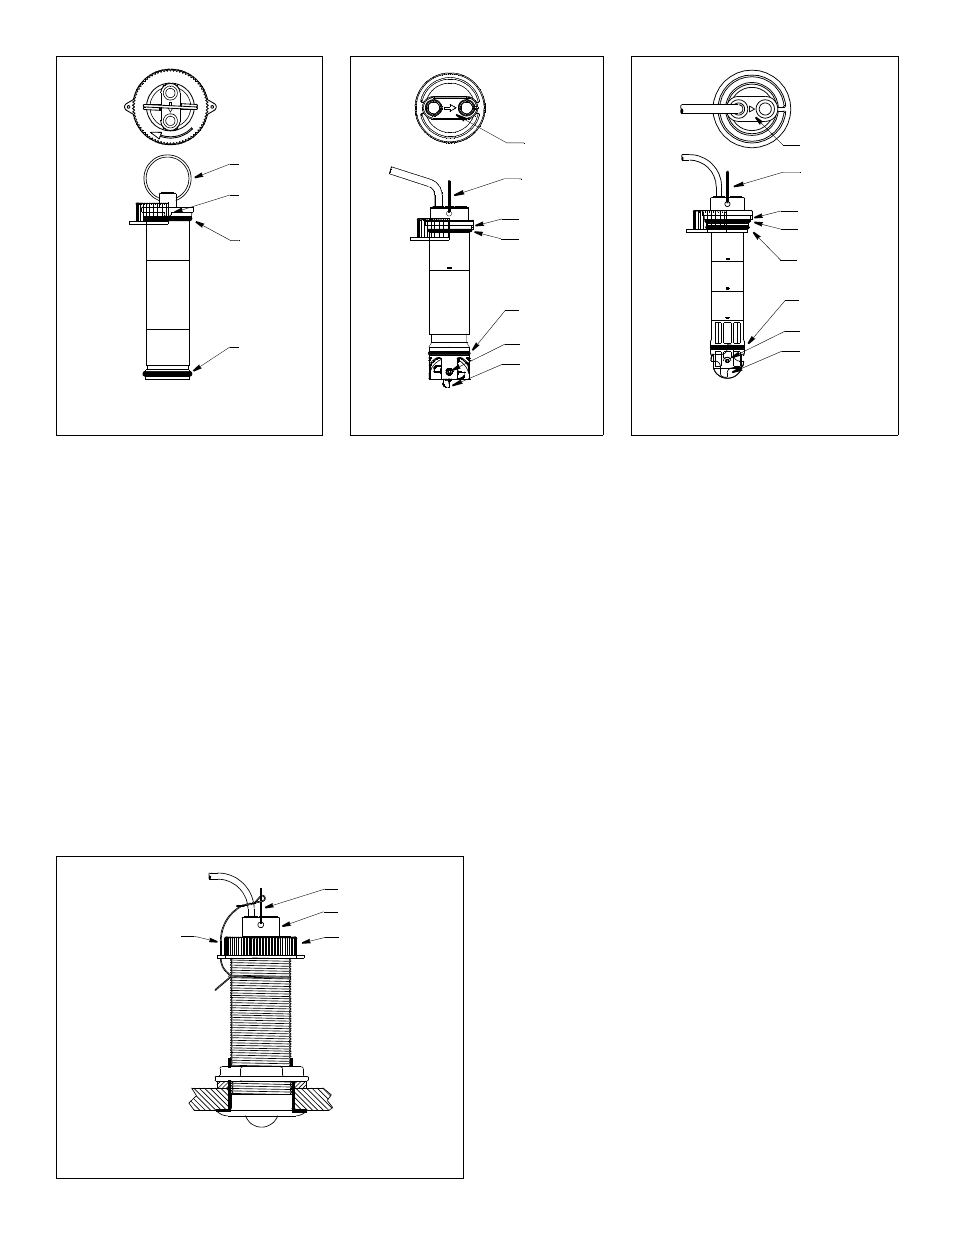
Installing the Insert
1. Slide the cap nut along the cable until it rests on top of the insert.
Attach the pull ring capturing the cap nut (see Figure 9, 10, or
11). Attach the pull ring to the blanking plug in a similar fashion.
2. The O-rings must be intact and well lubricated to make a
watertight seal. After the marine sealant cures, inspect the O-
rings on the insert (replace if necessary) and lubricate them
with the silicone lubricant supplied.
3. Slide the insert into the housing. Point the arrow on the top
forward toward the bow. Seat the insert into place with a
twisting motion until the key fits into the notch. Be careful not to
rotate the outer housing and disturb the sealant. Screw the cap
nut in place and hand tighten only. Do not over tighten.
4. Attach the safety wire to prevent the insert from backing out in
the unlikely event that the cap nut fails or is screwed on
incorrectly (see Figure 12). Wrap one end of the safety wire
tightly around the housing and twist it together with the long
end. Keeping the wire taut throughout, lead it straight up and
through the eye in the cap nut. Loop the wire through the pull
ring and twist it securely to itself.
Cable Routing & Connecting
CAUTION: If your sensor came with a connector, do not remove it
to ease cable routing. If the cable must be cut and spliced, use
Airmar’s splash-proof Junction Box No. 33-035 and follow the
instructions provided. Removing the waterproof connector or
cutting the cable, except when using a water-tight junction box,
will void the sensor warranty.
1. Route the cable to the instrument, being careful not to tear the
cable jacket when passing it through the bulkhead(s) and other
parts of the boat. Use grommet(s) to prevent chaffing. To reduce
electrical interference, separate the sensor cable from other
electrical wiring and the engine. Coil any excess cable and
secure it in place using cable ties to prevent damage.
2. Refer to the echosounder owner’s manual to connect the
sensor to the instrument.
Checking for Leaks
When the boat is placed in the water, immediately check around
the thru-hull sensor for leaks. Note that small leaks may not be
readily observed. Do not to leave the boat in the water for more
than 3 hours before checking it again. If there is a small leak,
there may be considerable bilge water accumulation after 24
hours. If a leak is observed, repeat the bedding and installing
procedures immediately.
pull ring
small
shaft
flat side
of blade
faces bow
large
medium
O-ring
Figure 11. ST700 insert
Copyright © 2001 Airmar Technology Corp.
BOW
►
O-ring
O-ring
Figure 9. B122 insert/blanking plug
large
O-ring
small
O-ring
key
Copyright © 2006 - 2011 Airmar Technology Corp.
pull
ring
Figure 10. DST800L insert
Copyright © 2011 Airmar Technology Corp.
BOW
►
arrow
pull ring
safety
cap nut
insert
(plastic)
wire
Figure 12. Safety wire
(ST700 shown)
Copyright © 2001 Airmar Technology Corp.
pull
small
shaft
flat side
of blade
faces bow
large
O-ring
O-ring
ring
key
key
arrow