Airmar, Cleaning the multisensor, Servicing the paddlewheel insert – Airmar B66VL User Manual
Page 6: Servicing the valve assembly, Winterizing, Replacement parts, Replacing the multisensor
6
Cleaning the Multisensor
Aquatic growth can accumulate rapidly on the multisensor’s
surface, reducing it’s performance in weeks. Clean the surface
with mild household detergent. If fouling is severe, use a stiff
brush or putty knife to remove the growth being careful to avoid
making scratches.The paddlewheel can be removed by pushing
out the shaft using a spare shaft or a 4D finish nail with a flattened
point. Wet sand the paddlewheel with fine grade wet/dry paper.
Servicing the Paddlewheel Insert
The water lubricated paddlewheel bearings have a life of up to 5
years on low-speed boats [less than 10kn (11MPH)] and 1 year
on high-speed vessels. Paddlewheels can fracture and shafts can
bend due to impact with water borne objects and mishandling in
boat yards. O-rings must be free of abrasions and cuts to ensure
a watertight seal. Order a replacement Paddlewheel Kit #33-113.
1. Using the new paddlewheel shaft, push the old shaft out about
6mm (1/4"). With pliers, remove the old shaft (see Figure 6).
2. Place the new paddlewheel in the cavity with the flat side of the
blade facing the direction of the arrow on the top of the insert.
3. Tap in the new shaft until the ends are flush with the insert.
4. Install two O-rings in the lower groves near the paddlewheel.
Do not place them near the pull ring.
5. The remaining two O-rings are placed in a similar position near
the bottom on the blanking plug.
Servicing the Valve Assembly
Should the valve fail, remove it for servicing. Order a replacement
Paddlewheel and Valve Kit #33-218.
WARNING: The blanking plug cannot be secured without the
valve assembly. After removing the valve assembly, temporarily
insert the blanking plug, but do not leave the boat in the water
unattended.THIS IS NOT A WATERTIGHT OR SECURE SEAL!
Warning: O-rings must be intact and well lubricated to make
a watertight seal.
1. Inspect the O-rings on the blanking plug and lubricate them with
silicone lubricant or petroleum jelly (Vaseline®) (see Figure 6).
2. Remove the safety wire and unscrew the cap nut. With the
blanking plug ready in one hand, remove the paddlewheel
insert and valve assembly as one unit by grasping the pull ring
and pulling upward (see Figure 7). Rapidly replace the valve
assembly with the blanking plug to minimize the flow of water
into the boat. TEMPORARILY secure it with the safety wire.
3. Separate the
paddlewheel insert
from the valve
assembly by removing
the safety ring and the
retaining pin. Grasp
the pull ring and pull
slowly upward.
Warning: If a new valve assembly is required and not
immediately available, the valve sleeve must be reinstalled in
the multisensor housing for a watertight seal. Remove the flap
valve, spring pin, and spring from the sleeve.
4. Clean, repair, or replace the valve assembly so that the flap valve
moves freely and seats against the sleeve (see Figure 10).
WARNING: The O-rings must be intact and well lubricated
for a watertight seal.
5. To reinstall the valve assembly, inspect the O-rings on the
paddlewheel insert and lubricate them with silicone lubricant or
petroleum jelly (Vaseline®) (see Figure 6).
6. Slide the paddlewheel insert into the valve assembly. Seat it in
place with a twisting motion until the keys fit into the notches.
Secure the paddlewheel insert with the retaining pin and safety
ring (see Figure 7).
Caution: Be careful to avoid cross threading the cap nut.
7. Remove the safety wire from the multisensor. With the valve
assembly ready in one hand, remove the blanking plug. Slide
the assembly into the multisensor housing with the arrow on the
top pointing forward. Be sure the cable fits into the cable
channel and the key in the housing fits into the notch in the
sleeve (see Figure 10). (A pushing twisting motion will locate
the key.) Screw the cap nut in place and hand-tighten only.
Do not over tighten.
Warning: Always attach the safety wire to prevent the insert
from backing out in the unlikely event that the cap nut fails or is
screwed on incorrectly.
8. Reattach the safety wire (see Figure 7).
Winterizing
After the boat has been hauled for winter storage, remove the
blanking plug to let the water drain away before re-inserting it.
This will prevent any water from freezing around the blanking plug
and possibly cracking it.
Replacement Parts
Lost, broken, and worn parts should be replaced immediately and
can be obtained through your marine dealer or instrument
manufacturer.
Part
Part No.
Paddlewheel Kit
33-113
Paddlewheel & Valve Kit
33-218
Replacing the Multisensor
The information needed to order a replacement Airmar multisensor
is printed on the cable tag. Do not remove this tag. When ordering,
specify the part number, date, and frequency in kHz.
Model
Cap Nut Hull Nut
Standard
Fairing
High-
Performance
Fairing
Blanking
Plug
Insert
B744V
04-234-1 02-030
04-469-01 33-476-01
33-385-01 20-752-1
B744VL 04-234-1 02-030
04-469-01 33-476-01
33-483-01 20-752-3
B66V
04-234-1 02-030
33-029
—
33-385-01 20-752-1
B66VL
04-234-1 02-030
33-029
—
33-483-01 20-752-3
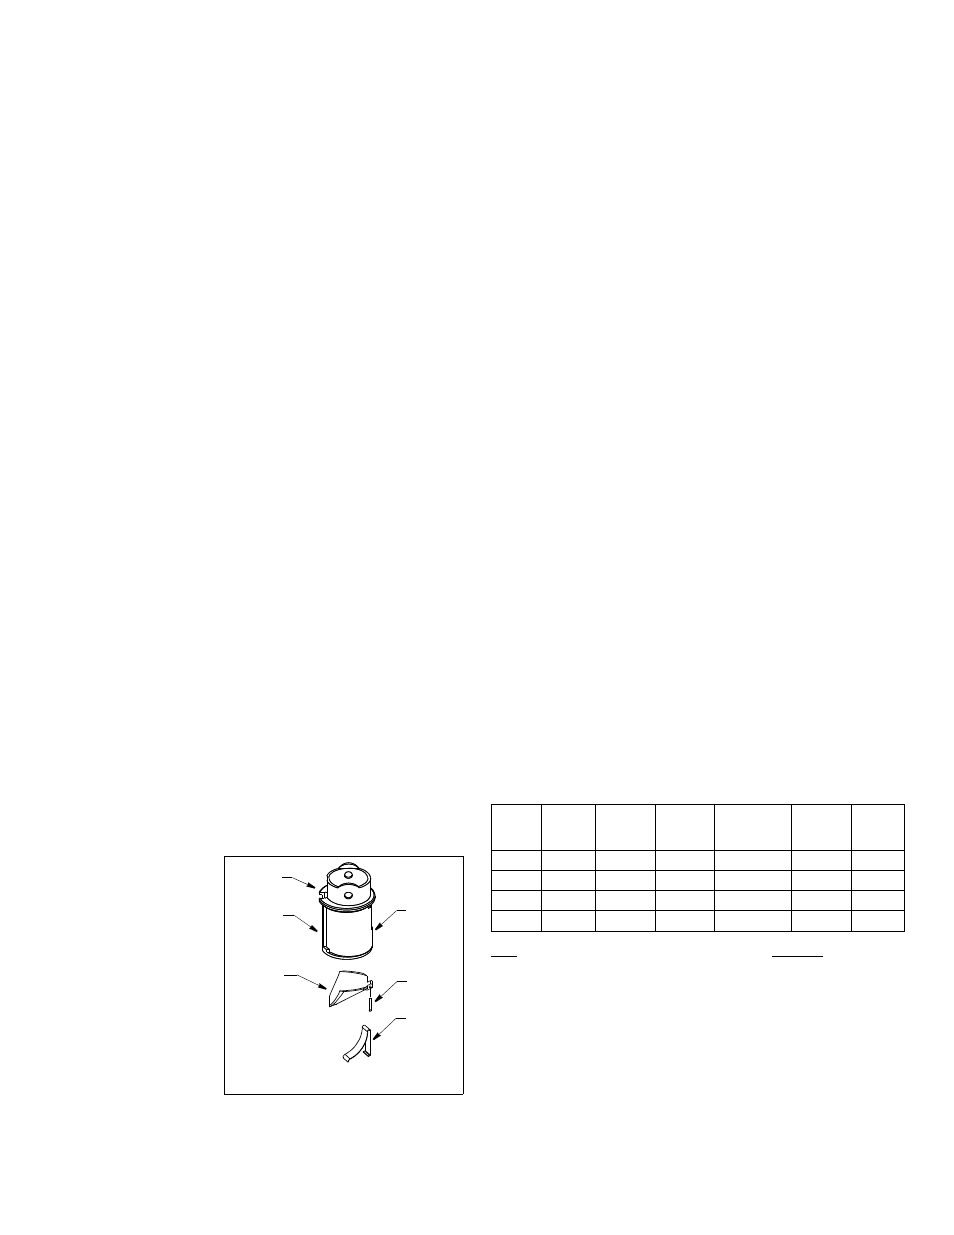
Figure 10. Valve assembly
sleeve
flap
spring
spring
cable
notch
channel
valve
pin
Copyright 2001 - 2011. All rights reserved.
AIRMAR
®
AIRMAR
®
TECHNOLOGY CORPORATION
35 Meadowbrook Drive, Milford, New Hampshire 03055-4613, USA
www.airmar.com