Assigning and naming ports, To assign and name ports – Ensemble Designs BrightEye NXT 410 Clean HDMI Router User Manual
Page 37
www.ensembledesigns.com
Page 37
BrightEye NXT 410/415/430 Compact Router Installation, Configuration and Operations Guide
Configuring the Router’s Ports from the
Web Interface
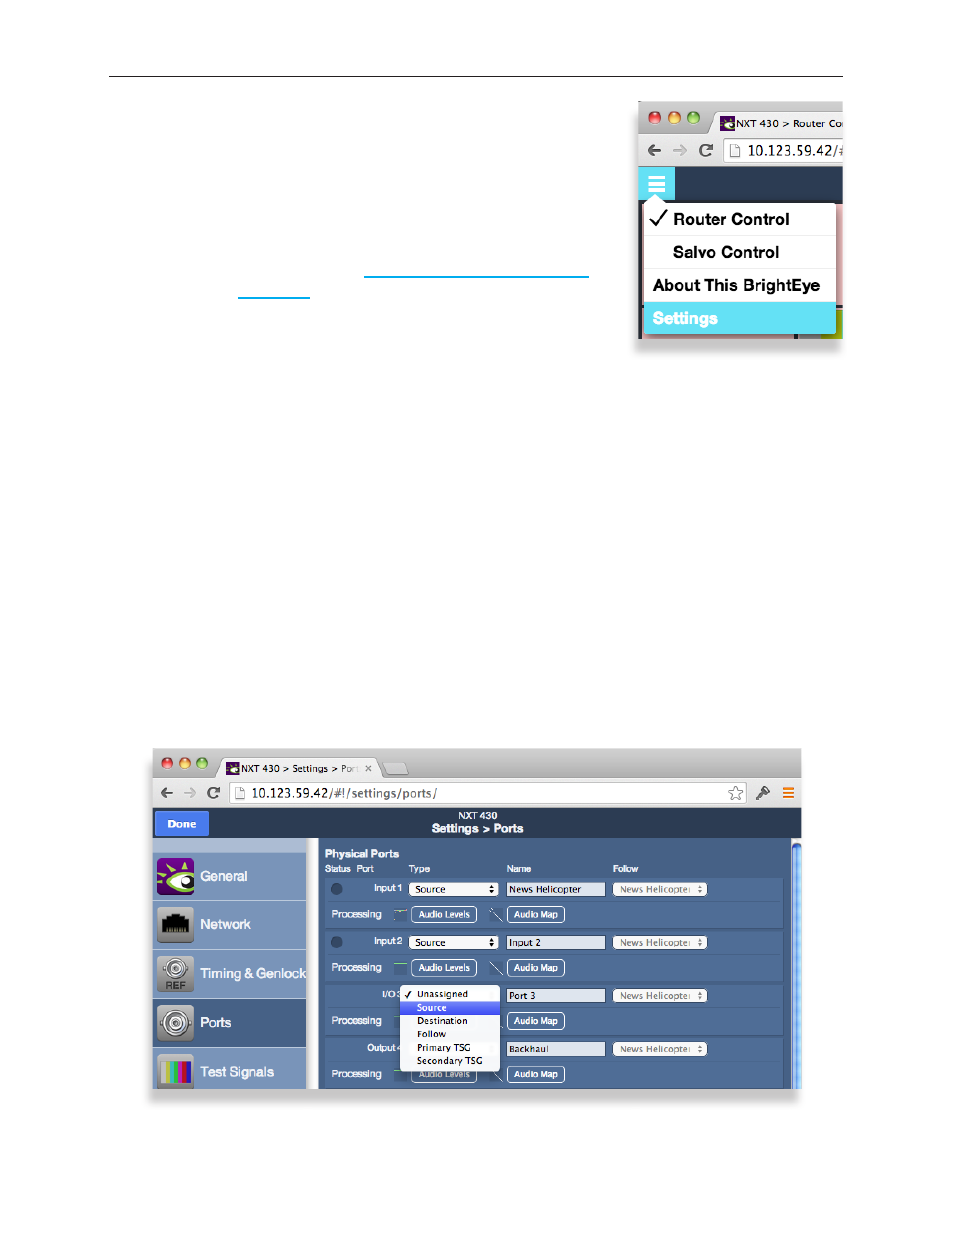
From the upper-left drop-down menu of the web interface, select
Settings. The Settings > General page displays.
Note:
If you have not previously established a web control
point, please see: Setting Up a Web Control Point
(Optional) on page 62.
Configuring Ports: Making a selection from the Type drop-down control for I/O Port 3
Assigning and Naming Ports
Assign each port that you need to use. Once you have assigned a port, it becomes available to include
in a Profile. It’s fine to leave ports unassigned if you don’t need to use them.
Giving ports descriptive names makes them easier to work with. Port names display in a number of
places: on the front panel LCD screen header and footer, on the front panel Port menus, on the video
thumbnails used in the web interface, on Profiles, and on the Ports configuration page of the web
interface.
To Assign and Name Ports
From the left navigation panel of the Settings > General page, select Ports. The Ports page displays.
Initially, all the non-dedicated ports show “Unassigned” for the Type drop-down control.
For each port that you plan to use, take the following steps:
1. Select its Type from the Type drop-down control.
2. Enter a port name in the Name field.