Installing vsd using the vsd installer – Grass Valley Jupiter v.1.1.0 User Manual
Page 79
JUPITER AccuSwitch Soft Panels and Visual Status Display Instruction Manual
69
Installing VSD Using the VSD Installer
Installing VSD Using the VSD Installer
The following instructions show the steps needed to install the Visual
Status Display (VSD) application. The PC, which the VSD application is
installed on, must have network settings that allow communication with
the Jupiter or Prelude network. Consult with your Network administrator
for this information.
Follow these steps to begin installing the VSD application:
1.
Insert the supplied software CDROM into the computer’s CD Drive
and follow the prompts.
Note
The CD should automatically start the installation process. If not, browse to
the CD, using Window Explorer, and then click the setup.exe icon.
•
If Microsoft .NET Framework was not installed earlier, you may see a
message asking if you want to install Microsoft .NET Framework. If so,
select “Yes.” The 3.5 version of .NET is located on the CD. Depending
on the OS version, the system may reboot automatically during this
process.
Note
After an auto reboot, it may take several minutes for the system to display the
VSD installation welcome screen.
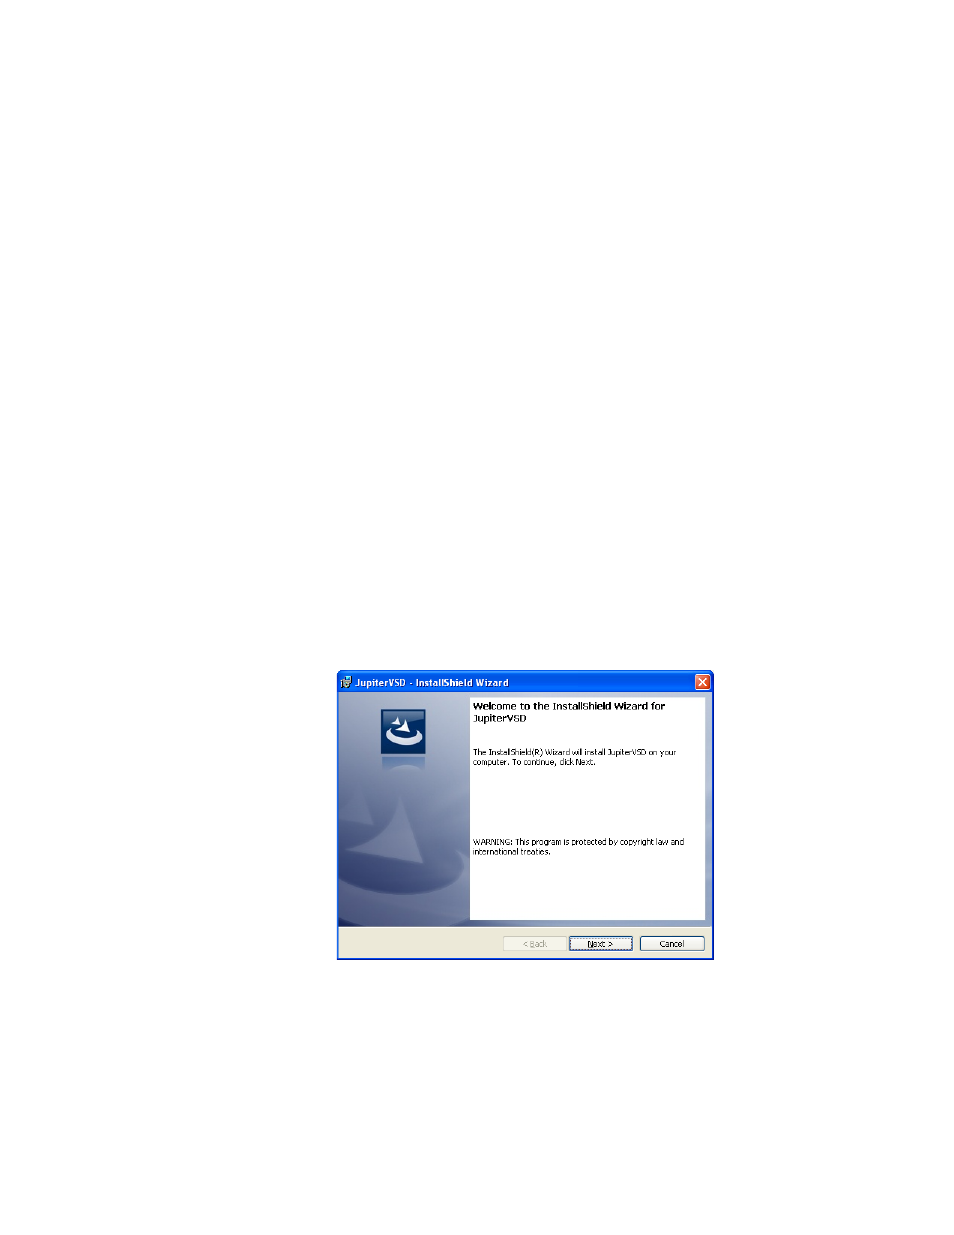
The Jupiter VSD Welcome screen will then appear (
Figure 74. Jupiter VSD Installer Welcome Screen
2.
Click the
Next>
button to begin the installation process. The License
Agreement screen will then appear (
).