The vertigo xg’s rear panel components, The vertigo xg’s rear panel components -4 – Grass Valley XG Vertigo Configuration Guide v.5.0 User Manual
Page 15
2-4
Vertigo XG Configuration Guide
Overview of the Vertigo XG’s Hardware
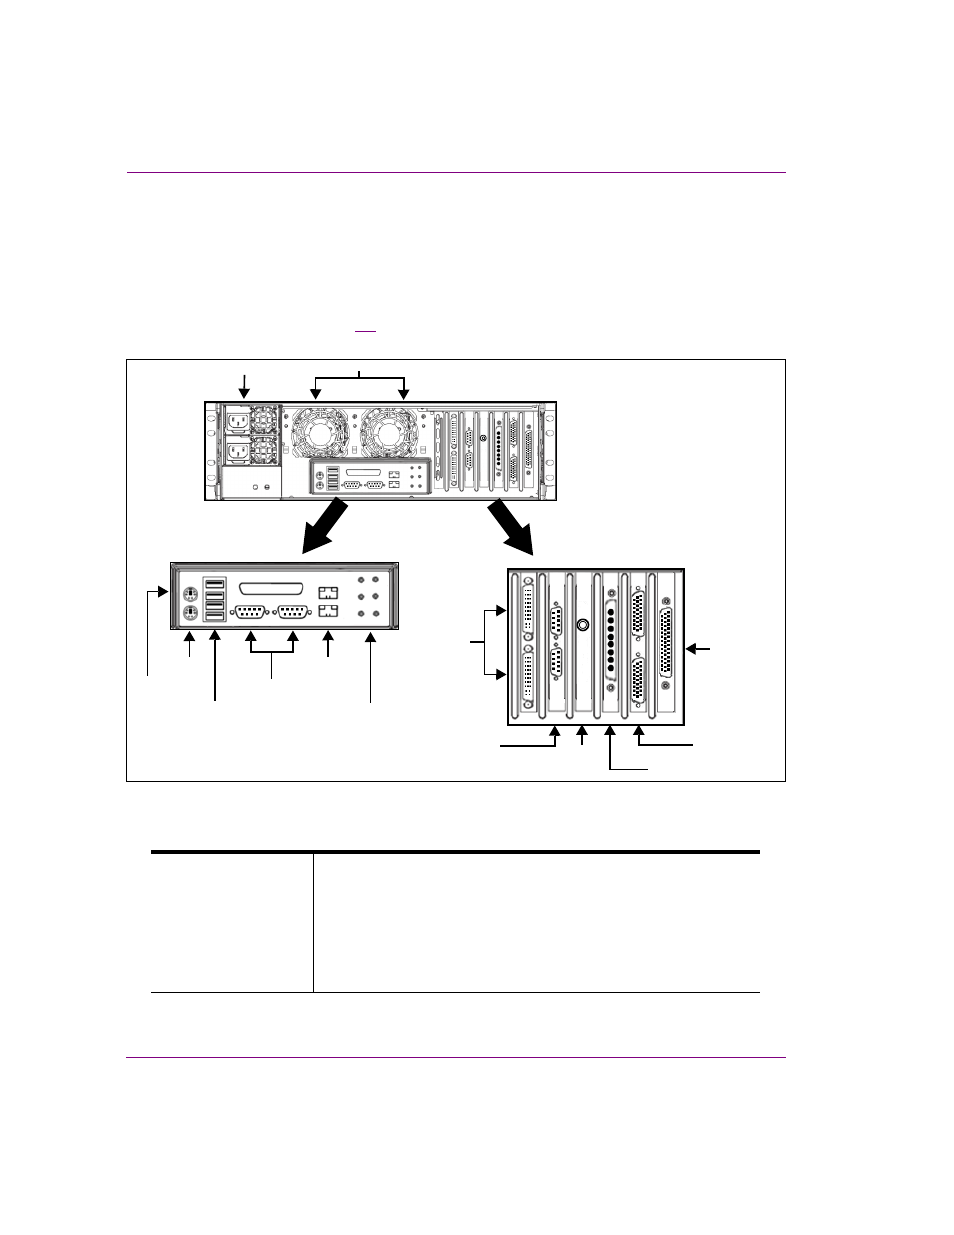
The Vertigo XG’s rear panel components
The Vertigo XG’s rear panel features convenient access to the video card’s I/O connector,
which provides 4 SD/HD SDI video outputs, a reference signal input, and AES audio
input/output. The rear panel also provides access to the graphics card connector, as well
as various I/O ports (RS-422, USB, Ethernet...etc.).
The table following the figure
2-2
describes the function of each connector on the rear panel
of the Vertigo XG chassis.
Figure 2-2. The Vertigo XG’s rear panel components
Mouse & Keyboard
connectors
The two (2) PS/2 connectors on the rear panel allow you to connect a
mouse and keyboard to the Vertigo XG device. These peripherals are
required during the device’s initial configuration, which involves using
the Vertigo XG’s desktop applications, including Dashboard.
Note that if the mouse or keyboard has a UBS connector, you can
connect them to the USB 2.0 connectors on the front or rear panels of
the Vertigo XG device.
Power Supply Modules (2)
RS-422 Connectors
USB 2.0
Network Ethernet
Connectors (2)
SDI Video Card
Connectors (4)
I/O Connector
Graphics Card
System Fans (2)
Serial
RS-232 Ports (2)
Mouse
Keyboard
Connectors (2)
(option)
Audio I/O Ports
(Disabled)
Discrete Audio
Connectors (2)
(option)
Connector
Connector
GPI Card Connector
(option)
Time Code
Card
LTC
IN
LTC
IN