Troubleshooting, Torque requirements, Changing valve action – Jordan Valve Mark 70 Series – Sliding Gate Control Valve User Manual
Page 5
Additionally, preload adjustments may be required after
one of the previous maintenance procedures.
Remove the air signal line from the actuator and
1.
replace with a pressure gauge and an air regulator.
Loosen, but do not remove, the stem connector bolt
2.
(19) and nut (20).
Adjust the actuator air pressure to just below the
3.
starting point of the range and rotate the actuator
stem (24) until the stem just starts to move. Continue
to rotate the actuator stem about one-half turn. Re-
move the air pressure. Increase the air pressure and
check the pressure at which the valve just starts to
move. Repeat actuator stem adjustment if necessary
and again check pressure at which the stem starts to
move.
After the preload has been properly adjusted,
4.
tighten the stem connector bolt (19) and nut (20)
and reattach the control air line.
Troubleshooting
Erratic Control
Oversizing causes cycling or hunting – recalculate
•
size required.
Steam traps downstream may need reconditioning.
•
Excessive foreign matter may be lodged in seats.
•
Valve stroke may be out of adjustment.
•
Valve disc may not be moving freely.
•
Will not operate
Diaphragm ruptured and needs replacement
•
Spring(s) broken and needs replacement
•
Improper spring setting (reset).
•
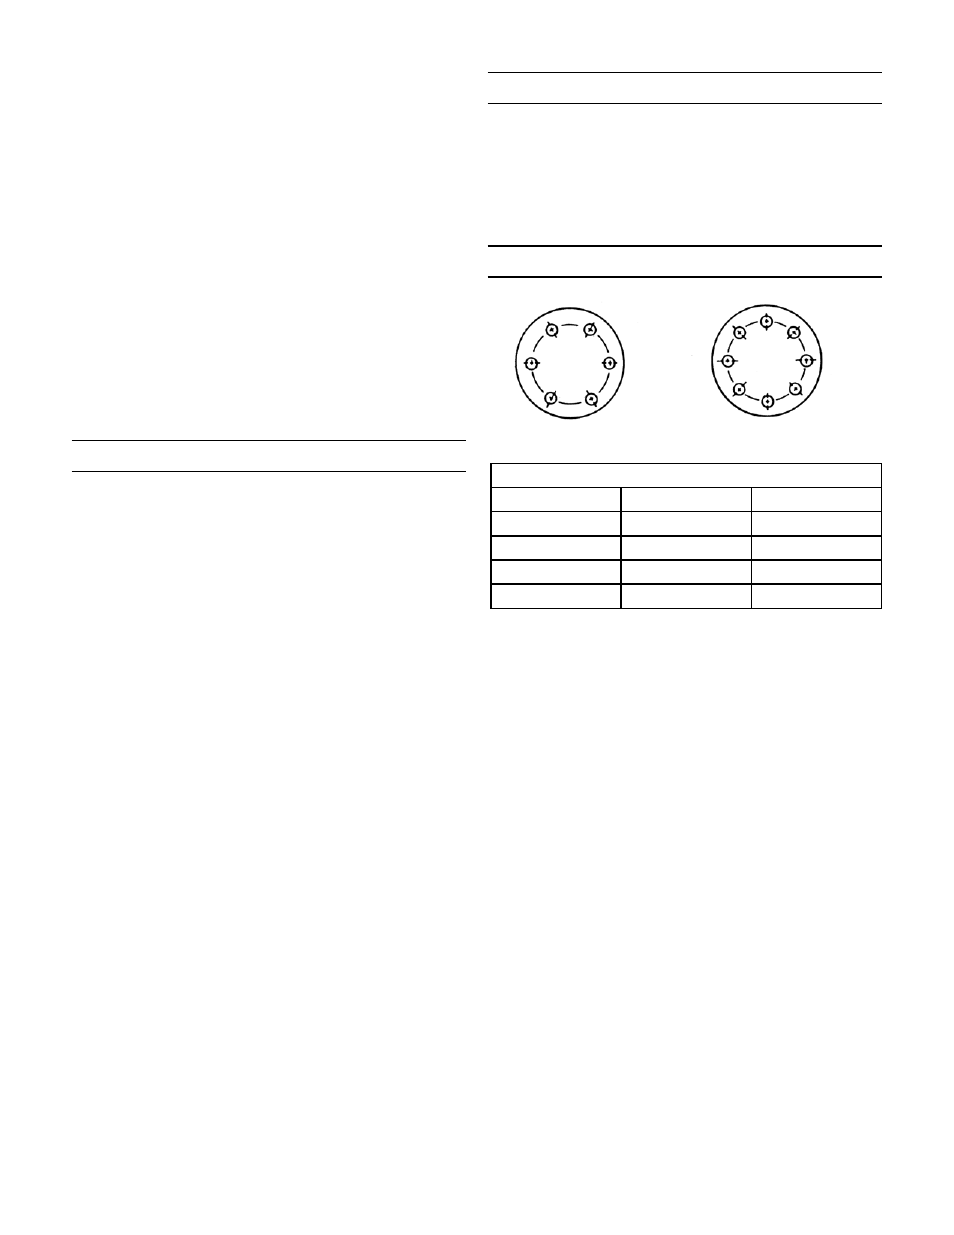
Torque Requirements
5
3
1
6
4
2
5
3
1
6 4
2
7
8
6 bolts (or multiples)
8 bolts (or multiples)
Torque for Bolts Connecting Cap to Body
Valve Size
CI, DI, BRZ
CS, SST
1/2” & 3/4”
110 in-lbs
200 in-lbs
1” & 1-1/4”
120 in-lbs
200 in-lbs
1-1/2” & 2”
140 in-lbs
200 in-lbs
2-1/2” & 6”
1080 in-lbs
1080 in-lbs
Changing Valve Action
The action of a sliding gate valve can be changed from
direct to reverse, or vice-versa, by rotating the disc, plate
and cap 180°. Check valve stroke and orifice alignment
and readjust, if required, as shown under Valve Stroke
Adjustment.
-5-