Remote control – Curtis RCD725 User Manual
Page 6
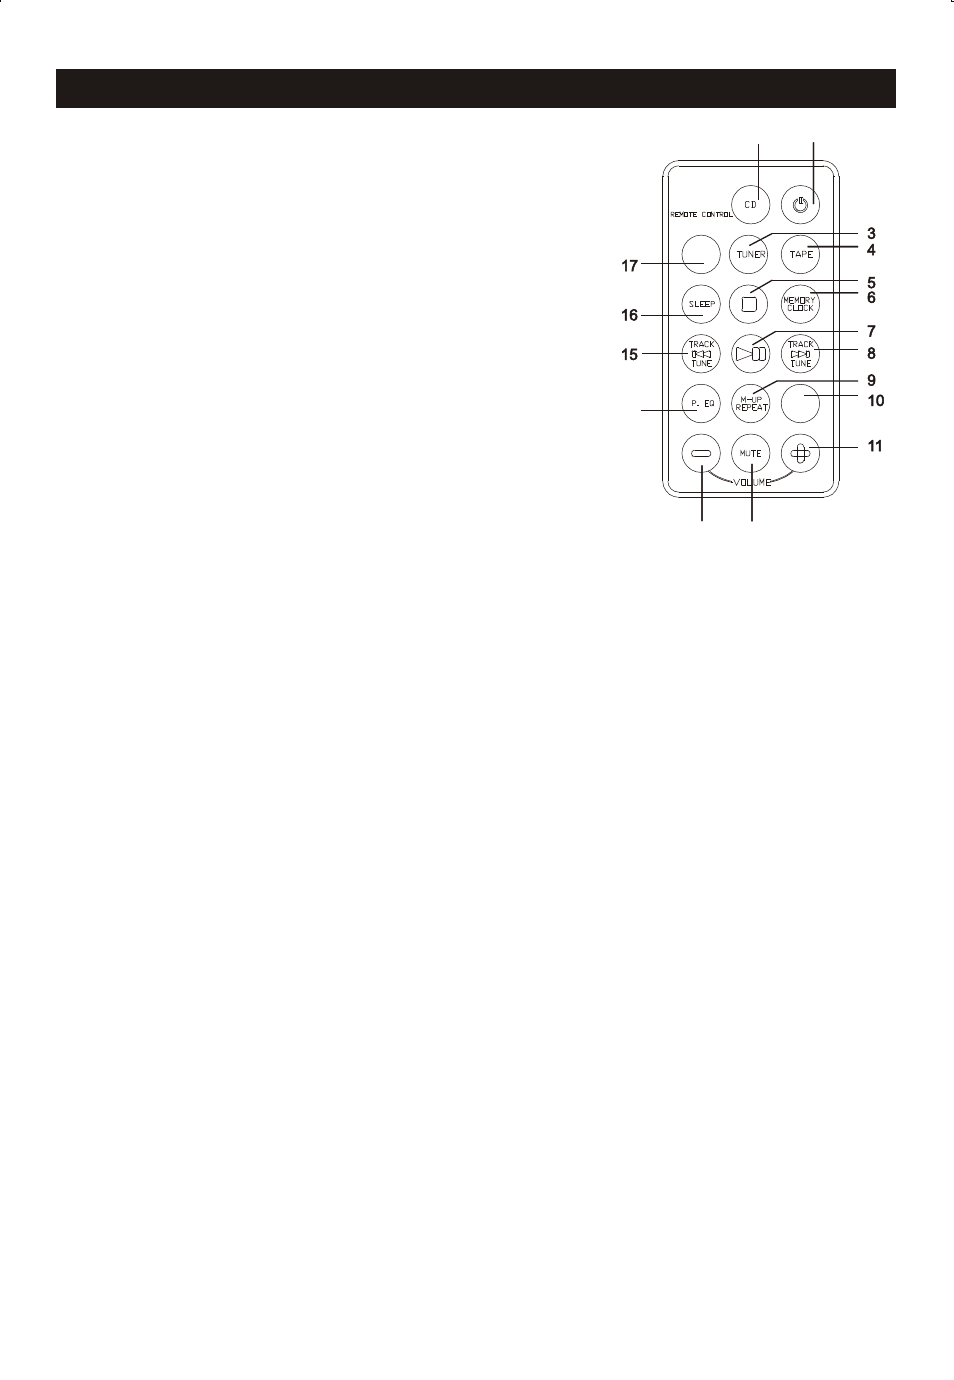
REMOTE CONTROL
1
1
2
2
13
13
14
14
12
12
INSTALLATION BATTERY
The remote control use 1 power source, CELL BATTERY (CR 2025, 3V).
Simply pull out the insulation tag in the battery compartment. The remote control is now
functional.
Be sure to observe the polarity makings which are engraved inside the battery
compartment, then close the cover.
BATTERY REPLACEMENT
When the batteries become too weak, the operating distance of the remote controller is
greatly reduced and you will need to replace the batteries.
Open the battery compartment cover, use a screwdriver or other tool to push out the
battery (follow the exit direction in pushing out). Push in the new battery in the opposite
direction (the +polarity is faced up.) Put the cover back and secure.
Note:
To maintain the accuracy and long life of the transmitter, do not press two or more
buttons simultaneously.
If the remote control is not used for a long time, remove the batteries to prevent possible
damage through leaking batteries.
Do not mix different types of batteries, or old batteries with new ones.
USING THE REMOTE CONTROLLER CORRECTLY
Point the remote controller at the Remote Sensor.
The functions of the buttons on the remote control are the same as the corresponding
controls on the main unit.
When there is a strong ambient light source, the performance of the infrared Remote
Sensor may be degraded, causing unreliable operation.
The maximum effective distance for remote control operation is about 15 feet.
Volume+ Button
Mute Button
Volume- Button
Preset EQ Button
Track/Tune REW Button
Sleep Button
10
11
12
13
14
15
16
17
4
CD Button
Standby/On Button
Tuner Button
Tape Button
Memory/Clock Button
Play/Pause Button
Track/Tune Forward Button
Stop Button
1
2
3
4
5
6
7
8
9 M-Up/Repeat Button
TIMER
MODE/
REMAIN
Mode/Remain
Timer Button