Saw chain tension adjustment, To adjust saw chain – Powerplus POW64115 CHAINSAW 37.2CC 406MM EN User Manual
Page 9
POW64115
EN
Copyright © 2011 VARO
P a g e
| 9
www.varo.com
Note: the saw chain may droop slightly on the lower part of bar. This is
normal.
Pull guide bar forward until chain is snug. Ensure all drive links are in the bar groove.
Install the clutch cover making sure the tang is positioned in the lower hole in the guide bar.
Make sure the chain does not slip off of the bar. Install the bar retaining nut hand tight and
follow tension adjustment instructions in section saw chain tension adjustment.
Note: the guide bar retaining nuts are installed only hand tight at this point
because saw chain adjustment is required. Follow instructions in section
saw chain tension adjustment.
7.3.3
Saw chain tension adjustment
Proper tension of saw chain is extremely important and must be checked before starting, as
well as during any cutting operation.
Taking the time to make needed adjustments to the saw chain will result in improved cutting
performance and prolonged chain life.
Warning: always wear heavy duty gloves when handling saw chain or
making saw chain adjustments.
7.3.4
To adjust saw chain:
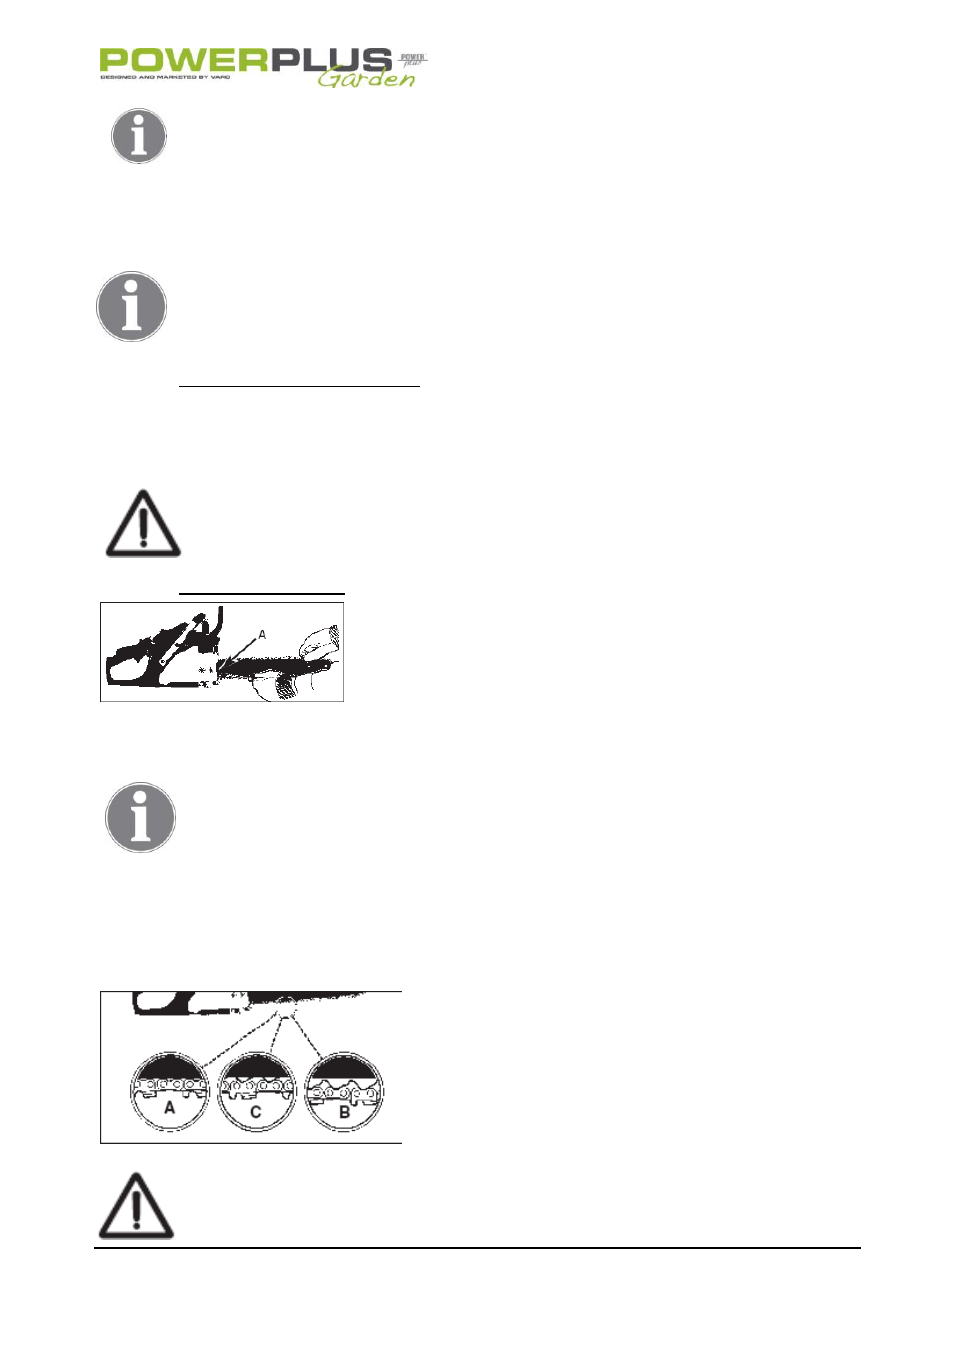
fig 5
Hold nose of guide bar up and turn adjustment
screw (16) clockwise to increase chain tension.
Turning screw counterclockwise will decrease
amount of tension on chain. Ensure the chain fits
snugly all the way around the guide bar. (fig 5)
After making adjustment, and while still holding nose of bar in the uppermost position,
tighten the bar retaining nuts securely. Chain has proper tension when it has a snug fit all
around and can be pulled around by gloved hand.
Note: if chain is difficult to rotate on guide bar or if it binds, too much
tension has been applied. This requires minor adjustment as follows:
Loosen the bar retaining nuts so they are finger tight. Decrease tension by turning the bar
adjustment screw counterclockwise slowly. Move chain back and forth on bar. Continue to
adjust until chain rotates freely, but fits snugly. Increase tension by turning bar adjustment
screw clockwise.
When saw chain has proper tension, hold nose of bar in the uppermost position and tighten
the 2 bar retaining nuts securely.
fig 6
Caution: a new saw chain stretches, requiring adjustment after as few as 5
cuts. This is normal with a new chain, and the interval between future
adjustments will lengthen quickly.