Launching, Before launching, Larks head knot – Crivit Sports Stunt Kite User Manual
Page 30
30
GB
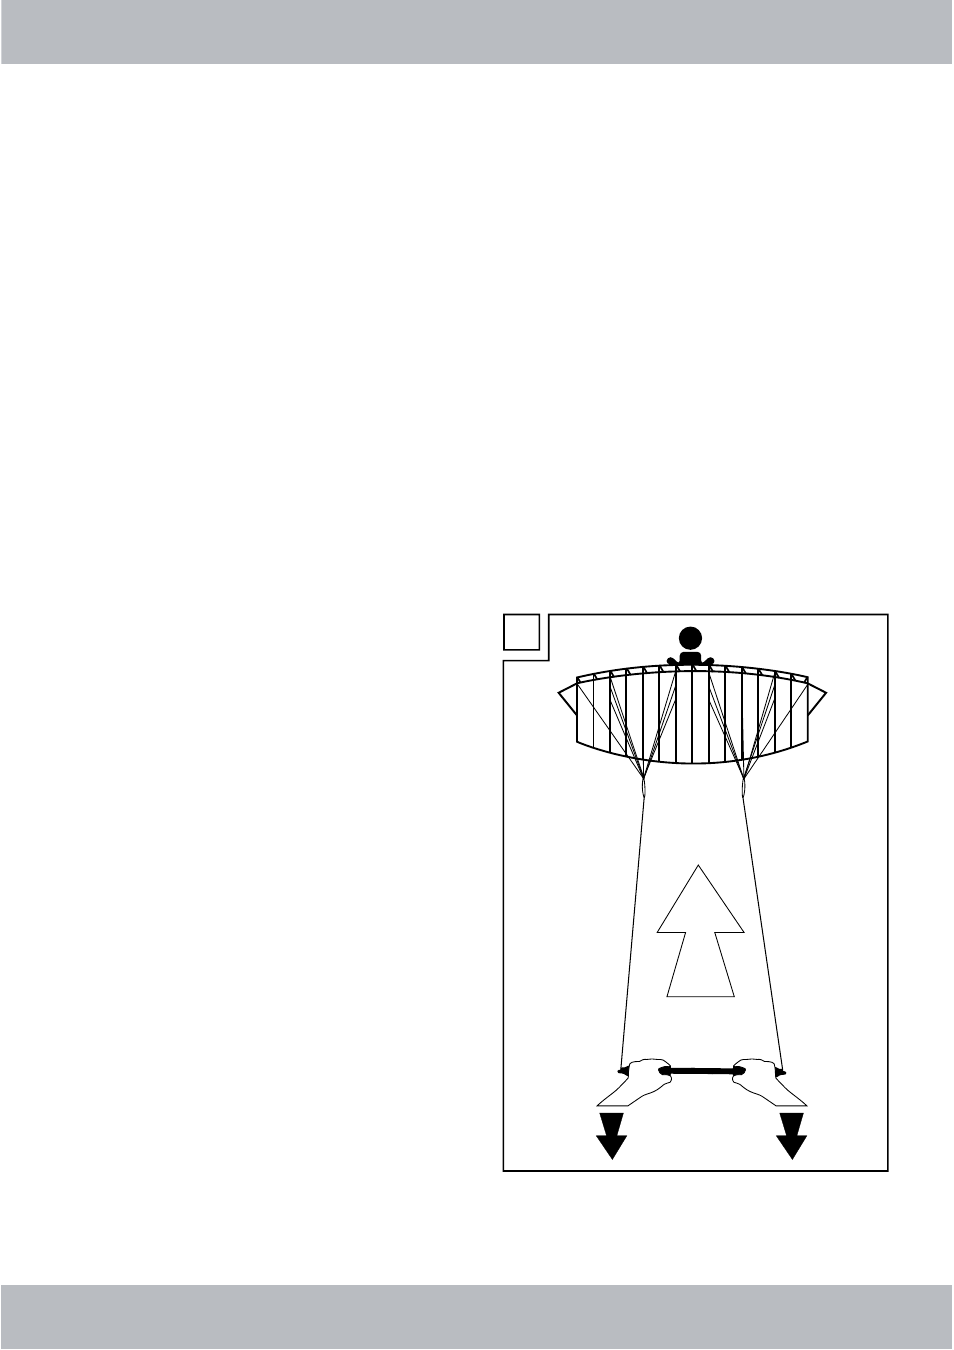
Launching
ATTENTION! Always verify the suitabili-
ty of the field (see safety notices, page
28-29), determine the wind direction
and force (using e.g. special wind
gauges – not included – available at
speciality retailers). Also note the de-
scription of wind forces page 32.
Ideally, have an assistant hold the parafoil kite
with the bottom facing the wind. The air cell
openings should be facing upward (fig. G).
Now step backwards against the wind until the
flying line is taut. Your assistant should still be
holding on to the kite. Once you give the com-
mand your assistant will release the parafoil kite.
Do not toss the parafoil kite into the air!
In sufficient wind you will only need to firmly jerk
the flying line now, and perhaps another step
backwards. Pay attention to other
persons or obstacles.
G
wind
Before Launching
Securing the flying line to the
handle (see assembly overview)
Remove the handle (7) from the storage pouch.
Completely unwind both flying lines (4) from the
handle. Now secure one flying line to the right
strap on the handle (5) and the other flying line
to the left strap of the handle. Secure using the
larks head knot (description larks head knot).
Securing the flying line to the para-
foil kite (see assembly overview)
The parafoil kite must be completely unfolded.
First remove the binding point of the flying line
(3) from the transport safety loop (9) on the
trailing edge (1). Now attach one flying line to
each binding point. Secure using the larks head
knot (description larks head knot).
Attention!
Before storing the parafoil kite after use, reattach
the binding point of the flying line to the trans-
port strap to avoid twisting.
Larks head knot
Place your thumb and index finger inside the
knot of the flying line, see fig. B.
Take the loop behind and under, see fig. C.
Push the side ends down, see fig. D.
Securing the flying line to the handle/parafoil
kite: Now place the line to be connected (flying
line binding point or handle strap), see fig. E.
Slide the larks head knot down to tighten,
see fig. F.