Compressor troubleshooting, Fault cause remedy – Sealey SA0615KIT User Manual
Page 4
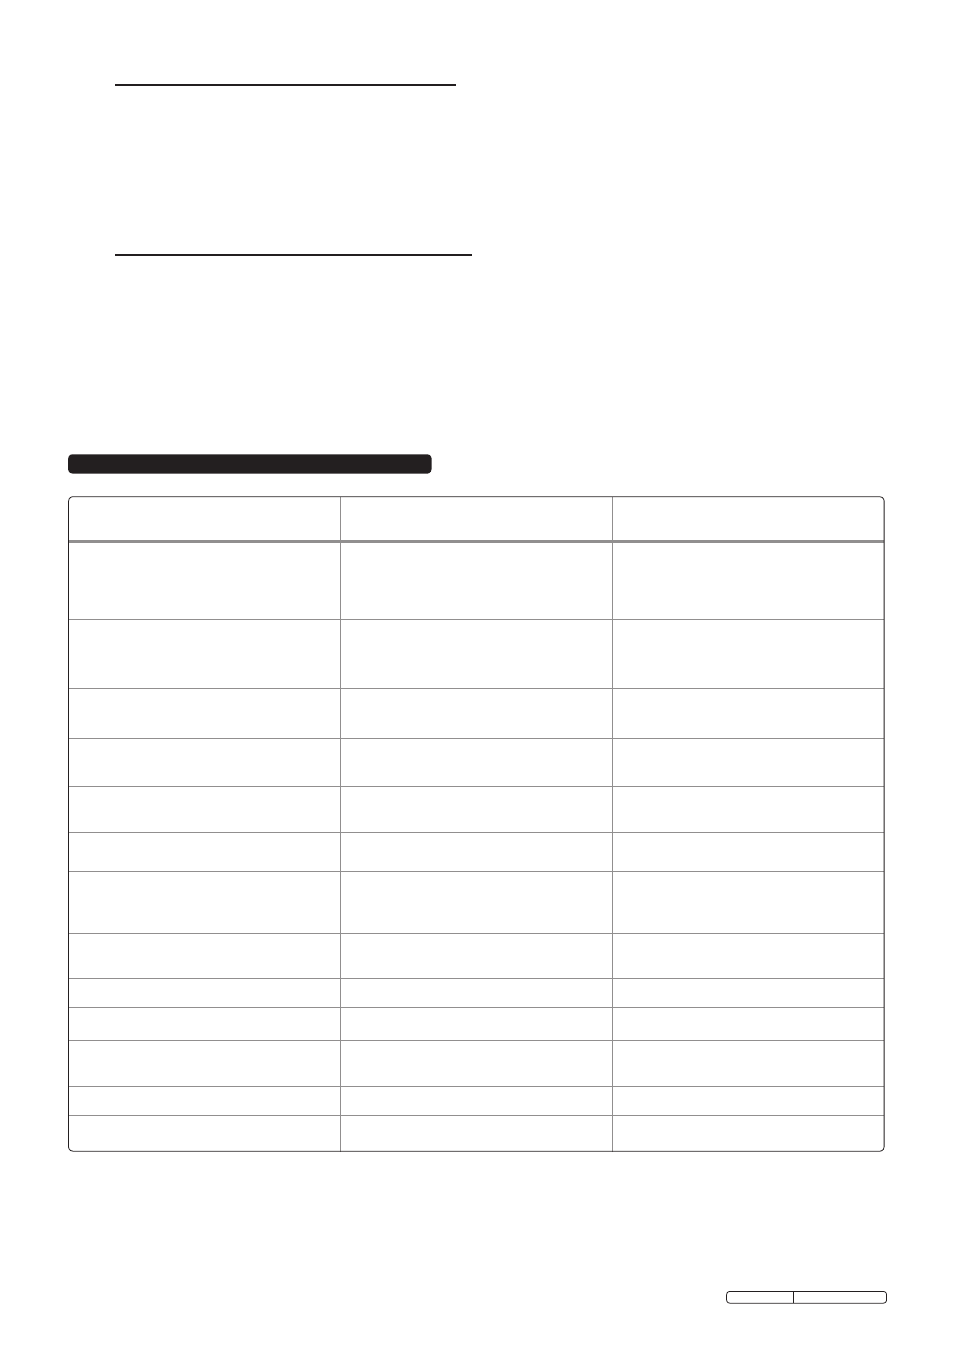
6. compRessoR tRouBleshootIng
Original Language Version
sa0615KIt Issue: 2- 20/02/12
FAult
cAuse
RemeDY
1a) Pressure drop in the tank.
air leaks at connections.
run compressor to max. pressure, switch off.
Brush soap solution over connections and look for
bubbles. tighten connections showing leaks.
If problem persists contact authorised service agent.
1B)
Pressure drop in the tank.
air leaks from safety valve.
operate the safety valve manually. If valve
continues to leak when in the closed position it
should be replaced.
1c) Pressure drop in the tank.
air leaks from cylinder head gasket.
check tightness of head bolts. If leak continues
contact authorised service agent.
2) Pressure switch valve leaks when
compressor is idle.
non-return valve seal defective.
empty the air tank, remove the non-return valve
cap and clean, or if necessary, replace the seal.
3) air leaks from tank body or tank welds.
Internal corrosion caused by infrequent tank
draining or non permitted modifications to tank.
tank could rupture or explode. cannot be repaired.
DIscontInue use ImmeDIAtelY.
4a) motor stops and will not restart.
thermal cut out has operated.
allow to cool for 10 to 15 minutes before restarting.
4B) motor stops and will not restart.
Plug fuse has burnt out.
replace fuse and restart unit. If repeat
occurs, contact authorised service agent.
5) compressor stops and does not restart.
motor failure.
contact authorised service agent..
6a) compressor does not stop at max. pressure.
Pressure switch fault..
contact authorised service agent.
6B) compressor does not stop at max. pressure.
filter clogged
clean or replace filter element.
6c) compressor does not stop at max. pressure.
Head gasket or valve fault.
contact authorised service agent.
7) compressor noisy with metallic knock.
Bearing or piston damage.
contact authorised service agent.
8) excessive moisture in discharged air.
High humidity environment.
drain tank after each use.
5.4. to Be cARRIeD out AFteR eVeRY 100 houRs oF use:
a) check that the automatic cut-out at maximum pressure, and the automatic cut-in at 2bar below that, are operating correctly.
b) replace the lubricating oil. for oil specifications see below.
remove the oil drain plug (fig.2), draining the oil into a suitable container. drain when the compressor is hot so that oil drains
rapidly and completely. Incline compressor if needed to ensure complete drainage. replace the oil drain plug and pour oil through
the filler/dipstick aperture. check oil level with dipstick (fig.3) and
Do not overfill.
Recommended oil: the pump is filled with synthetic oil at the factory, if topping up or changing oil use a synthetic oil of sae
5W50 viscosity. alternatively a mineral oil can be substituted when carrying out an oil change, after ensuring that the synthetic oil has
been thoroughly drained first. use a mineral oil of sae 15W40 viscosity.
WARnIng! Do not mix different oils and do not use non-detergent/low quality oils, as the compressor may be damaged.
Dispose of all waste oil responsibly, in accordance with local authority requirements.
5.5.
to Be cARRIeD out AFteR eVeRY 500 houRs oF use:
a) replace air filter.
b) check all tube fittings and electrical connections.
c) check all screws, nuts and bolts are tightly in place.
d) Inspect pressure tank inside and out for damage or corrosion.
ImpoRtAnt! Failure to carry out maintenance tasks may invalidate the warranty on your compressor.
5.6.
ImpoRtAnt WARnIng -
Air contaminants taken into the compressor will affect optimum performance. Example: Body filler dust or paint overspray will clog the
pump intake filter and may cause internal damage to pump/motor components. Please note that any parts damaged by any type of
contamination will not be covered by warranty.