Fig.12 – Sealey TBB300 User Manual
Page 3
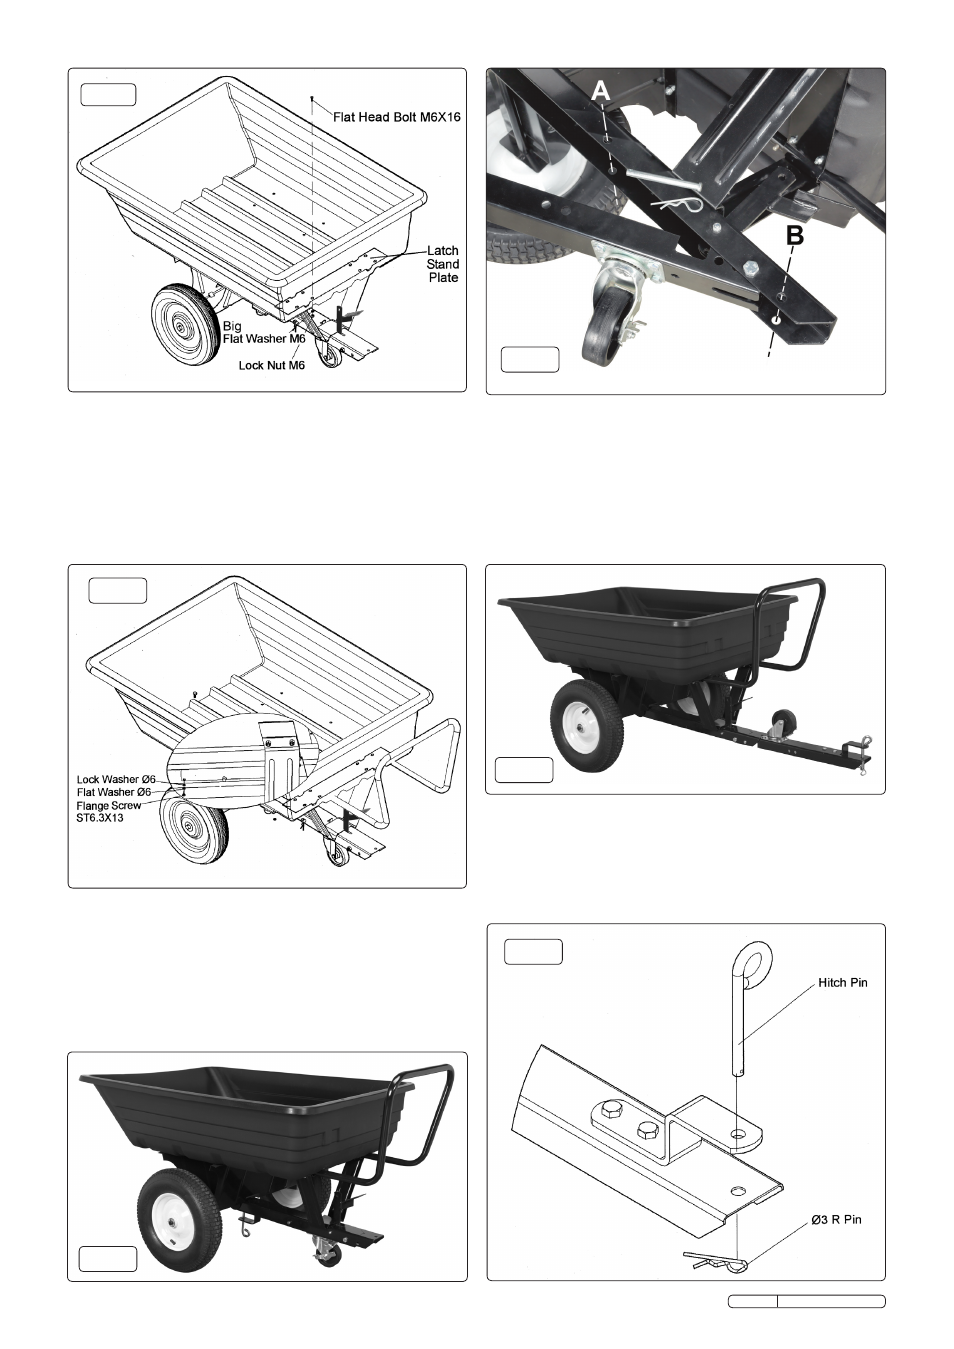
fig.9
fig.10
fig.11
fig.14
fig.13
4.3.3 Insert four M6x16 flat headed bolts down through the tray and
the inside holes in the latch stand plate. Secure the bolts with
four Ø6 flat washers and M6 nuts as shown in fig.9 but do not
yet fully tighten.
4.3.4 When all tray fixings are in place, fully tighten them.
4.4.3 Assemble the hitch pin through the tongue and hitch bracket
and secure it with a Ø3 'R' pin. See fig.14
4.4.2 To convert the handcart as seen in fig.11 to a trailer as seen in
fig.13, tip the cart back to rest on the back edge of the tray to
gain access to the front and back tongues. Remove the 'R' clip
from the clevis pin at position 'A' and withdraw it. See fig.12.
Allow the front tongue to hinge away from the back tongue and
move it through 180º until it is pointing forwards as seen in
fig13. Align the holes in the two tongue components and
reinsert the clevis pin at position 'B'. Retain the Clevis pin by
inserting the 'R' pin through the hole in the end of it.
4.4 Slide the handle into the channels in the latch stand plate.
Push the handle in all the way against the front of the tray by
depressing the detent buttons in the bottom of the handle as
shown in fig.10.
4.4.1 Assemble an Ø6 lock washer and then Ø6 flat washer onto
each of the two Self Tapping 6.3x13 flange screws. Screw a
screw into the hole at each end of the handle as shown in fig.10
fig.12
TBB300 Issue No.1 04/11/11
Original Language Version