Fig.1, Fig.3, Fig.2 – Sealey PWM2500 User Manual
Page 2: Assembly / pre-operation
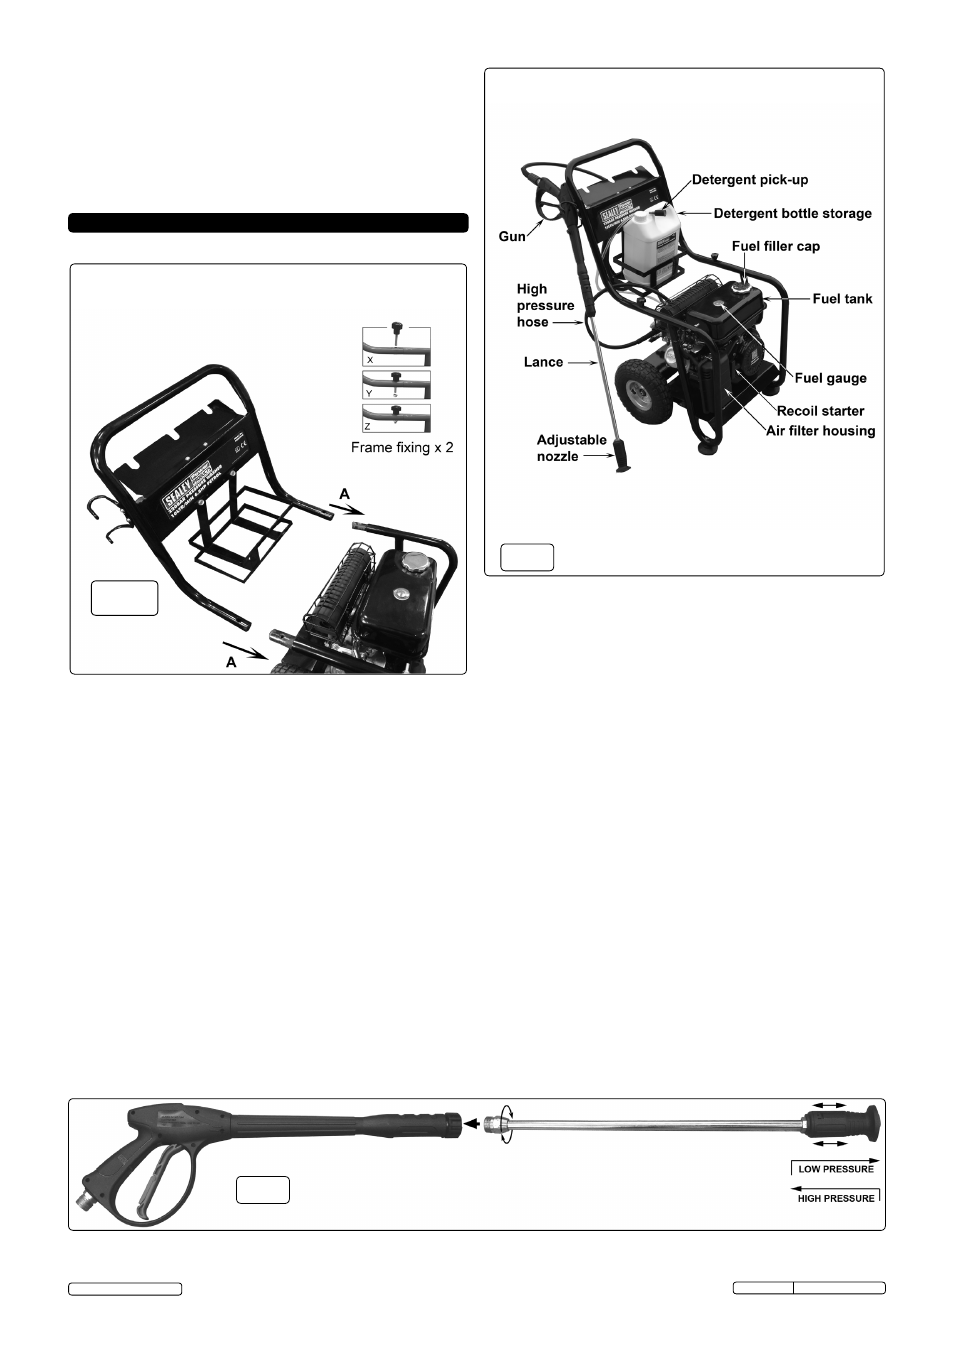
3. ASSEMbLY / PRE-OPERATION
Unpack contents and check to ensure all parts are in good
condition. If you experience any problems contact your
dealer immediately.
3.1. ASSEMbLY.
3.1.1. Attach the upper frame to the lower frame by pushing it onto the
spigots protruding from the lower frame as indicated at ‘A’ in fig.1
above. ensure that the holes in the ends of the upper frame align
with the holes in the spigots. Secure the two parts of the frame
together by screwing a frame fixing through each joint as indicated in
the inset pictures (fig.1X&Y). Tighten both fixings by hand using the
black knobs. lock each fixing using a nyloc nut applied to the thread
protruding from the underside of each joint. (fig.1Z)
3.1.2. Slide each wheel onto the axle stubs and retain with a washer and
13mm nut.
3.1.3. Screw together the two halves of the lance as shown in fig.3.
3.1.4. Attach the high pressure hose to the water inlet on the gun
handle as shown in fig.4A and B.
3.1.5. Attach the other end of the high pressure hose to the pump
outlet as shown in fig.5.
3.1.6. Connect the mains water supply hose to the pump inlet as
shown in fig.5. USe COld WATeR ONlY.
fig.3
Introduction:
Petrol powered pressure washer with recoil starting. Ideal for
commercial applications with 5mtr pressure hose, 1mtr gun and lance
and adjustable nozzle. low-pressure liquid detergent injection system
with provision for detergent bottle stowage. Safety latch on trigger and
automatic low-oil engine shutdown reduce risks of misuse and
equipment damage. Unit stands on four legs, two with sucker feet to
prevent creep, and tilts back onto two pneumatic tyred wheels for
moving. Supplied with tools and full Instructions.
fig.2
Note: The water supply hose must be reinforced and have an
internal diameter of 13mm (1/2”). The minimum water
supply rate must be at least equal to the washer flow rate.
3.2. DETERGENT DELIVERY.
3.2.1. Remove the cap from a bottle of detergent and place the bottle
into the stowage frame as shown in fig.2.
3.2.2. On the top of the pump outlet is a brass siphon injection fitting.
Push the detergent input pipe onto the fitting (fig.5) and place the
filter on the other end into the container of detergent. When
the nozzle on the lance is set to low pressure, detergent will be
drawn from the container by siphonic action and will mix
automatically with the water from the pump. Use Sealey General
Purpose detergent,
AK130 (25ltr) or AK131 (5ltr). Traffic Film
Remover is also available,
AK132 (25ltr) or AK133 (5ltr).
3.3. NOZZLE CONTROL.
3.3.1. PReSSURe. To change from high pressure to low pressure the
whole nozzle moves backwards and forwards by about 8mm on
the end of the lance. Pull the nozzle back towards the handle
for high pressure and push it away from the handle for low
pressure (see fig.3).
3.3.2. SPRAY PATTeRN. To change the spray pattern from a pencil
jet to a fan jet rotate the nozzle as shown in fig.6.
3.4. ENGINE LUbRICATION.
3.4.1. The pressure washer engine is shipped from the factory without
oil. do not attempt to start the engine before the sump has
been filled with the correct amount of oil. Refer to the section 7.2.
3.5. FUEL.
3.5.1. Fill the petrol tank with fresh unleaded petrol. Keep fuel level
on or below the fuel level indicator in the fuel filter which sits in
the neck of the tank.
Original Language Version
PWM2500 Issue: 1 - 08/05/13
© Jack Sealey limited
fig.1