Oil dispensing system air operated, Fig.9, Maintenance fig.8 – Sealey AK4561D User Manual
Page 4
NOTE: It is our policy to continually improve products and as such we reserve the right to alter data, specifications and component parts without prior notice.
IMPORTANT: no liability is accepted for incorrect use of product.
WARRANTY: Guarantee is 12 months from purchase date, proof of which will be required for any claim.
INFORMATION: call us for a copy of our latest catalogue on 01284 757525 and leave your full name and address including your postcode.
01284 757500
www.sealey.co.uk
01284 703534
Sole U.K. Distributor
sealey Group
Bury St. Edmunds
Suffolk.
Web
6. DeClARATION OF CONFORmITy
Declaration of Conformity
We, the sole importer into the UK, declare that the product listed below is in conformity with the following
standards and directives
The construction file for this product is held by the Manufacturer and may be inspected on
request by contacting Jack Sealey Ltd.
For Jack Sealey Ltd. Sole importer into the UK of Sealey Power Products.
Oil Dispensing System
Air Operated
Model: AK4561D
2002/95/Ec RoHS Directive
2002/96/EEc WEEE Directive
14th november 2008
Signed by Steve Buckle
AK4561D
Issue no: 1 - 14/11/08
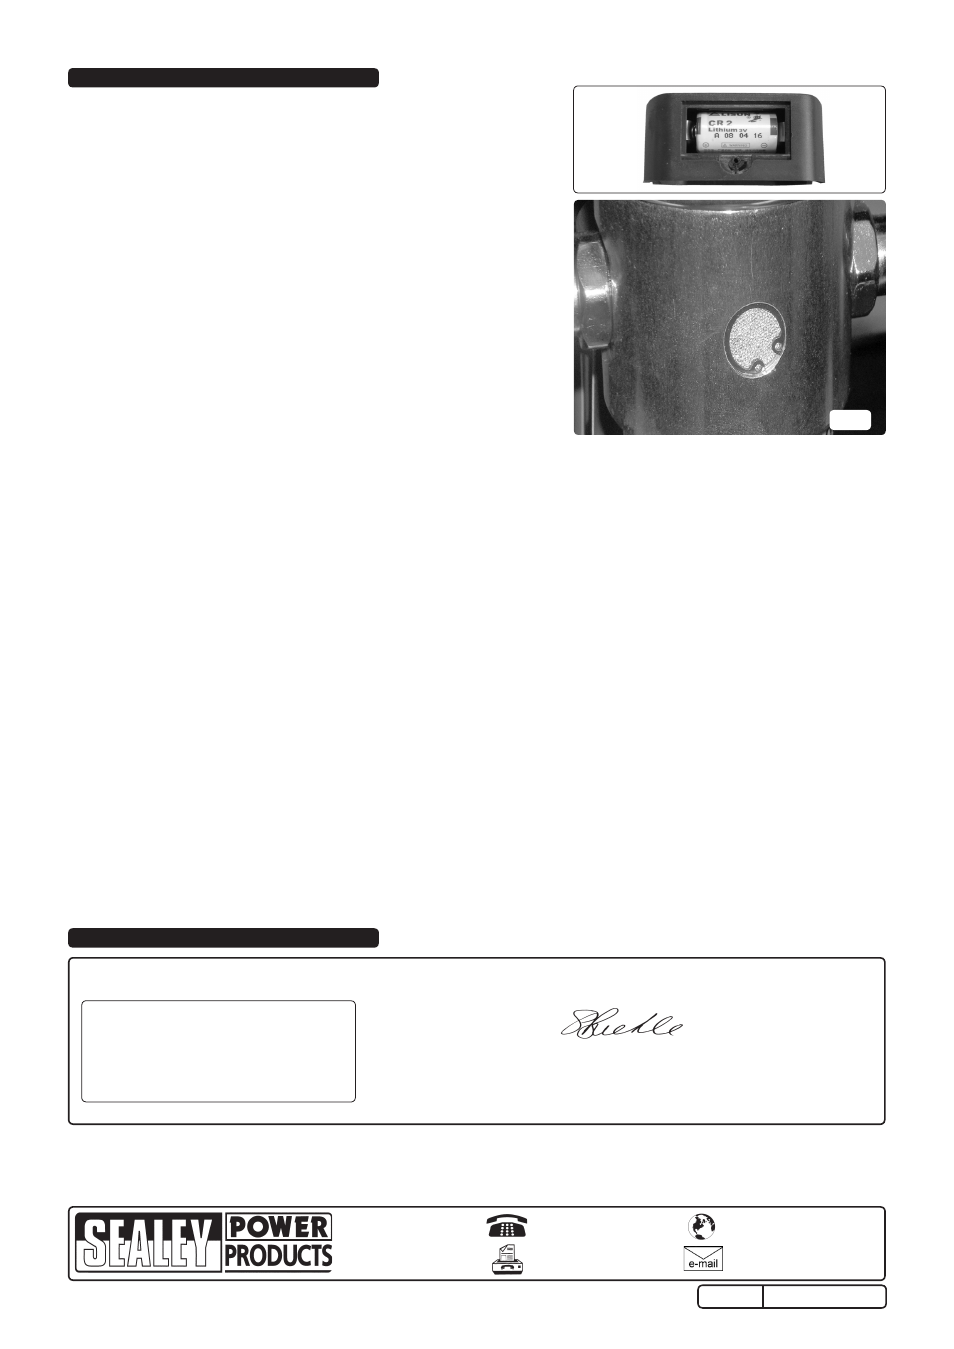
fig.9
5.1
Changing the Digital Meter Battery
5.1.1 Remove the rubber protective cover from the meter.
5.1.2 Remove the screw and cover from the side of the meter.
5.1.3 Remove and replace battery (fig.8).
5.1.4 Replace cover and secure with screw.
5.1.5 Replace the protective rubber cover.
Note: If the LcD display does not activate, remove the meter as in section 4.3.1,
press button 1 (fig.7.1) to reboot the meter.
5.2
Before every use visually check the supply hose for damage and check
all joints for leaks, any damaged component must be replaced or leaks
repaired before using.
5.3
check the nozzle valve for leaks, if it does not seal, replace before using.
5.4
Drain air regulator water trap daily.
5.5
Top up lubricator as required, using a quality air tool oil.
5.6
To change the silencer, remove the circlip (fig.9) and remove the old
silencer, place a new silencer into the recess and refit the circlip.
Note: For any other maintenance and repairs the unit should be returned to your
Sealey dealer.
5. mAINTeNANCe
fig.8