Sealey SC02 User Manual
Page 3
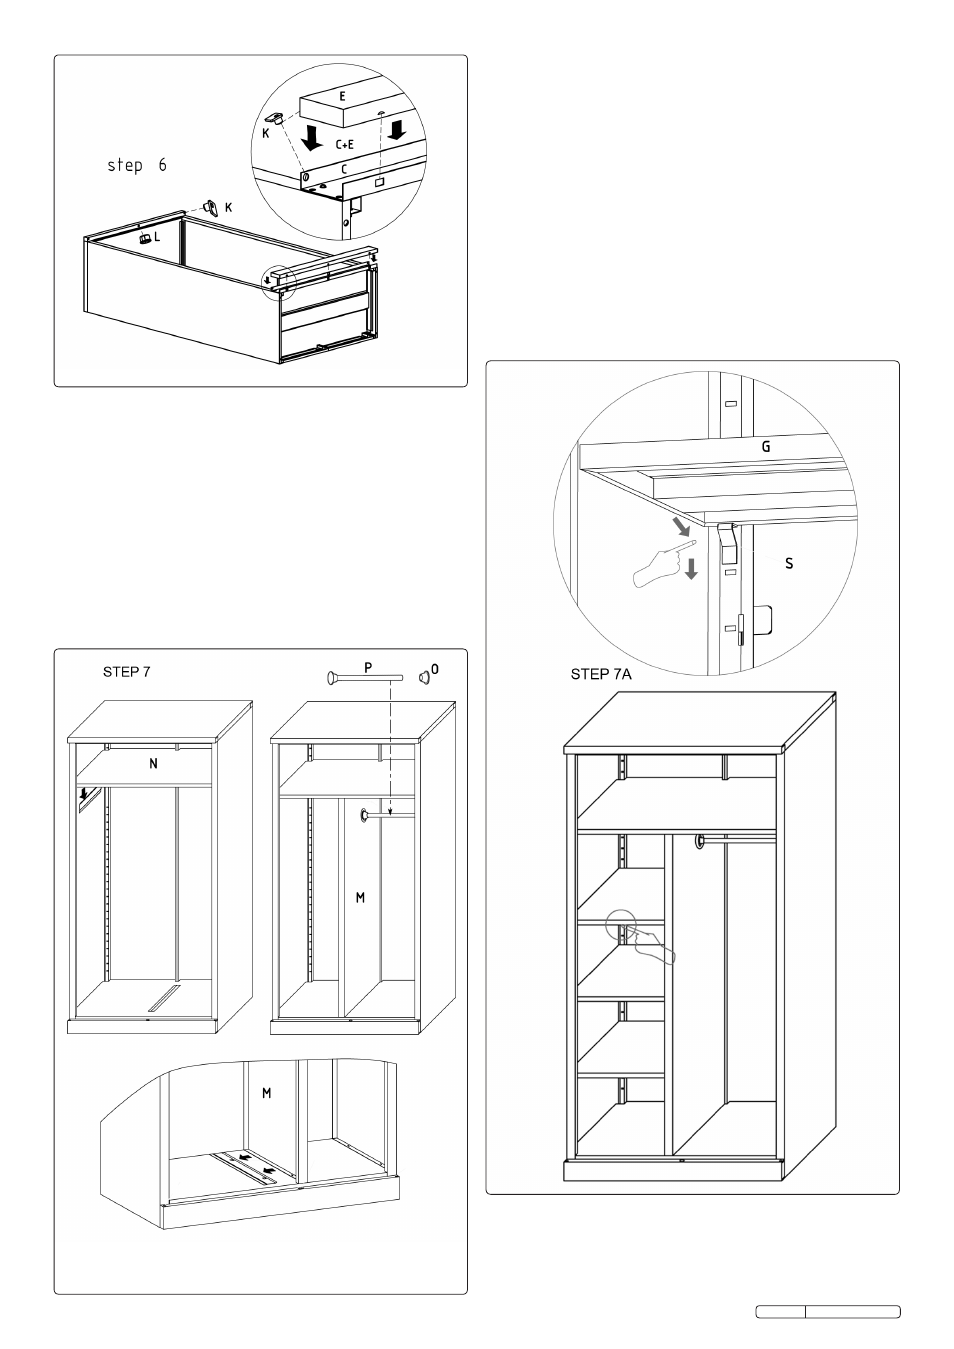
4.8
SHELF ASSEMBLY (Step 7A)
4.8.1 Insert shelf stops (S) at the desired height for each shelf
and lay the shelves (G) onto the stops.
4.7
INTERNAL DIVIDERS ASSEMBLY (Step 7)
4.7.1 Manoeuvre the Full width shelf (N) into the top of the
cabinet, then move it downwards until the edges of the
shelf begin to enter the receiving channels on the inside
faces of the back and sides. Using a rubber hammer, tap
down the shelf until it is fully engaged.
4.7.2 Position the divider panel (M) inside the cabinet, just to
the right of the receiving channels on the base and on
the underside of the full width shelf (N). Move the divider
panel to the left until its edges begin to enter the
receiving channels. Using a rubber hammer, tap the
divider into place so that it is fully engaged.
4.7.3 Take the coat rail (P) and position a fixing (O) on either
end. Slide the assembly into the right hand compartment
of the cabinet and slide each fixing down into the 'U'
shaped channels provided.
4.6
BASE OUTER FASCIA ASSEMBLY (Step 6)
4.6.1 Fit the base outer fascia (E) over the cross member (C)
with the hinge pivot holes facing upwards. Tap the base
outer fascia down with a rubber hammer until the indents
in the sides of the fascia clip into the matching holes on
the cross member (C).
4.6.2 Insert a hinge pivot moulding (K) at each end of the
upper face of the base outer fascia (E). Insert the other
two hinge pivot mouldings at each end of the downward
facing edge of the cabinet top.
4.6.3 Insert a locking rod recess moulding (L) into the centrally
placed holes in the same faces used for mounting the
hinge pivot mouldings at both the top and the bottom.
Original Language Version
SC02 Issue:1 - 15/07/10