Sealey SC02 User Manual
Page 4
4.9
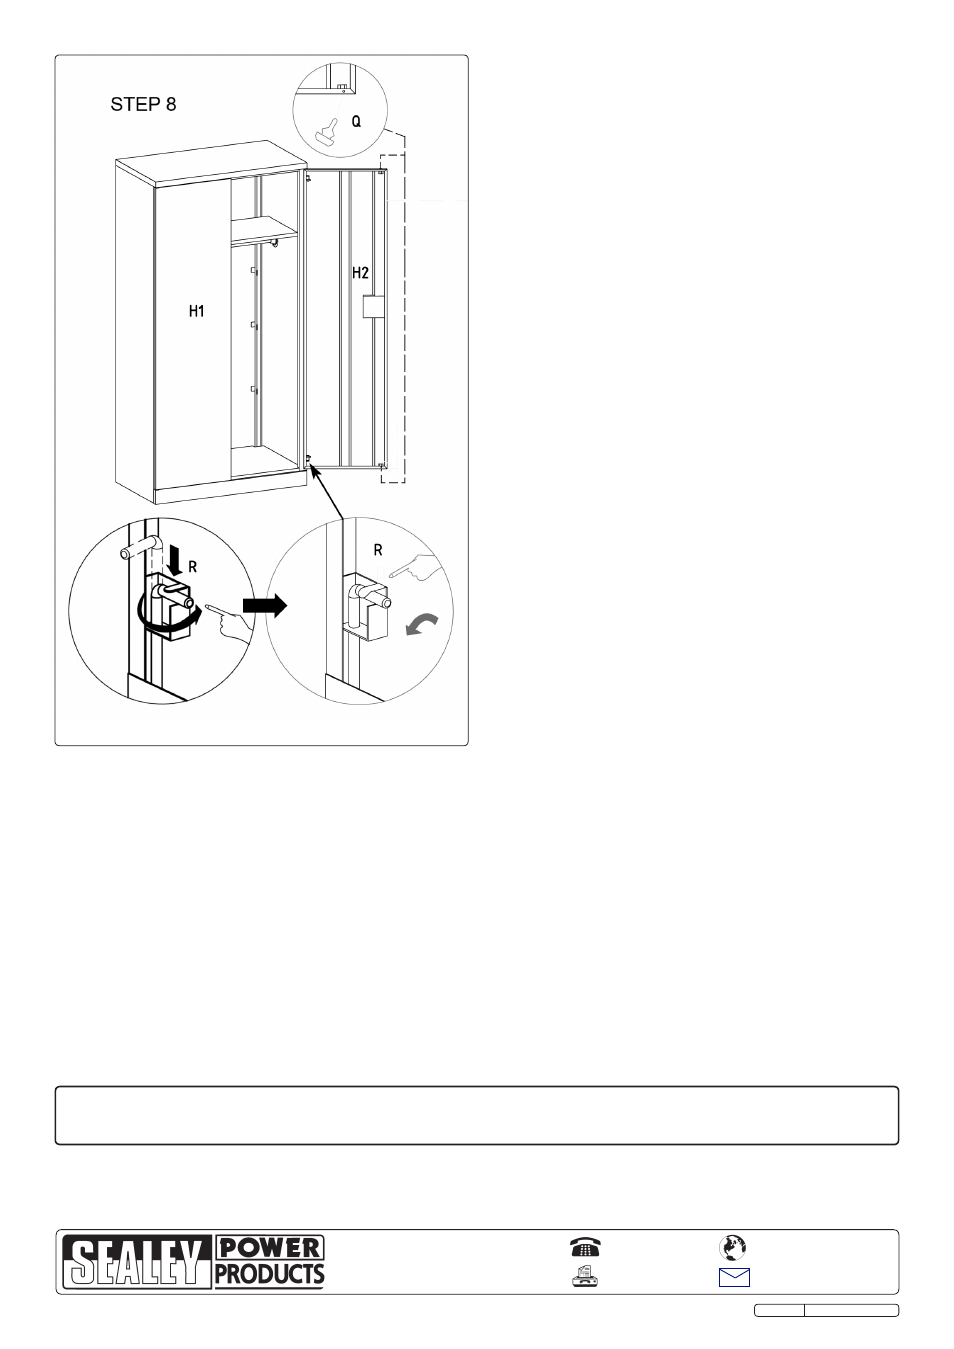
DOORS ASSEMBLY (Step 8)
4.9.1 Mount each door in turn by placing it between the upper
and lower hinge pivot mouldings. Align the upper hole in
the door edge with the hole in the upper pivot moulding
and insert a hinge pin upwards through the door and into
the moulding. Rotate the short arm of the pin around onto
the inner face of the door as shown above and bend over
the metal tab to retain it. Mount the lower hinge pin in the
same way. Repeat the process to mount the other door.
4.9.2 Fit the rubber door stops (Q) as shown in Step 8 to the
corners of each door
4.10 Using a mild solution of detergent and water and wipe
the unit down with a soft cloth.
Parts support is available for this product. To obtain a parts listing and/or diagram, please log on to
www.sealey.co.uk, email [email protected] or phone 01284 757500.
NOTE: It is our policy to continually improve products and as such we reserve the right to alter data, specifications and component parts without prior notice.
IMPORTANT: No liability is accepted for incorrect use of this product.
WARRANTY: Guarantee is 12 months from purchase date, proof of which will be required for any claim.
INFORMATION: For a copy of our latest catalogue and promotions call us on 01284 757525 and leave your full name and address, including postcode.
01284 757500
01284 703534
Sole UK Distributor, Sealey Group,
Kempson Way, Suffolk Business Park
,
Bury St. Edmunds, Suffolk,
IP32 7AR
www.sealey.co.uk
Web
Original Language Version
SC02 Issue:1 - 15/07/10