Sealey GSS3030 User Manual
Page 10
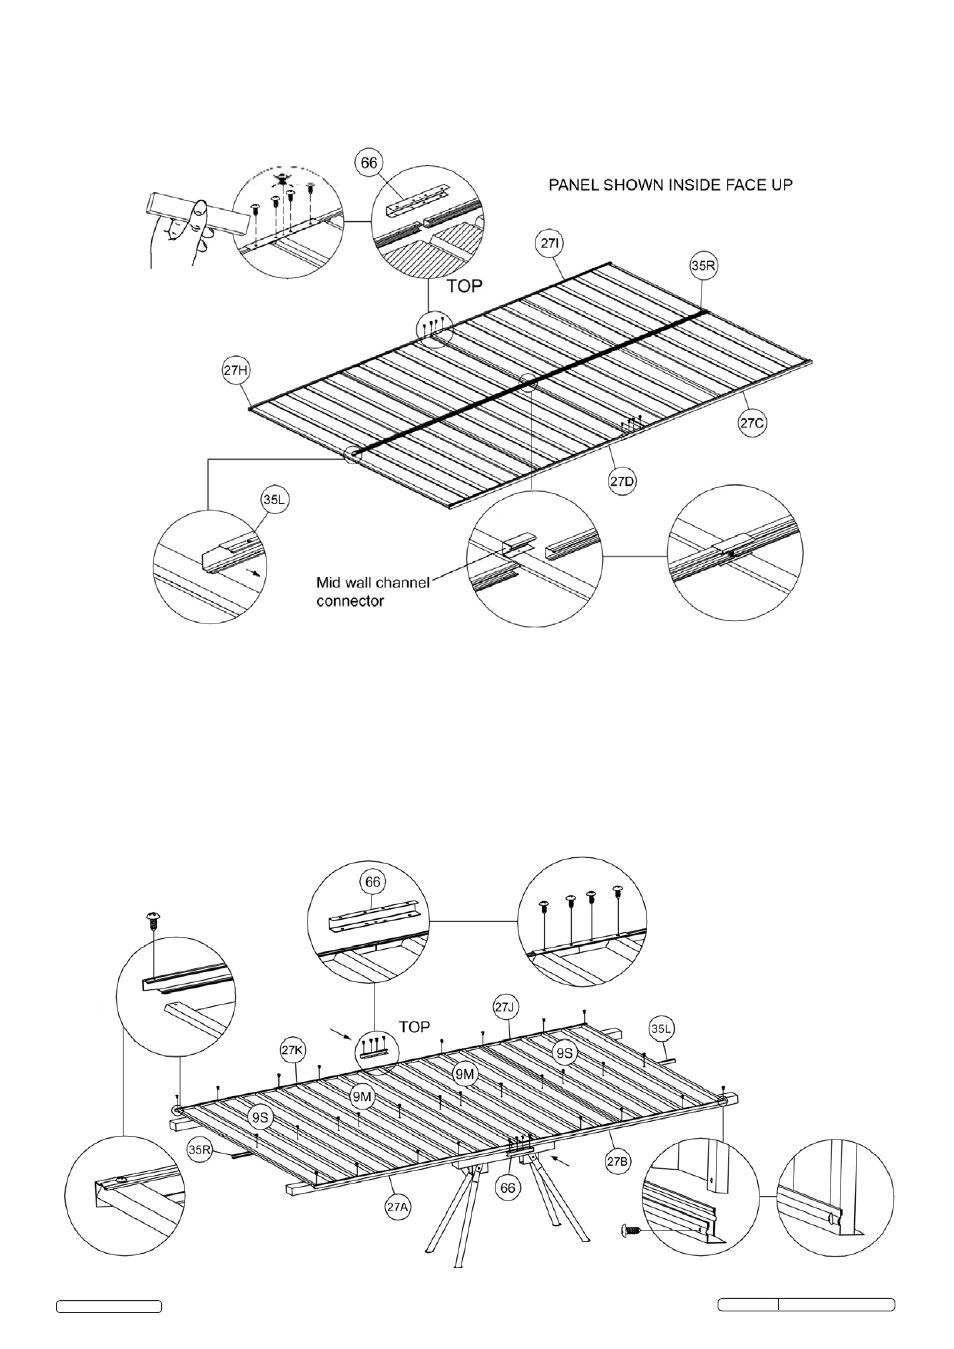
7.1.5 Now fix the 35R and 35L mid wall channels to the panel assembly using self tapping screws from the outside
(as indicated in the previous diagram), ensuring that the open side of the channel is facing downwards. You will
need to use a mid wall channel connector where the two sections of the channel meet in the centre of the panel
as indicated on the diagram below.
7.2 ASSEMbLE THE SIDE WALL PANELS
7.2.1 Place 2 x 9S and 2 x 9M sheeting panels onto your work table and fix them together with self tapping screws as
shown in the diagram below. Now fit top channels 27K and 27J plus bottom channels 27A and 27B to the panel
edges by sliding them into position or tapping them into place using a soft faced hammer. Note that the small
lip of the channel should be positioned on the outside face to prevent water ingress. Ensure that channels
27K and 27J are used for the top edge of the panel. Fix the channels in place using self tapping screws and
strenghten the central joints, top and bottom, by screwing into place a channel connector (66). Now fix the mid
wall channels 35R and 35L to the panel with self tapping screws ensuring that you use a mid wall channel
connector in the centre of the panel where the two channels meet. The open part of the channel should be
facing downwards.
© Jack Sealey Limited
Original Language Version
GSS3030 Issue No.1 13/08/12