Om design series manual, Mounting your omd-r speakers – Mirage OMD-28 User Manual
Page 9
om design series manual
3 . 0 i n i t i a l s p e a k e r p l a c e m e n t
7
You can also achieve excellent results in the rear
position. Try not to place the speakers directly into a
corner. Leave 2 or more feet between the edge of the
cabinet and the sidewall, so the sound can reflect into
the room environment. The rear position is usually
chosen when your room will not accommodate the
sidewall position due to unequal walls, a doorway, or
a large opening, etc. It is recommended that the rear
center (6.1 system) or dual rear surrounds (7.1) be
placed at the same height as the other two rear
surround speakers wherever possible.
MOUNTING YOUR OMD-R
SPEAKERS
NOTE: THE OMD-R FEATURES A VERY SIMPLE WALL
MOUNTING SYSTEM. CAREFUL ATTENTION MUST BE
MADE TO MOUNT IT SECURELY AS THE SPEAKER IS
HEAVY AND DAMAGE TO THE PRODUCT AND/OR
INJURY COULD RESULT FROM IMPROPER MOUNTING.
PLEASE FOLLOW THE DIRECTIONS CAREFULLY!
NOTE: THE MOUNTING HARDWARE FOR THE OMD-R
CAN BE FOUND ON TOP OF ONE OF THE PROTECTIVE
FOAM PIECES INSIDE THE SHIPPING CARTON. THEY
ARE TAPED INTO ONE CORNER, AND SHOULD BE
VISIBLE WHEN YOU OPEN THE OMD-R PACKAGING.
1. Select the mounting position best suited for your
room.
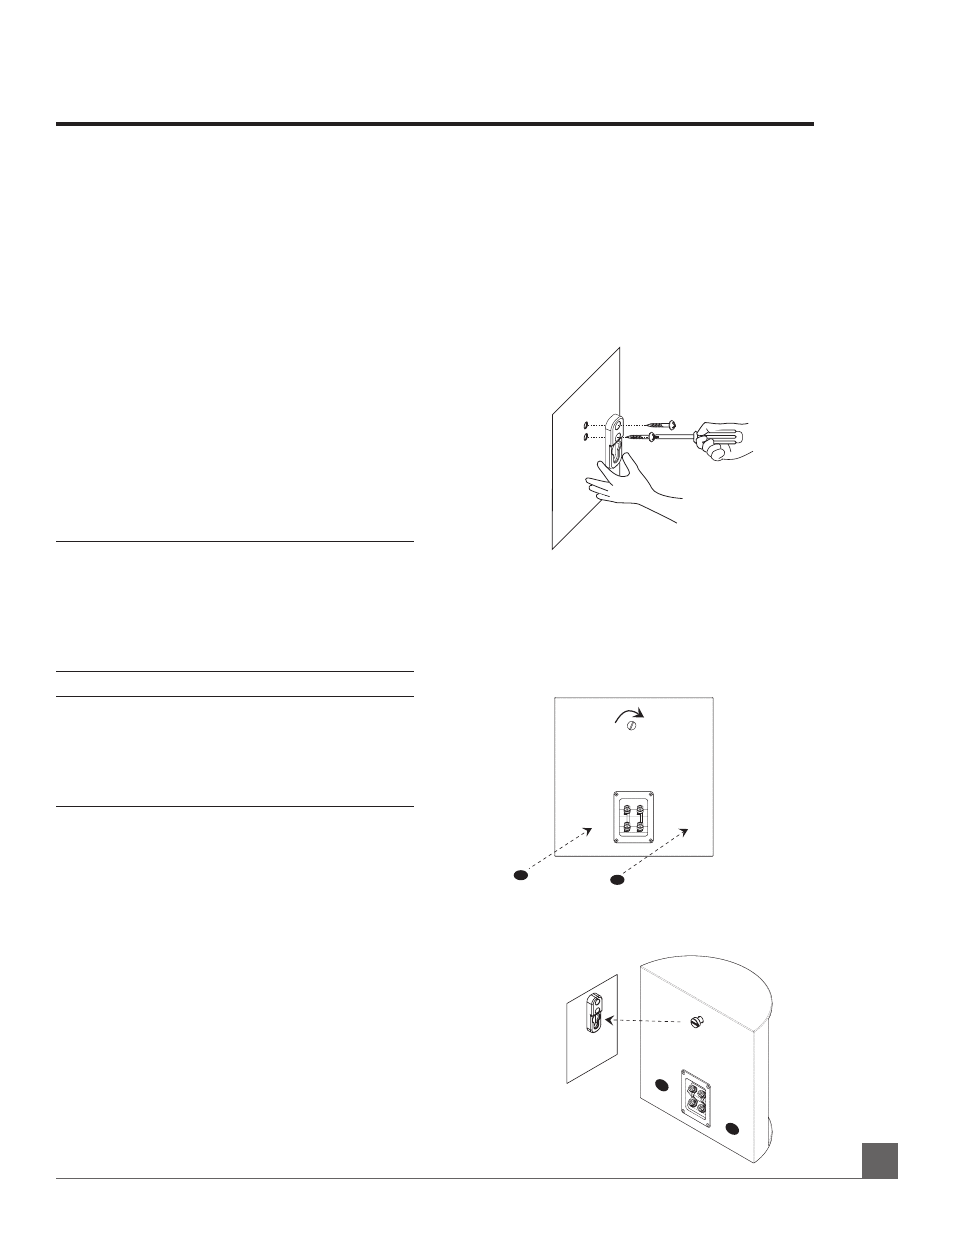
2. Place the wall-mounting bracket against the wall in
the desired mounting location and mark the center
of the two holes with a pencil. This is where you
need to insert the appropriate mounting hardware
to securely fasten a load of 22 lbs. Hardware is not
included with the speaker, as building materials
vary greatly in different countries, but the
recommended screw head size is a #8. Screw
length is to be determined by the wall material.
3. If you are mounting directly to drywall, please ensure
that you use the appropriate anchors, as screws
into drywall itself will not provide a secure mount.
Insert the anchors, and then hold the mounting
bracket up to the wall. Insert the screws until tight.
Try to locate into wall studs wherever possible.
4. Screw the included bolt into the insert in the back
of the OMD-R speaker, located above the terminal
cup. Hand tighten the bolt all the way, and then
loosen a few turns counter clockwise. Place the
two included rubber bumpers on the back of the
speaker, on either side of the back label.
5. Hold the speaker upright, and insert the bolt head
into the large hole. Let the speaker slide down into
place.