Retrotec DucTester with DM-2 User Manual
Page 3
□
Press [On] twice to get to main
screen.
□
Adjust fan speed knob clockwise
until “PrA” reaches test pressure.
□
If not possible, go to Step
5 for advice on changing setup.
□
Connect Speed Control Cable to
fan.
□
For a test pressure of 25 Pa *,
press
[Set Pressure] [25] [Enter].
* 50 Pa for Northwest ENERGY STAR.
□
Press [@ Pressure] to display what
the result would be at exactly 25 Pa.
Page 3 of 8
Step 3:
Connect DM-2 gauge & fan
□
Insert blue tube into the
supply register closest to
the air handler.
□
Read results directly from the gauge.
Speed Control Cable
□
Connect power cord.
□
Switch to on: “ l “. Green
light indicates that power
is connected.
□
Connect yellow and green
tubes to matching color
ports on fan. Ethernet
style Speed Control Cable
will disable the knob. It is
connected later in Step 4.
If Pressurizing, see tubing setup on page 7.
□
Connect Flex Duct to fan inlet for depressurization.
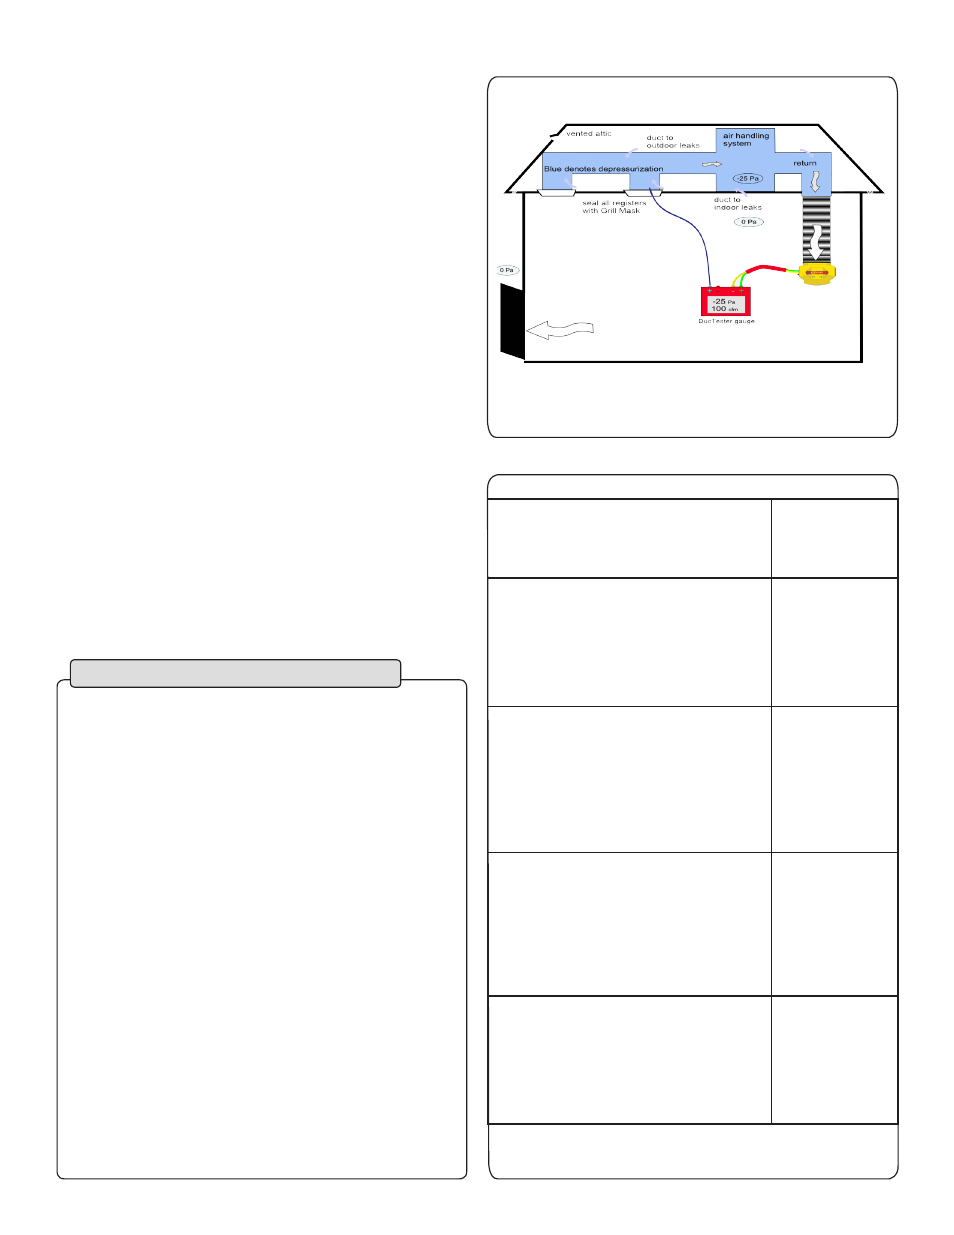
Ready to conduct the test by depressurizing the ducts:
Depressurization is easiest and permitted in all States
except CA & WA where it can still be used to
evaluate, but not for a final result.
Step 2:
Connect to ducts cont’d
Total Duct Leakage Test: Depressurize
Step 4:
Conduct test
To pressurize, connect the Flex Duct to fan exhaust.
All other connections remain the same
pressurize
Inlet
airflow
Exhaust
Inlet
with Range Rings
inside Flex Duct
Exhaust
depressurize
Solid green Status light
indicates DM-2 is ready
to control speed.
airflow
Depressurizing works best because the fan pulls the
Grill Mask tight on the registers during the test.