Subaru Robin EX13 User Manual
Page 35
- 32 -
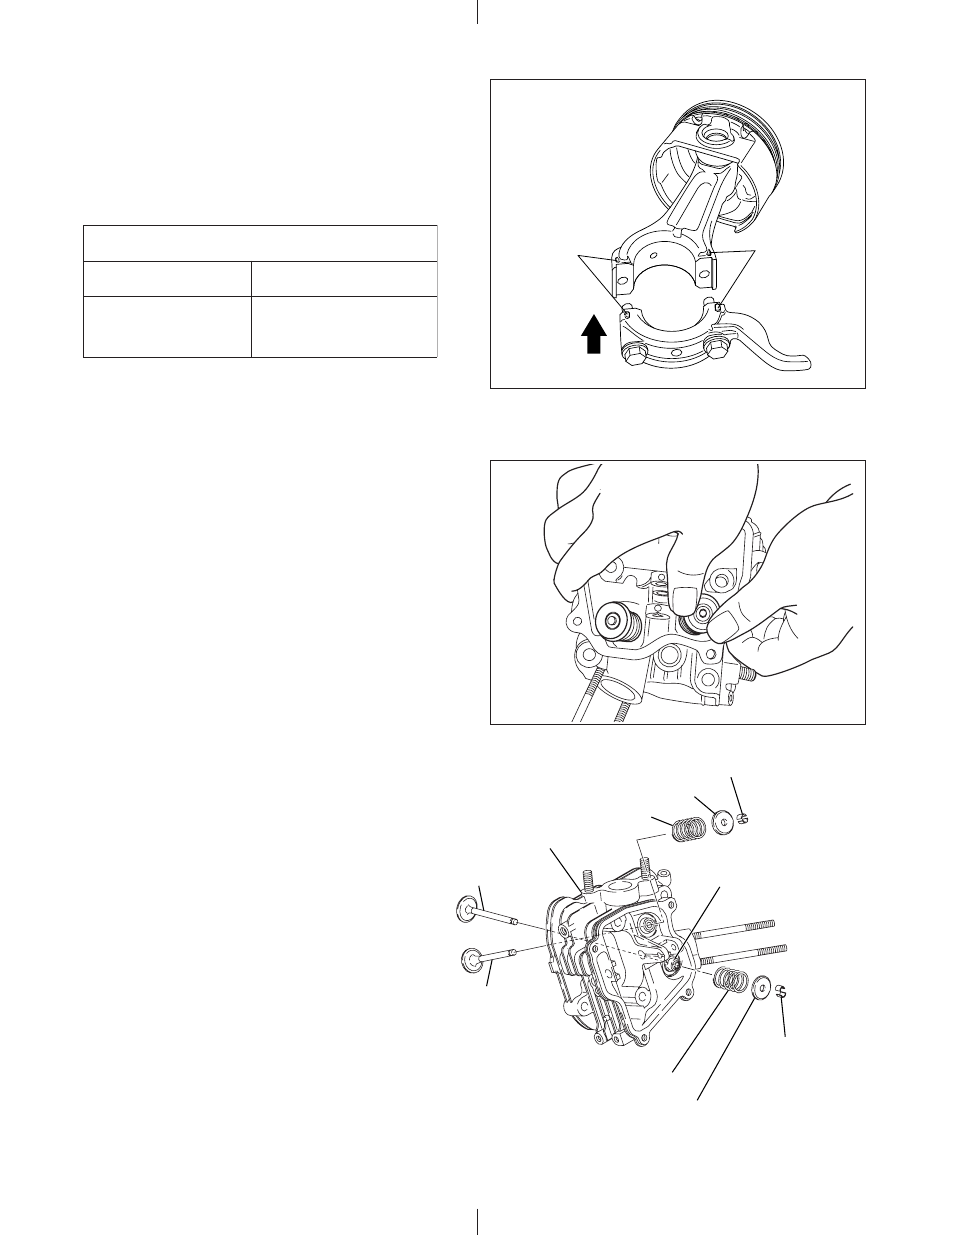
(b) Rotate the crankshaft down to the bottom dead center
and lightly tap the piston head until the large end of
the connecting rod touches the crank pin.
(c) To mount the connecting rod, line up the matching
marks and fit the clinch portions firmly together.
Fig. 5-37
ALIGNMENT
MARKS
ALIGNMENT
MARKS
(d) Check for free movement of the connecting rod by
turning the crankshaft slowly.
(6) INTAKE AND EXHAUST VALVES
Take the following points into account when
mounting the intake and exhaust valves on the
cylinder head.
NOTE 1: Replace the valve with a new one if it shows
signs of wear. (Refer to the “STANDARD
REPAIR TABLES” on page 78 and 79.)
NOTE 2: Carefully scrape off any carbon deposits
on the combustion chamber. Apply oil to
the valve stems before mounting the intake
and exhaust valves. Insert the valves in the
cylinder head and place it on a level
workbench. Next, mount the valve springs,
the spring retainers and collet valves.
(Mount the stem seal on the intake valve
guide.)
Fig. 5-38a
EXHAUST VALVE
INTAKE VALVE
CYLINDER HEAD
VALVE SPRING
VALVE SPRING
COLLET VALVE
COLLET VALVE
SPRING RETAINER
SPRING RETAINER
STEM SEAL
Fig.5-38b
Tightening torque
EX13,17,21
EX27
13
.
0 - 15.0 N m
(130 - 150 kgf cm)
(9.4 - 10.8 ft
lb.)
17.0 - 20.0 N m
(170 - 200 kgf cm)
(
12.3
- 1
4
.
5
ft
lb.)