SAF-HOLLAND XL-FW503 FleetMaster LowLube Series Fifth Wheels with Manual Sliding Secondary Lock XA-201-S10217, XA-201-S10579 & XA-231-S10217 User Manual
Page 20
20
XL-FW503 Rev B
MANUAL SLIDING SECONDARY LOCK
Rebuilding Instructions
If your fifth wheel is equipped with the
manual sliding secondary lock, then
rebuild per standard FleetMaster
Rebuilding Instructions (XL-FW355-XX),
but replace the Manual Secondary Lock
Installation (as stated on Page 7 of
XL-FW355-XX) with the following:
Note: During assembly, use threadlocker
(Permalok MM118, Loctite No. 243, or
equivalent on all threads.
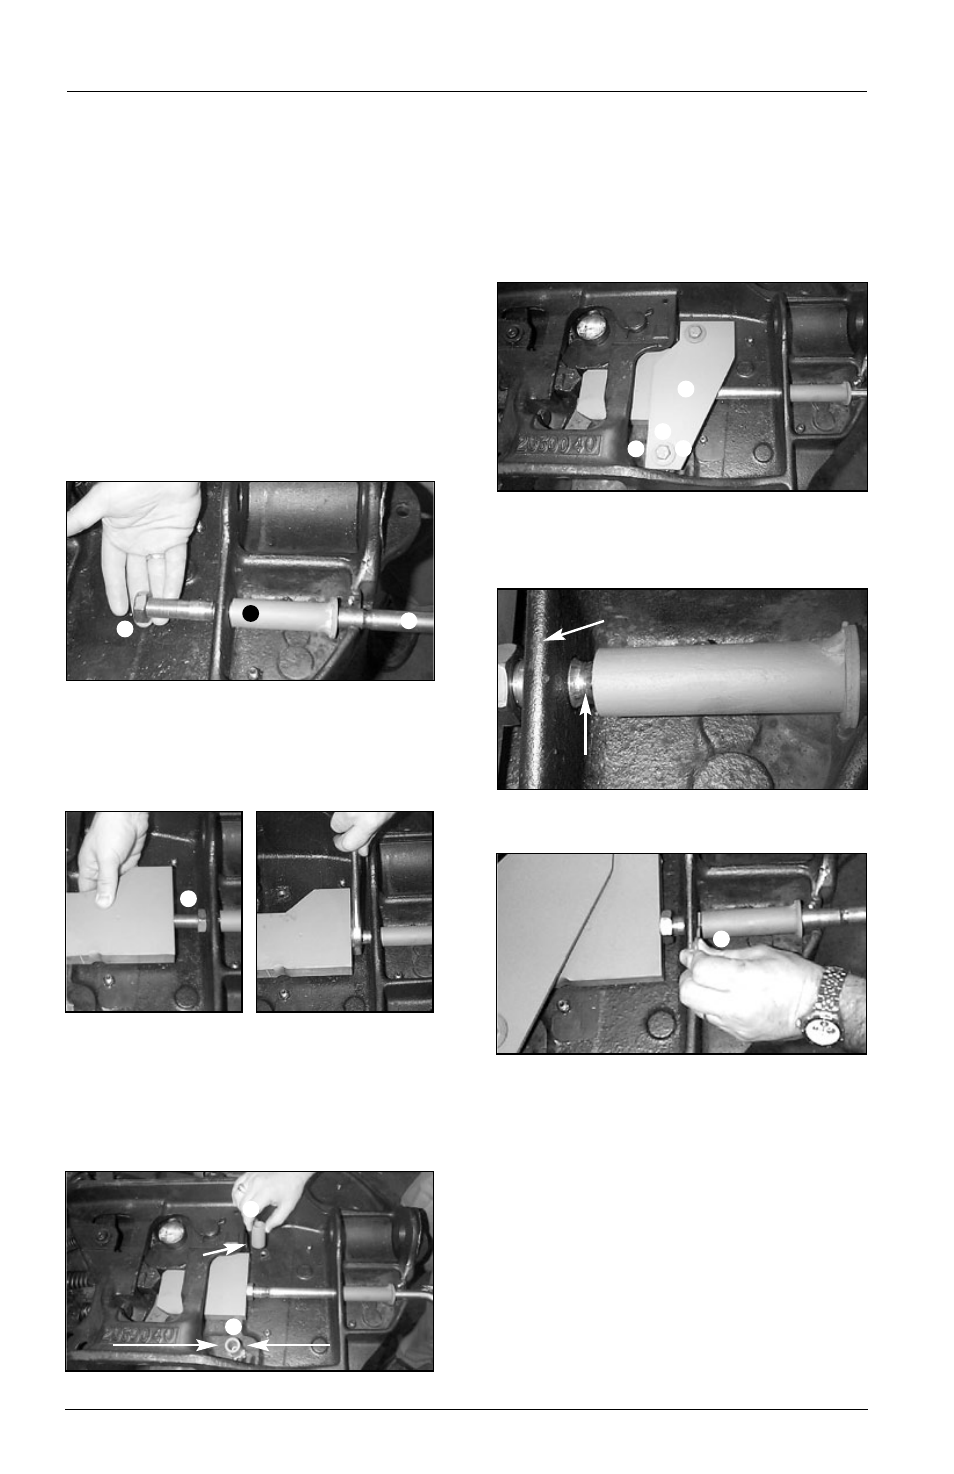
1. Insert handle through guide sub-
assembly and install jam nut on
handle rod (Figure 3 – Items 1, 2 & 11).
2. Screw handle into threaded safety
bar making sure handle grip is
oriented towards ramps of wheel and
tighten jam nut (Figure 4 & Figure 5)
(Item 3).
3. Position spacer tubes over threaded
holes in casting. These spacers come
in two different lengths, so be sure to
place shorter spaced on the raised
portion of casting (Figure 6) (Items 4
& 5).
4. Position cover on spacers and use
two 1/2˝ washer, two 1/2˝ lock
washer, and two 1/2˝ x 2-3/4˝ bolts,
to fasten cover to casting (Figure 7)
(Items 6, 7, 8, & 9). Tighten fasteners.
5. Pull secondary lock handle out so
that detent on handle is between
casting rib and guide tube (Figure 8).
6. Install spring clip on handle (
Figure
9) (Item 10).
7. Check the manual sliding secondary
lock for proper operation by
pulling/pushing handle to engage
secondary locking bar. Handle
should engage detent when
secondary locking bar is behind
primary lock and also engage detent
when pulled out to allow
uncoupling.
Figure 4
Figure 5
Figure 6
Figure 7
Figure 8
Figure 9
Detent
Raised
Portion
➂
➍
➎
➐
➏
➇
➓
Long Spacer
Short Spacer
Rib
➒
Figure 3
➊
➁
11