3 basic system configuration, 4 placement, 5 physical connection – PLANET IPX-2100 User Manual
Page 17: Pstn, 1 web login, Physical connection topology of the ipx-2500
17
3.2.4 Placement
Make sure the device is placed in a safe environment to avoid equipment failure.
DO NOT place anything on top of the device. Excessive weight could damage it.
DO NOT obstruct ventilation slots on each side of the IPX-2500 or expose it to
direct sunlight or other heat sources. Be sure that there is adequate air flow
around the IPX-2500.
Place the IPX-2500 on a flat surface to avoid any damage.
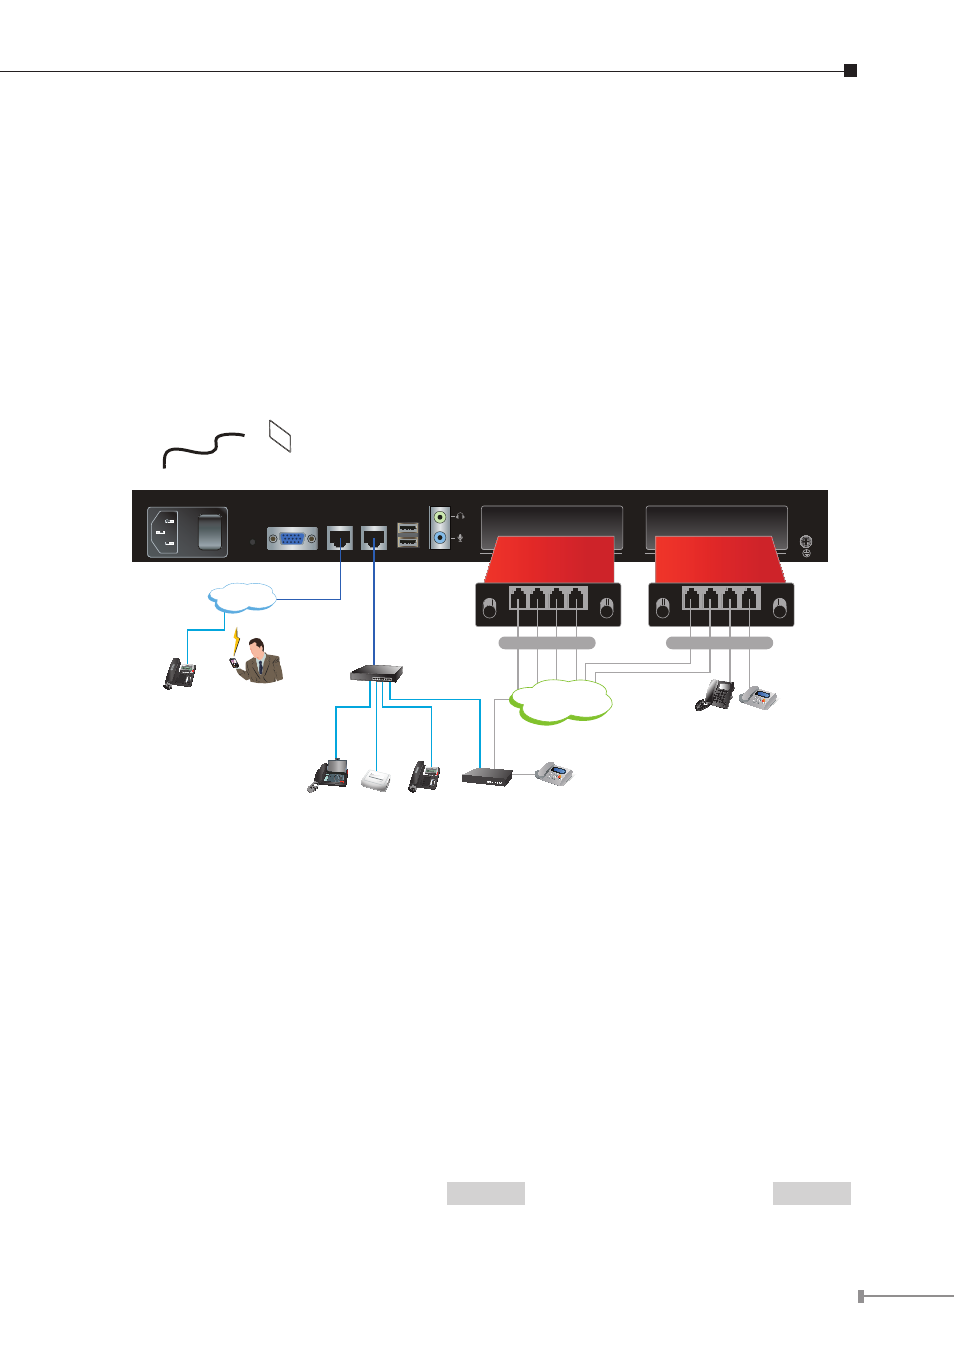
3.2.5 Physical Connection
100~240V AC
PWR
VGA
WAN
LAN
USB
AUDIO
SLOT 2
SLOT 1
FXO Card
Life Line Card
Video Phone
IP Phone
Voice
Gateway
Switch
ATA
SLT Phone Fax
2 x FXO + 2 x FXS
4 x FXO
Fax
PSTN
Internet
IP Phone
Mobile
SIP Phone
100Base-TX UTP
1000Base-T UTP
Telephone wire
Physical Connection Topology of the IPX-2500
3.3 Basic System Configuration
3.3.1 Web Login
Step 1. Connect a computer to a LAN port on the IPX-2500. Your PC must set up
to the same domain as 192.168.0.X as the IPX-2500.
Step 2. Start a web browser. To use the user interface, you need a PC with
Internet Explorer (version 6 and higher), Firefox, or Safari (for Mac).
Step 3. Enter the default IP address of the IPX-2500: 192.168.0.1 into the URL
address box.
Step 4. Enter the default user name admin and the default password admin ,
and then click Login to enter Web-based user interface.