Yamaha YDP-S52 User Manual
Page 31
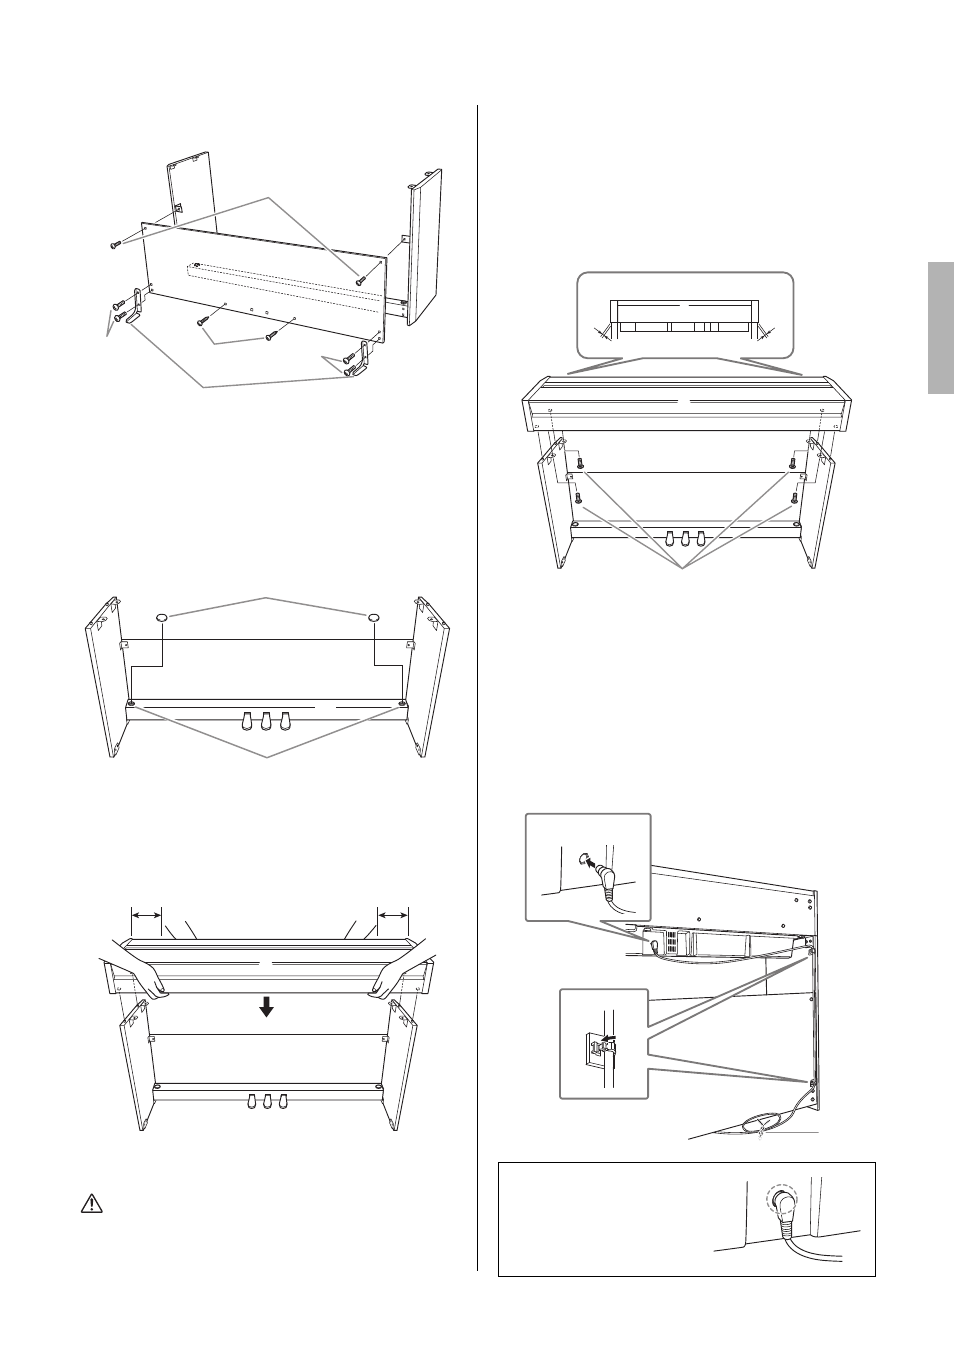
Keyboard Stand Assembly
31
YDP-S52 Owner’s Manual
2-4
Securely tighten the screws on the top of B
that were attached in Step 2-1.
3.
Secure C.
3-1
Securely tighten the screws on C that were
attached in Step 1-3.
3-2
Attach the caps ( ) to the head of the
screws.
4.
Mount A.
Be sure to place your hands at least 10 cm from
either end of A when positioning it.
Align the dowels on D and E with the
corresponding holes on the bottom of A.
CAUTION
• Be careful not to pinch your fingers or drop the unit.
• Do not hold the keyboard in any position other than the
position shown in the illustration.
5.
Secure A.
5-1
Adjust the position of A so that the left and
right ends of A will project beyond D and E
equally when seen from the front.
5-2
Secure A by tightening the short screws
(6 x 16 mm) from the bottom.
6.
Connect the pedal cord
6-1
Insert the pedal cord plug to the
[TO PEDAL] jack from the rear.
6-2
Attach the cord holders to the rear panel
as shown, then clip the cord into the holders.
6-3
Use a vinyl tie (Step 1-1) to take up any
slack in the pedal cord.
2-1, 2-4
2-3
D
E
B
2-2
2-2
Secure the anti-fall brackets (
)
using the screws.
C
B
3-2
3-1
D
E
A
D
E
B
At least 10 cm
At least 10 cm
Insert the pedal cord securely
until the metal part of the cord
plug disappears from view.
Otherwise, the pedal may not
function properly.
5-1
5-2
A
A
Projection of A
6-1
6-2
6-3