Front components, Ont components – HP Z40c G3 39.7" 21:9 Curved 5K IPS Monitor User Manual
Page 9
●
VESA mounting capability (100 × 100 mm) for attaching the monitor to a swing arm mount
●
Support for a mounting bracket to attach the monitor to a workstation
NOTE:
For safety and regulatory information, see the Product Notices provided in your documentation kit.
To access the latest user guide, go t
ollow the instructions to find your
product. Then select Manuals.
Front components
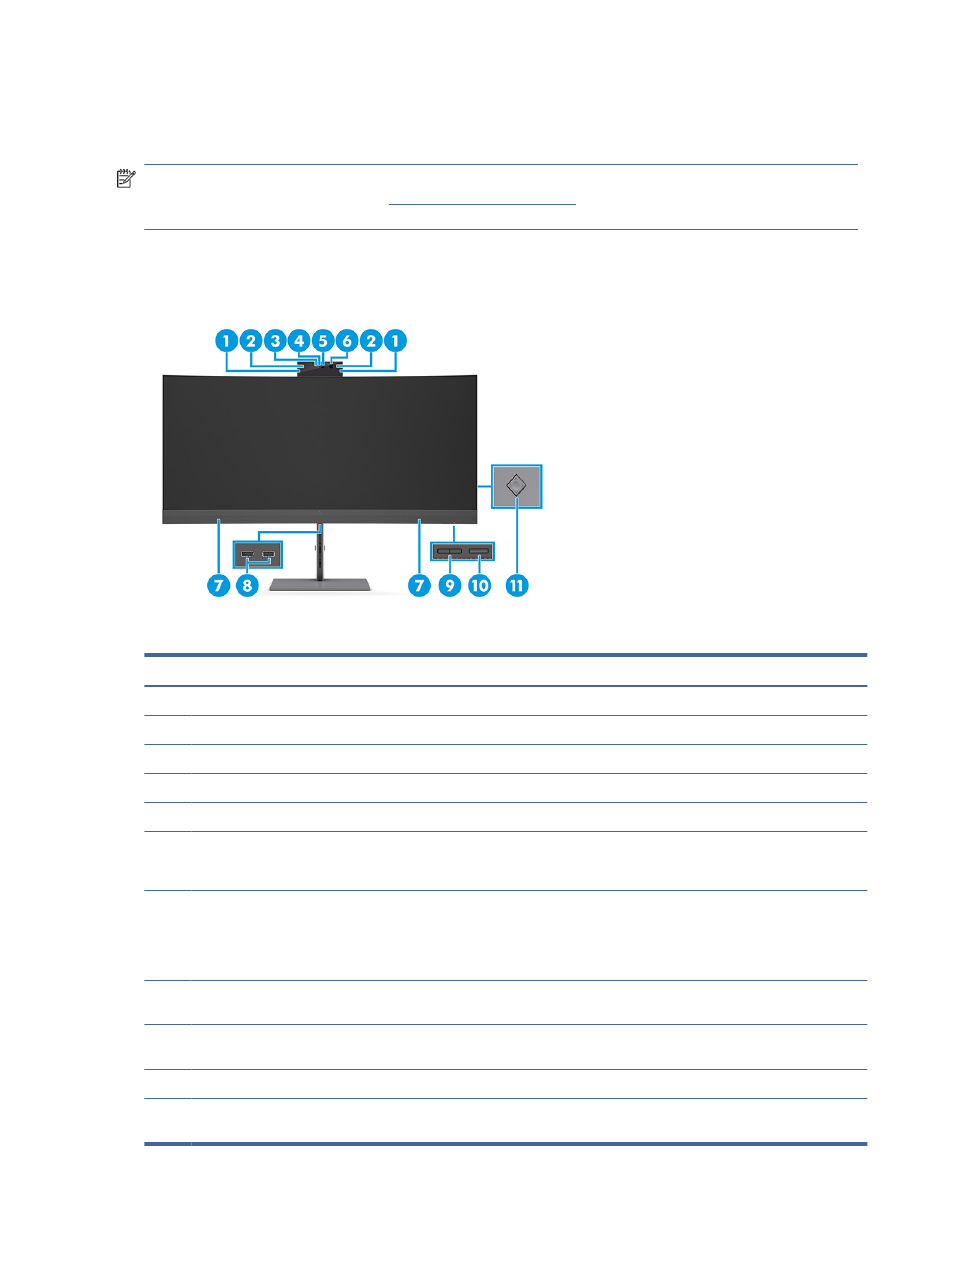
To identify the components on the front of the monitor, use this illustration and table.
Table 1-2
Front components and their descriptions
Component
Description
(1)
Tilt levers
Allow you to tilt the camera.
(2)
Camera microphones
Allow you to participate in a video conference.
(3)
Camera light
On: The camera is in use.
(4)
Camera RGB lens
Transmits your image in a video conference.
(5)
Camera IR lens
Transmits your image for Windows Hello facial recognition.
(6)
Camera IR light
Additional IR light for facial recognition.
NOTE:
You might not be able to see the camera IR light when it is on.
(7)
Speakers
Produce sound. You can control the audio volume from the OSD menu in the Input
menu.
NOTE:
For the best audio experience, connect a USB cable from your monitor to your
computer, and then select your monitor as the sound device.
(8)
USB ports (downstream)
Connect a USB cable to a peripheral device, such as a keyboard, mouse, or USB hard
drive, and supports battery charging.
(9)
PbP or brightness buttons
The buttons function as left and right when PbP is on and brightness plus and minus
when PbP is off.
(10)
Power button
Turns the monitor on or off.
(11)
OSD control
Activates the OSD buttons so that the button labels appear on the right side of the
screen.
4
Chapter 1 Getting started