Installing the diagonal and eyepiece, Installing the finderscope (travel scope 70 only), Aligning the finderscope – Celestron Travel Scope 80mm f/5 AZ Refractor Telescope Kit User Manual
Page 9
ENGLISH
I
9
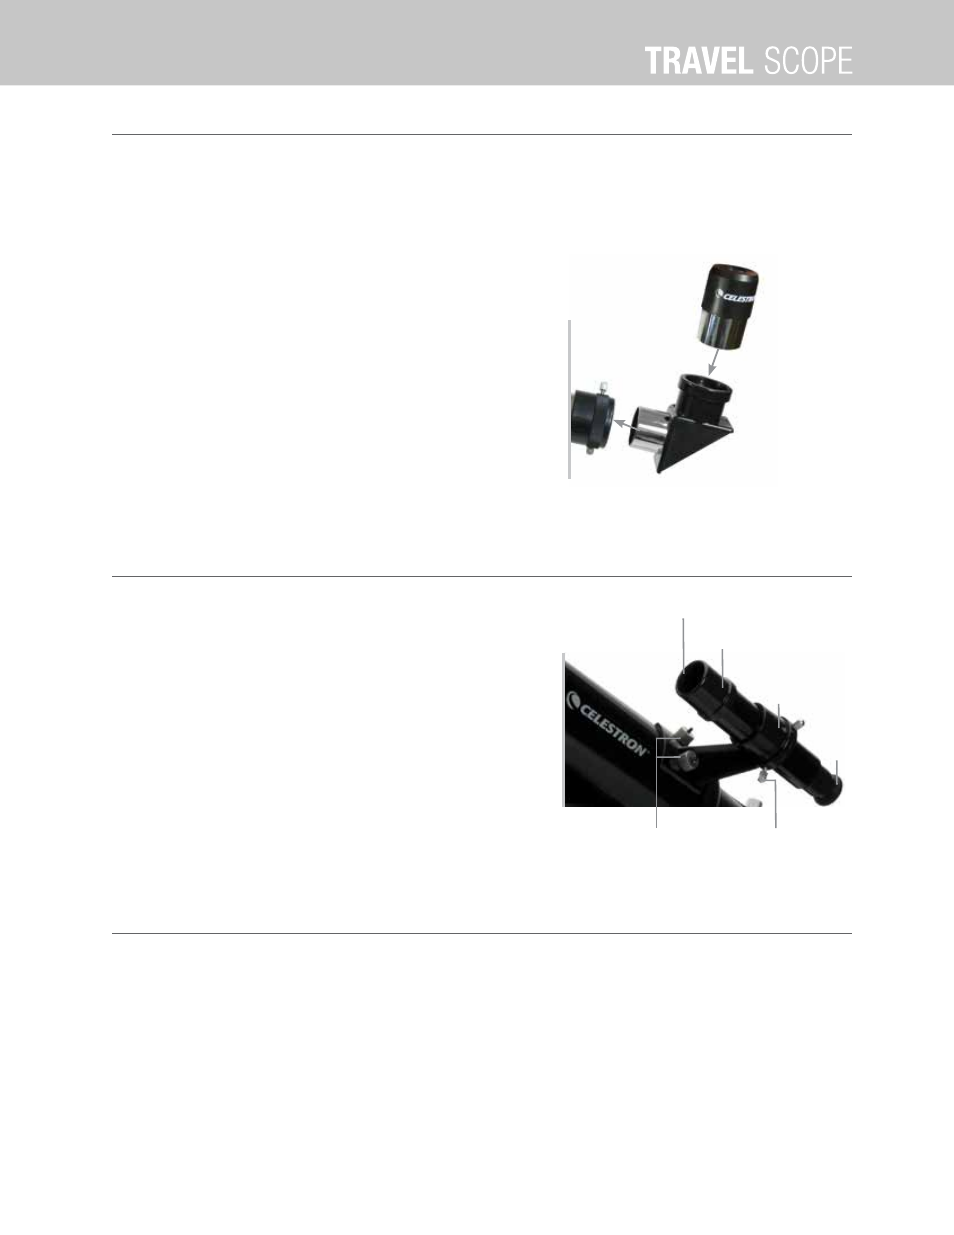
INSTALLING THE DIAGONAL AND EYEPIECE
The diagonal is a prism that diverts the light at a right angle to the light path of the telescope This allows you to observe
in a position that is more comfortable than if you had to look straight through The Travel Scope diagonal is an erect image
model that corrects the image to be right side up and oriented correctly left-to-right which is much easier to use for terrestrial
observing Also, the diagonal can be rotated to any position which is most favorable for you To install the diagonal and
eyepiece:
1 Make sure the two thumbscrews on the rear of the telescope
tube do not protrude into the opening before installation, the
plug up cap is removed from the opening at the rear of the
telescope tube, and the caps are removed from the barrels on
the diagonal Insert the small barrel of the diagonal all the way
into the rear opening of the telescope tube (Figure 11) Then
tighten the two thumbscrews
2 Put the chrome barrel end of one of the eyepieces into the
diagonal and tighten the thumb screw When doing this make
sure the thumbscrew is not protruding into the diagonal before
inserting the eyepiece
3
T
he eyepieces can be changed to other focal lengths by
reversing the procedure in step 2 above
Fig. 11
INSTALLING THE FINDERSCOPE (TRAVEL SCOPE 70 ONLY)
1 Locate the finderscope (it will be mounted in the finderscope
bracket)
2 Remove the knurled nuts on the threaded posts on the
telescope tube (Figure 12)
3 Mount the finderscope bracket by placing it over the posts
protruding from the optical tube and then holding it in place
thread on the knurled nuts and tightening them down
4 Note that the finderscope should be oriented so that the larger
diameter lens is facing toward the front of the telescope tube
5 Remove the lens caps from both ends of the finderscope
ALIGNING THE FINDERSCOPE
1 Locate a distant daytime object and center it in the low power (20 mm) eyepiece in the main telescope
2 Look through the finderscope (the eyepiece end of the finderscope) and take notice of the position of the same object
3 Without moving the main telescope, turn the adjustment thumbscrews (figure 12) located around the finderscope bracket
until the crosshairs of the finderscope are centered on the object chosen with the main telescope
4 If the image through the finderscope is out of focus, rotate the eyepiece of the finderscope for a clear view
Note: Objects viewed through a finderscope are upside down and backwards which is normal
Fig. 12
Finderscope
Bracket
Finderscope
Eyepiece
Adjustment
Screws
Knurled
Nuts
Objective Lens