Step 2: check the digital/analog select switch, Step 3: connect the audio cord, Step 4: connect the power cord – Sony SDM-M51D User Manual
Page 8: Step 5: secure the cords and close the back cover, Step 2, Step 3, Step 4, Step 5, 8step 2: check the digital/analog select switch
8
Step 2: Check the digital/analog
select switch
Before turning on the monitor, be sure to check the switch setting.
When connecting the DVI-I input connector on the monitor to a
computer equipped with an HD15 (analog RGB) output connector
using the DVI-HD15 (analog RGB) video signal cable (supplied),
set the switch to A (Analog) – the right position.
When connecting it to a computer equipped with a DVI (digital
RGB) output connector using a with a DVI-DVI (digital RGB)
video signal cable (not supplied), set the switch to D (Digital) –
the left position.
The switch is set to the right position (for analog RGB signal
input) as the default setting
Step 3: Connect the audio cord
Open the back cover and turn off the display and computer before
connecting.
Note
Do not open the back cover more than 90 degrees, otherwise damage may
result to the back cover or latch.
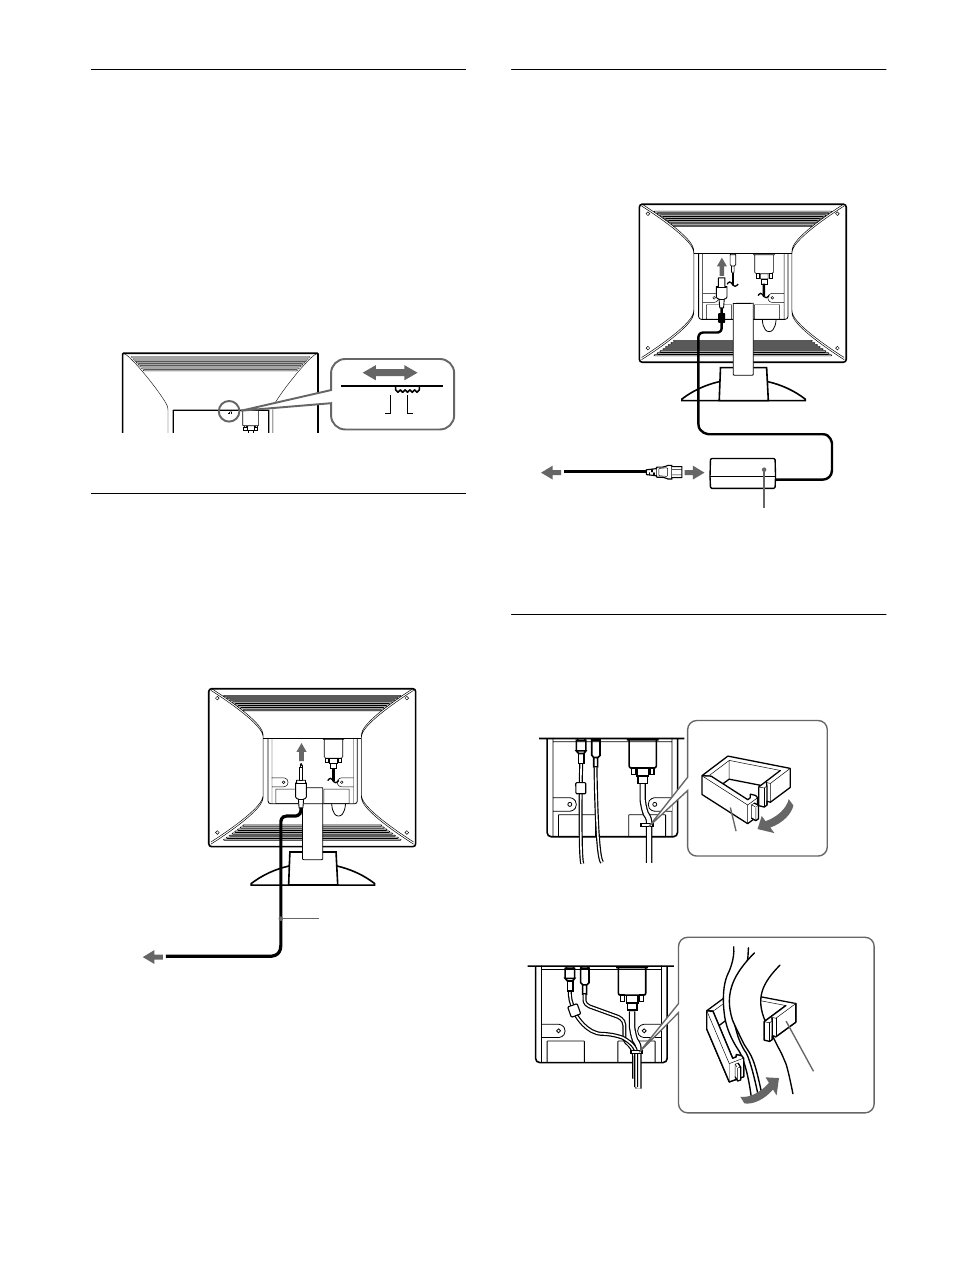
Step 4: Connect the power cord
With the monitor and computer switched off, first connect the AC
adapter and power cord to the monitor, then connect it to a power
outlet.
Step 5: Secure the cords and close
the back cover
1
Remove the cable holder.
2
Secure the cables and cords with the cable holder.
3
Close the back cover.
D
A
OPEN
to audio input
to audio input of the
computer or other audio
equipment
audio cord (supplied)
OPEN
AC adapter (supplied)
to a power outlet
power cord (supplied)
to DC IN
Cable holder
Cable
holder